Bake Dairy-Free Snickerdoodle Cookies Today

- Let’s Talk Snickerdoodle Cookies!
- A Little Cookie History
- What’s So Great About These Cookies?
- Not Just Any Ordinary Cookie
- Ready, Set, Bake!
- The Ultimate Essential Ingredients Guide for Baking
- Mastering Professional Cooking: Your Guide to Success
- Pro Tips & Secrets
- Perfect Presentation
- Storage & Make-Ahead
- Creative Variations
- Complete Nutrition Guide
- Expert FAQ Solutions
- 📝 Recipe Card
Let’s Talk Snickerdoodle Cookies!
Oh my gosh, have you ever had a cookie that just feels like a warm hug? that’s exactly how i feel about snickerdoodle cookies.
I remember the first time i made them. i was trying to impress my friends for a movie night. you know, cookies and a classic flick! i combined some simple ingredients, and bam! my kitchen smelled like a cinnamon paradise.
But then... plot twist! one friend couldn’t have dairy. so, i thought, “let’s bake dairy-free snickerdoodle cookies today !” because who doesn’t deserve a cookie that makes you feel warm and fuzzy inside?
A Little Cookie History
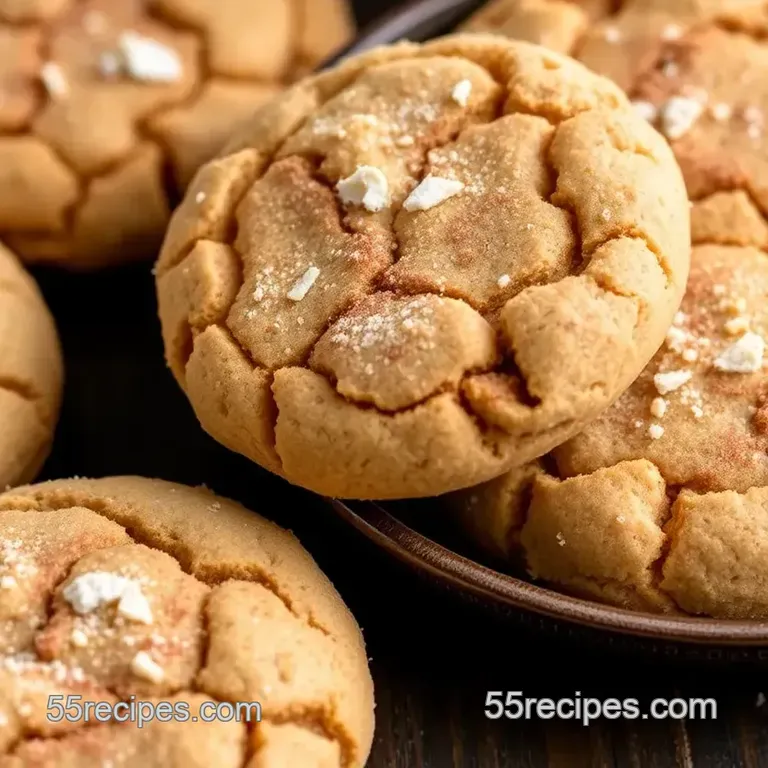
If you’re not familiar, snickerdoodles are those soft, chewy cinnamon sugar cookies we all know and love. they have a bit of a tang due to the cream of tartar in the recipe.
It’s a game changer! these little gems date back to at least the 19th century and were probably born in new england.
They’ve remained a classic because they’re sweet, buttery, and downright irresistible!
Today, snickerdoodles have evolved. they’re not just for grandma’s cookie jar anymore! people are loving them gluten-free, vegan, and of course, dairy-free.
And guys, making these cookies is totally easy! in about 30 minutes or less , you can whip up a batch that yields about 24 cookies.
What’s So Great About These Cookies?
Let’s chat about why you should totally make these cookies. first off, they’re healthier than a cake or pie (in moderation, of course).
With coconut oil as the base, these dairy-free cookie recipes are kind of a treat you can feel good about.
Plus, it's a pretty darn good source of healthy fat.
Now, let’s talk occasions. these cookies are perfect for everything ! want something sweet for a party? check. need a pick-me-up after a long day? absolutely.
And if you’re trying to impress at a dinner, your friends will think you’re a baking genius!
These cookies for dietary restrictions bring all the flavor without the dairy drama. seriously, your friends with allergies (and even those who aren’t!) will thank you.
And to top it off, they’re so soft and chewy, that each bite just brings a smile.
Not Just Any Ordinary Cookie
What’s special about these dairy-free snickerdoodles? Well, for one, the cinnamon sugar coating is to die for. It’s like one of those gourmet snickerdoodles you’d find in a fancy bakery but made right in your own kitchen!
Also, because we'll be using simple baking substitutions like coconut oil it keeps the flavor profile rich without the dairy. honestly, i’ve made these cookies so many times, i can practically make them in my sleep! plus, they’re kid-friendly.
Your little ones can help roll the dough in cinnamon sugar, and that is a memory in the making!
Ready, Set, Bake!
So, you’re convinced to make these delicious dairy-free treats , right? they’re just one recipe away from being your all-time favorite easy cookie recipe .
Let’s dive into the ingredients so you can get started on this fun and tasty journey!
Here’s the magic you’ll need:
- All-purpose flour
- Baking soda
- Cream of tartar
- Coconut oil
- Brown and granulated sugars
- dairy-free milk
- Vanilla extract
- Plus, the cinnamon sugar for that fabulous dusting
Just think about how simple it’ll be! if you’re craving something warm and sweet tonight, or just want to fill your home with the smell of baking, go ahead and pull up that apron.
Let’s make some amazing snickerdoodles!
Hold tight for the next steps and tips! Get your sweet tooth ready because you're in for a treat!
The Ultimate Essential Ingredients Guide for Baking
Let’s dive into the heart of baking with the essential ingredients guide ! whether you're whipping up some dairy-free cookie recipes or battling it out for the best gluten-free snickerdoodles , knowing your ingredients is key.
Premium Core Components
First things first, let’s talk measurements. You know, a pinch here, a scoop there sometimes it can get a little sketchy! For your basic needs, here's what I suggest you keep handy:
- Flour: Generally, you’ll need about 2 ¾ cups (340 g) for those soft and chewy cookie vibes.
- Baking Soda: A teaspoon ( 5 g ) gives you that lift without becoming a cake!
- Cream of Tartar: A key player in snickerdoodle magic, you’ll want 1 teaspoon (5 g) for that unique flavor punch.
But now, how do you know this stuff is good? Look for freshness indicators ! Flour should smell a bit nutty if it’s musty, toss it.
And storage? airtight containers are your best friend, keeping everything fresh and ready for action. flour is usually safe for up to a year, while baking soda should stay good for 6 months.
Trust me; fresh ingredients make a header difference!
Signature Seasoning Blend
Okay, everyone knows cookies need that special zest, right? Here’s where your herb selections and pairings come in handy!
For snickerdoodles, the star is obviously cinnamon ! you’re going to need about 1 tablespoon (8 g) for the famous sugar coating.
But don’t stop there! mix in some nutmeg or a hint of cardamom to spice things up a notch.
Looking for regional variations ? Try swapping the cinnamon for pumpkin spice in the fall. Oh, girl you’ll be the belle of the bake sale!
Smart Substitutions
Now, let’s tackle the kitchen scenario where you hit a snag. You find yourself out of an ingredient at a crucial moment. No need to panic; I've got your back!
- Coconut Oil: If you’re short, you can swap with dairy-free butter or even applesauce for a healthier twist.
- Eggs: For those on a plant based journey, use a flaxseed meal or chia seed mix 1 tablespoon of seeds mixed with 2.5 tablespoons of water does the trick.
Trust me, emergency replacements will save your sanity! Always keep a list of these handy so you can make your easy cookie recipes without missing a beat.
Kitchen Equipment Essentials
Alright folks, let’s get real about kitchen tools. You need the basics:
- Mixing Bowls: A must, get a few in varying sizes.
- Measuring Cups: Precision is key, especially while baking.
- Baking Sheets: Go for the good ones preferably non-stick or lined with parchment paper.
And let’s not forget about cookie scoops ! Those babies ensure uniform cookies, making you look like a pro. If they’re too expensive, a simple tablespoon will do in a pinch!
Here’s a little tip: Keep your tools clean and organized . It makes the whole process so much smoother.
Transition to the Fun Part - Baking!
So now you’ve got the nitty gritty on what goes into baking delights and how to stretch those ingredients to their max potential! It’s almost time to roll up those sleeves.
When you’re ready to bring this all together, you’ll want to bake dairy-free snickerdoodle cookies today . trust me, these cookies are soft, chewy, and oh-so-clutch when you’re looking for a sweet treat that fits dietary restrictions.
The snickerdoodle flavor profile is unbeatable, and everyone will beg you for the recipe for homemade cookies!
Stick around as we jump right into the step-by-step instructions for getting these goodies out of your oven and into your heart literally! nothing beats the warm smell of cookies wafting through your kitchen, especially when you can share them with your crew.
Let’s do this!
Mastering Professional Cooking: Your Guide to Success
Hey there, fellow food lovers! are you ready to dive into the world of professional cooking ? whether you're a culinary newbie or just want to hone your skills, mastering the basics can transform your home cooked meals.
Today, we’ll break down essential cooking methods, so you can ace those kitchen moments like a pro!
Essential Preparation Steps
Let’s kick things off with some essential preparation steps that will set you up for success. first up, mise en place , which is just a fancy french term for “everything in its place.
” this means measuring out all your ingredients, chopping your veggies, and organizing your kitchen before you start cooking. seriously, it makes a world of difference!
Next is time management . always keep an eye on the clock when cooking; remember, a well timed dish can make the difference between seasoned perfection and a dry mess! and trust me, that last five minutes can be brutal; you’ll want to have everything prepped before you fire up the stove.
Organization strategies are crucial, too. keep your workspace clean; it'll help you focus. plus, it’s much easier to whip up a meal when you’re not battling a cluttered countertop!
And don’t forget about safety considerations keep sharp knives away from the edges, use oven mitts, and always wash your hands after handling raw ingredients.
Step-by-step Process
Alright, let’s get into the meat of it (pun intended)! Here’s a crystal clear, step-by-step process for getting it right every time.
- Preheat the Oven: Always start by preheating your oven to the right temperature , which is usually at 365° F ( 185° C) for most baking. It sets the stage for even cooking!
- Mix Dry Ingredients First: In a separate bowl, combine your dry ingredients (think flour, baking powder, etc.).
- Cream Wet Ingredients: In another bowl, cream together your butter and sugars until fluffy.
- Combine Mixtures: Slow and steady wins the race! Combine your dry and wet mixtures gradually; don’t over mix you don’t want tough cookies.
- Know When to Bake: For most cookies, you’ll want to bake at 350° F ( 175° C) for about 10- 12 minutes , then keep an eye on those cookies! They are done when the edges are golden but the center still feels soft.
Check if they’re set by gently touching them; they should spring back!
Expert Techniques
So, what are some expert techniques that can really elevate your cooking? one critical step is to always check your ingredients for freshness.
The quality of what you use directly affects the end result.
Quality checkpoints are key. taste as you go: it’s totally normal to adjust the seasoning and flavors throughout cooking! if something feels off, it’s okay to troubleshoot.
Maybe a pinch of salt will brighten your dish or an extra splash of citrus can freshen it up; don’t be afraid to experiment!
Success Strategies
Let’s chat about some success strategies . one of the biggest mistakes to avoid is overmixing your batter it can lead to dense, dry cookies.
Staying mindful will help you achieve those soft and chewy cookies that everyone loves.
Consider adopting quality assurance tips like measuring ingredients accurately and never baking stale flour. and hey, for those lazy days, embrace make-ahead options ! many items, like cookie dough for your infamous dairy-free snickerdoodle cookies , can be frozen and baked as needed.
Think about baking dairy-free treats using coconut oil instead of butter it gives an extra depth of flavor and is perfect for cookies like vegan snickerdoodles.
Guys, if you haven't yet, just go bake dairy-free snickerdoodle cookies today . your taste buds will thank you!
Additional Information
By now, you should feel energized and ready to hit the kitchen like a pro. remember, cooking is just as much about joy and exploration as it is about technique.
Embrace the journey, adjust your seasoning like a maestro, and top it all off with a sprinkle of love.
So grab those ingredients and let’s create some delicious dairy-free desserts together . Your kitchen is about to smell heavenly!
Pro Tips & Secrets
Let's talk about some pro tips that'll turn your dairy-free snickerdoodle cookies into absolute masterpieces! first off, trust me when i say that the secret to achieving that soft and chewy texture is to not overmix your dough.
You want to mix until everything is just combined. overmixing can lead to tough cookies, and no one wants that!
Also, here’s a little time saving trick: if you're short on time, skip chilling the dough. yep, you heard me right! just go straight to scooping those delicious balls of dough.
But if you’re after those thicker cookies , chilling for about 30 minutes will do the trick. they plump up beautifully!
Now, when it comes to flavor enhancement, don’t shy away from experimenting with spices. a pinch of nutmeg or ginger can add a delightful twist to the classic cinnamon flavor.
Think of it as the snickerdoodle’s little party trick!
For a perfect presentation, get ready to impress. Arrange those cookies on a nice platter and sprinkle a little extra cinnamon sugar on top. Trust me, everyone will do a double take.
Perfect Presentation
Ah, the art of plating ! it’s more than just tossing your cookies on a plate. think about those color combinations the warm browns of the cookies against a white plate.
It looks fancy without needing to break a sweat.
For garnish, a light dusting of powdered sugar can add a nice touch. you could even drizzle some dairy-free chocolate sauce or place a few fresh berries on the side for a pop of color.
Visual appeal is key to whetting appetites, so don’t overlook this step!
Storage & make-ahead
Wondering about how to keep these bad boys fresh? here’s how i do it. let the cookies cool completely, then store them in an airtight container.
They’ll last about 5-7 days . trust me, they won't last that long , but it’s good to know!
If you're planning ahead, you can make the dough up to three days in advance and refrigerate it. Roll them in the cinnamon sugar coating right before baking for a fresh out-of-the-oven taste.
When it’s time to reheat, pop them in the microwave for 10-15 seconds . Voila! They’ll be warm and gooey again.
Creative Variations
Let’s get a little wild with ideas! you can absolutely mix up the flavors. why not try adding dairy-free chocolate chips ? that gooey surprise just makes life better.
Or if you’re a nut lover, feel free to chop some up and toss them in.
You can even experiment based on the season think pumpkin spice for fall or peppermint for the winter holidays. There are endless possibilities for your snickerdoodle variations!
For those following specific diets, you can easily swap the all-purpose flour for a gluten-free option . Just grab that 1:1 gluten-free flour blend, and you’re good to go!
Complete Nutrition Guide
Now, if you’re wondering about what you're munching on, here's the lowdown. Each cookie has roughly 120 calories and a good mix of sweet goodness perfect for a pick-me-up without overwhelming yourself.
And don’t forget about the benefits of homemade cookies : you control the ingredients! plus, the whole family can enjoy indulgent treats that cater to their dietary needs.
You can make these cookies fit into a healthy dessert repertoire, no sweat!
Expert FAQ Solutions
Got questions? Here’s a quick rundown.
Q: Can I use butter instead of coconut oil? A: Absolutely! Just make sure it’s dairy-free. Most brands are friendly these days.
Q: Why cream of tartar? A: It adds that classic tang and helps your cookies stay chewy total game changer!
Q: What if my dough is too sticky? A: No worries! Just sprinkle a little flour on your hands while scooping, or chill the dough for a while.
Now with the knowledge to bake dairy-free snickerdoodle cookies today , you’re ready to indulge guilt free! so, gather your ingredients, channel your inner baker, and let’s create some magic in the kitchen.
Trust me, once you start, you won't want to stop! happy baking!
Bake dairy free Snickerdoodle Cookies Today

