Chill Dino Jello Cups for Fun Desserts
- look into into the World of Chill Dino Jello Cups for Fun Desserts!
- Your Go-To Guide for Essential Ingredients
- Professional Cooking Method
- Pro Tips & Secrets for Chill Dino Jello Cups
- Perfect Presentation of Your Dino Cups
- Storage & Make-Ahead Tips
- Creative Variations
- Complete Nutrition Guide
- Expert FAQ Solutions
- Wrapping it Up
- 📝 Recipe Card
look into into the World of Chill Dino Jello Cups for Fun Desserts!
Oh my gosh, let me tell you a little story! the other day, my niece came over for a playdate.
I was feeling all nostalgic, remembering the colorful jello cups we’d always whip up for her birthday parties. she looked at me with those big, eager eyes and asked, "auntie, can we do dino desserts?" so, naturally, i put my thinking cap on and decided to create some chill dino jello cups for fun desserts !
seriously, these little treats are a crowd pleaser and take you back to childhood without breaking a sweat in the kitchen.
Want to feel like a rockstar? keep reading!
A Little Backstory
The magic of jello dates all the way back to the 1840s, but lately, it’s making a big comeback especially with dinosaur themed desserts ! kids go bananas for anything dino related, and these cups turn plain old gelatin into a jurassic feast.
Plus, we’re living in a world where even no-bake desserts for kids are trending, so why not join the fun?
When it comes to making chill dino jello cups, you're looking at a super easy and delightful project. it’ll take you just 15 minutes of hands-on time and then, voilà, your colorful gelatin masterpieces can chill in the fridge for about 4 hours .
Quick, easy, and strikingly impressive what’s not to love?
What's In It for You?
Okay, let’s talk benefits for a second. first off, these edible gelatin treats are as fun to eat as they are to make.
Each cup is layered with fruity flavors, so you’ll not only impress your dino loving guests but also give them something refreshing.
Honestly, what kid wouldn’t want to dig into a cup full of gummy dinosaur candies ?
Let’s be real here: whether it’s a birthday bash, a school party, or even your typical saturday afternoon, these are the fun dessert ideas that will have everyone smiling.
Plus, unlike many themed treats, these are fairly low in calories, making them a guilt free addition to your snacking lineup.
Bye-bye, boring!
Why These Dino Cups Rock
One of the coolest things about chill dino jello cups is their versatility. you can mix up the colors and flavors or even add some fruit and jello combinations to create gorgeous layers.
Imagine a rainbow of gelatin sitting pretty, ready to burst with flavor! plus, they’re perfect for celebration treats for children , making them the hit of any gathering.
If you’re looking to avoid sugar, feel free to dive right into sugar-free gelatin options. and if you want that added flair, layer in some soft fruits for a fresh twist.
These cups can also easily adapt to seasonal themes, making for refreshing summer desserts or even cozy fall treats.
Here’s What You’ll Need
So, are you ready to make your very own jurassic vibe in dessert form? you’ll want to gather some basic ingredients, nothing fancy, just a few boxes of flavored gelatin, water, and those cute dino figurines.
The best part? you don’t need a culinary degree to whip these up! just a bit of patience while those layers chill.
Now that you’re all revved up about this charming dino dessert, get ready to flip to the next section where we dive headfirst into the ingredients list and all the juicy details on how to create these whimsical treats.
Trust me; it’s going to be a blast making these colorful gelatin desserts come alive!
Your Go-To Guide for Essential Ingredients
Hey there! so, whether you're whipping up chill dino jello cups for fun desserts or trying out that new spicy taco recipe, knowing your ingredients inside and out is key.
Let’s dive into some essential aspects of cooking that can elevate your dishes from good to jaw-dropping!
Premium Core Components
First thing's first, you need to know what you're working with. detailed measurements can save your dish from turning into a culinary disaster.
In the u.s., we’re used to cups and tablespoons, but if you’re feeling fancy in the kitchen, here’s some metric lingo: 1 cup equals about 237 ml .
When it comes to quality indicators for each ingredient , fresh is always best. grab those vibrant herbs over wilted ones, and really check the expiration dates on your spices.
Spoiler alert: if it’s been hanging out for years, it’s time for a new jar!
Storage is crucial, too. for instance, did you know that fresh herbs stored in water can last up to two weeks in the fridge? just snip the bottom and treat them like flowers.
On the flip side, shelf stable items, like dried spices and grains, can stay good for a long time if you keep them in a cool, dark pantry.
Signature Seasoning Blend
Let’s talk signature seasoning blends . they can totally transform a dish. think about essential spice combos like garlic powder with paprika.
Whether you’re festive with the flavors or sticking to basics, having a go-to blend can save your meal.
And herbs? Oh boy, they’re a game changer! Basil, thyme, and oregano work harmoniously together. Have you ever tried rosemary with lemon? Just heavenly!
Adding aromatics like onions, garlic, or even the zest of an orange can totally amp up any meal. depending on where you live, you might have some flavorful regional variations to explore.
Experimenting with local spices can introduce a whole new flair to your dishes!
Smart Substitutions
Now, let’s face it sometimes you don’t have what you need. knowing common alternatives can keep you moving. out of olive oil? grab coconut oil instead! there are tons of dietary modifications, too.
Say goodbye to dairy with nut milks or swap white sugar for honey.
Ever run out of eggs? Try mashed bananas or even applesauce! Seriously, who knew baking could be so flexible? Talk about emergency replacements that create an “ah-ha” moment in the kitchen!
And seasonal options? fresh, local ingredients sing in any dish. use strawberries in spring , plump blueberries in summer, and pumpkins in fall could turn any ordinary recipe into a colorful dessert presentation.
Kitchen Equipment Essentials
You know those must have tools we wish everyone would have? For starters, invest in a good quality whisk and some mixing bowls. Trust me a good whisk will save you from lumpy batters!
If you don’t have a food processor, no worries. a good old-fashioned knife can do the job, just a bit more elbow grease involved.
And don’t forget about storage solutions. i’ve learned the hard way that keeping your tools organized saves tons of time!
Wrapping It Up with Fun Desserts
So, as you see, understanding your essentials transforms the cooking game. especially for those delightful chill dino jello cups for fun desserts , it’s all about quality ingredients, smart substitutions, and the right tools to create those fruity jello recipes that kids will love.
Now that you’ve got the groundwork laid out, let’s get into the fun part : the step-by-step instructions for crafting those whimsical layered treats that will wow everyone at your next dinosaur themed bash.
Get ready for a jurassic adventure in your kitchen!
Professional Cooking Method
Alright, my friends, if you’ve ever had that moment when you’re in the kitchen and everything’s a glorious mess, you’re definitely not alone .
Professional cooking might sound fancy, but trust me it’s all about mastering a few basic steps. so, whether you’re setting up for a family dinner or whipping up some dino themed desserts , let’s dive into the nitty gritty of making those chill dino jello cups for fun desserts with style and efficiency!
Essential Preparation Steps
Mise en Place: Your Best Pal
First thing’s first mise en place . it's french for "everything in its place," and boy, does it make life easier.
Gather all your ingredients and tools before diving into the fun. for your jello cups, that means having your flavored gelatin, cups, and dino figurines ready to go.
Nothing like scrambling around for the mixer while your jello is turning into a sad soup.
Time Management Tips
Next up, think about timing. prep time for our dino jello is about 15 minutes , but don’t forget you’ll need a good 3- 4 hours for chilling.
Plan your dessert around this! you know, like asking the kids to play outside while you play your very own mad scientist in the kitchen.
Organization Strategies
Let’s talk organization. when making layered treats, a clear game plan keeps you on track. i like to work on one layer at a time.
For our jello, that means make the first layer, chill, and then repeat the process for each layer. whisper your favorite theme song to keep things upbeat as you go!
Safety Considerations
And safety? don’t forget about it! boiling water brings its own set of risks. be careful while pouring; use pot holders.
When it's hot, it’s not your friend! always watch your fingers around sharp tools too.
step-by-step Process
Prepare the Jello: Start by boiling 4 cups of water . Then pour it into your bowl with the flavored gelatin (say, strawberry for whimsy!). Stir until fully dissolved .
Mix It Up: Add in 2 cups cold water and mix to cool it down a bit. This will make pouring easier.
Layer It Right: Pour about a third of that Jello mixture into your cups. Then, chill them for 1 hour . You got this!
Insert Dino Friends: Once set, gently stick a dino figure upright in each cup. Make sure it’s comfy there!
Top it off: complete the dino adventure by filling the cups with more jello and chilling for another 2- 3 hours .
Just like that, your colorful creations are on their way to being a reality.
Serving Time: Once everything’s set, serve ‘em up! Gaze at your handiwork and have a moment of pride these are not just any desserts!
Expert Techniques
Professional Methods
Now, if you want to level up, consider layering flavors. a hint of lime atop strawberries? why not! use clear cups to showcase the layers.
Seriously, the more colors, the more wow factor .
Quality Checkpoints
Before serving, give them a little wiggle. If it gently shakes like jelly should, you’re in business! If not, more chilling is your friend.
Troubleshooting Tips
If your jello isn’t setting, it could be a syrupy situation cause by too much stirring or maybe…just maybe, it wasn't cold enough before layering.
Leftovers? store them in the fridge and they might disappear faster than a dino on the run!
Success Strategies
Common Mistakes to Avoid
The biggest boo-boo is mixing those gelatin flavors too vigorously it can create air bubbles, and nobody wants a frothy dino! Also, ensure your dino figures are safe for eating.
Quality Assurance Tips
Visual appeal equals better taste in the mind of your guests. So keep those vibrant colors popping!
Perfect Results Guide
To nail your Jello cups, trust the chilling times. No shortcuts here wait it out for that perfect jiggle!
make-ahead Options
These babies are perfect for making ahead. A few days in advance? Yes, please! Just keep ‘em covered in the fridge.
And there you have it your go-to guide for professional cooking at home! Plus, the best part about these Chill Dino Jello Cups for Fun Desserts ? They're not just easy they also bring a party to life, perfect for birthdays or just a splash of fun!
Additional Information...
For more tips on cool treats, themes, and flavor combos, i’ve got you covered! with a bit of creativity and some practice, you’ll be whipping up these colorful gelatin desserts like a pro.
✌️
Pro Tips & Secrets for Chill Dino Jello Cups
Honestly, making these chill dino jello cups for fun desserts is a breeze! but, oh boy, have i learned a thing or two while whipping these up.
First off, when you're stirring that boiling water into the flavored gelatin, go slow and steady . i can’t tell you how many air bubbles i popped in my first batch because i mixed it like i was trying to whip cream.
Just a gentle stir, and you'll keep those colors popping!
Another little gem? after pouring your first layer into the cups, chill them for about one hour till they’re firm.
Be patient! it’s worth the wait. and when it’s time to add your dino friends, press them in gently. i’ve had a couple take a dive on me, and let me tell ya, a sinking dino isn’t the most charming sight!
Perfect Presentation of Your Dino Cups

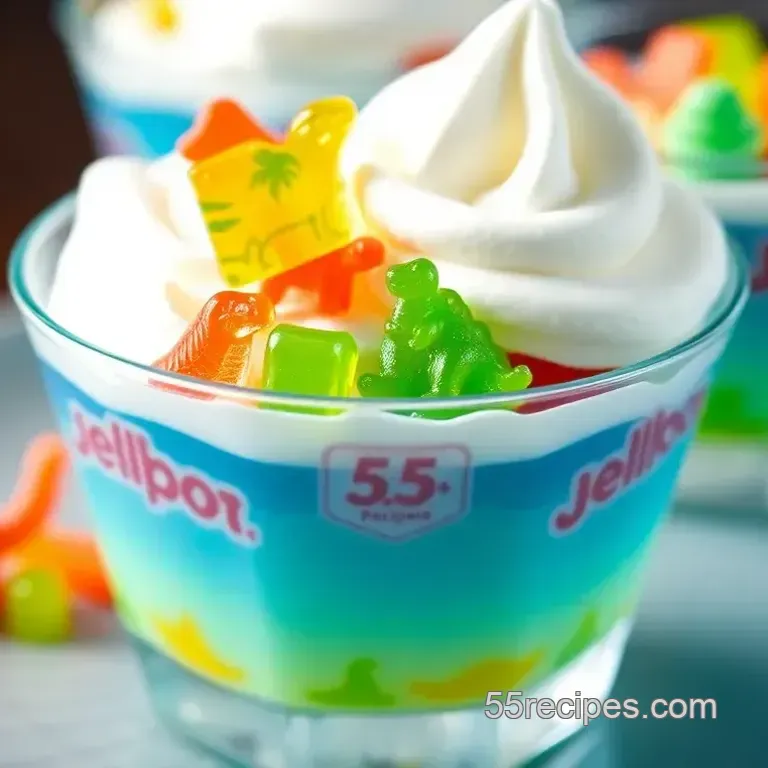
Presentation is everything, folks! once your colorful gelatin desserts are ready, grab those clear plastic cups . they let those vibrant layers shine through like a sunset.
Want to add a little extra pizazz? top with a swirl of whipped cream. it’s like giving your dessert a little dollop of happiness!
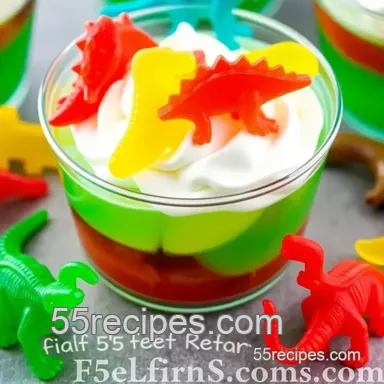
For garnish, i love tossing in a few mini gummy dinosaur candies around the cup. it ups the whimsical party treats factor and looks great for any dino themed desserts gathering.
Plus, a pop of color always grabs attention!
Storage & make-ahead Tips
These delightful treats are perfect for prepping in advance. you can whip them up a day or two before your party.
Just keep them covered in the fridge, and they’ll stay fresh. for storage, i usually place them in an airtight container.
They’ll last up to five days if they last that long, because my kids love them!
When it comes to reheating, there's really no cooking involved, just jiggly, fruity goodness! just be mindful not to let them sit out too long.
The warmer they get, the wobblier they become. however, that’s kind of the fun part of these durable, kid-friendly recipes they won't go bad instantly!
Creative Variations
When it comes to adapting these cups, the possibilities are endless! want to jazz it up for the summer? try a tropical jello cup using pineapple jelly or mango hello, vacation vibes! if you're feeling adventurous, layer in fruits like strawberries or blueberries for a fruity twist.
Just make sure the fruit is diced small enough to fit snugly and stay visible.
And hey, if you've got kids with dietary needs, consider looking for sugar-free gelatin options. Creating sugar-free desserts for kids doesn’t mean sacrificing taste!
Complete Nutrition Guide
Let’s break it down a bit. these dino jello cups have around 120 calories . not bad for a dessert, right? they provide a fun burst of sugar (about 23 grams) , making them a great occasional treat for birthday parties or playdates.
They’ve got a little bit of protein and virtually no fat. just keep in mind those sugar levels if you’re serving little ones!
As always, portion control is key. i love dividing them into small cups so everyone gets a taste without overdoing it.
Plus, they’re a great way to have some family friendly recipes that don’t feel like a chore to whip up.
Expert FAQ Solutions
Got questions? you're not alone! one of the most common questions i get is, “can i substitute the dinosaur figurines?” absolutely! swap them for some gummy dino candies if you want a sweeter ground dwelling friend.
If layer separation happens, my tip is to let the layers cool a bit before pouring, so they don’t mix.
And don’t stress if the colors aren’t perfect! it’s a fun dessert, so embrace the chaos after all, you’re serving a dino, not running a michelin star restaurant!
Wrapping it Up
In conclusion, making these chill dino jello cups for fun desserts is not just easy; it’s a total blast! whether you’re catering to a dino loving kiddo or hosting a themed party, your guests will be delighted by these vibrant and fun dessert ideas.
So go ahead, unleash your inner child, and have some fun while you're at it! you got this!
Chill Dino Jello Cups For Fun Desserts
Ingredients:
Instructions:
Nutrition Facts:
| Calories | 120 |
|---|---|
| Protein | 2 g |
| Fat | 0 g |
| Carbs | 29 g |
| Sugar | 23 g |
| Sodium | 40 mg |
