Creamy Dairy-Free Banana Pudding Delight
- A Sweet Escape: My Love for Dairy-Free Banana Pudding
- The Roots of Banana Pudding
- Why You Need This Pudding in Your Life
- Getting Started: Ingredients You’ll Love
- Essential Ingredients Guide for Dairy-Free Desserts
- From Kitchen Novice to Pro: Your Guide to Mastering Cooking Techniques
- Pro Tips & Secrets
- Perfect Presentation
- Storage & Make-Ahead
- Creative Variations
- Complete Nutrition Guide
- Expert FAQ Solutions
- 📝 Recipe Card
A Sweet Escape: My Love for dairy-free Banana Pudding
Let me take you back to a sunny afternoon. i was hungry, looking for something to sweeten my day, and stumbled upon a pile of ripe bananas on my kitchen counter.
Oh my gosh! just the sight of them had my taste buds dancing! my mind flashed back to grandma’s classic southern banana pudding.
But with a twist i needed something a little kinder on my stomach since i’ve cut down on dairy.
That’s when the magic happened. i whipped up my dairy-free banana pudding , and let me tell you, it’s a game changer.
Banana pudding has a bit of history, right? southern roots, a nostalgic classic, and now, it’s everywhere! people are all about those dairy-free desserts these days, and what’s better than a creamy dessert that gives you all the feels without the lactose?
easy to make and even easier to devour, this pudding checks all the boxes.
Plus, it’s a breeze to throw together. i mean, who doesn’t love an easy pudding recipe that you can whip up in under an hour?
The Roots of Banana Pudding
Did you know that banana pudding goes way back to the late 1800s? think about it you take ripe bananas, slap in some layers of goodness, and you’ve got dessert heaven.
Fast forward to now, and folks are modifying it to fit their lifestyle. this dairy-free banana pudding is trendy and oh-so-relevant.
With the rise of plant based dessert recipes , more people are craving lightened-up versions of classic treats. honestly, this pudding makes for one of the best family friendly dessert recipes .
So how much time do you need? let’s break it down. you’ll spend about 15 minutes of active prep time and another 30 minutes chilling in the fridge.
A total of about 50 minutes to heavenly satisfaction, and it yields 4-6 servings . talk about bang for your buck, right?
Why You Need This Pudding in Your Life
Now, let’s chat about the perks. first off, we’re talking health benefits here. this pudding is rich in flavor but not in guilt.
Made with coconut milk , it’s packed with healthy fats and keeps the calorie count manageable. with ripe bananas, you’ve got natural sweetness plus potassium that your heart will appreciate.
It’s the perfect combo for anyone looking to satisfy that sweet tooth without a heavy tummy later. finding a lighter touch can sometimes feel tricky, but this pudding? it makes healthy eating feel like a treat!
No lie, this dessert shines during special occasions. hosting a backyard cookout? looking for a refreshing summer dessert? this pudding is your ticket! it's super customizable, too.
You can layer it with your favorite cookies for a fun twist or even toss in some crushed nuts if you're feeling adventurous.
Whatever your heart desires, make it yours!
You won't find another recipe quite like this. it’s creamy and dreamy without dairy something that can be hard to nail in no dairy banana recipes .
Plus, you can serve it with dairy-free whipped cream alternatives for an extra touch of indulgence. come on, who doesn’t want to be the dessert hero at the next family gathering?
Getting Started: Ingredients You’ll Love
Alright, let’s dive into the key players. Like I always say, great things come from simple ingredients. For this creamy vegan pudding , all you need is:
- 2 large ripe bananas
- 2 cups of full fat coconut milk
- 1/4 cup granulated sugar
- 1/4 cup cornstarch
- 1 teaspoon vanilla extract
- And a pinch of salt
These are your foundation ingredients, and trust me, together they’re downright delicious!
My hint? use bananas that have spots. those beautiful speckles mean sweetness, and they’ll elevate your pudding like nobody's business.
So are you ready to step into the kitchen and start making this creamy dish? let's go!
Essential Ingredients Guide for dairy-free Desserts
So you’ve decided to dive into the world of dairy-free desserts ? Awesome choice! Whether you’re cruising through lactose intolerance or just exploring plant based options, getting familiar with essential ingredients is the first step to creating scrumptious treats think creamy vegan pudding or delightful dairy-free banana pudding !
Premium Core Components
Let’s talk about the premium core components you’ll want in your pantry. Here’s a quick cheat sheet for when you’re out shopping.
- Ripe Bananas: Aim for at least 2 large perfectly ripe ones (about 250 grams). The riper they are, the sweeter your desserts will taste!
- Coconut Milk: Stock up on 2 cups (480 ml) of full fat coconut milk. This stuff is the magic potion that gives your puddings that creamy texture. And trust me, it lasts in the fridge for about 7-10 days after opening.
- Sweeteners: A 1/4 cup (50 grams) of granulated sugar works wonders, but you can sub in maple syrup for a more earthy flavor.
- Thickening Agents: Don’t forget 1/4 cup (30 grams) of cornstarch. It’s key for that perfect pudding consistency. Alternatively, arrowroot powder works too if you’re looking for a gluten-free option.
Signature Seasoning Blend
Now, let’s spice things up! Herbs and spices can transform a simple recipe into something unforgettable.
- Vanilla Extract: Just one teaspoon adds such a lovely depth of flavor.
- Pinch of Salt: It might sound odd for dessert, but this will enhance all those sweet notes!
If you ever want to put a twist on your pudding, check out regional variations. For instance, a little nutmeg gives a Caribbean banana pudding vibe!
Smart Substitutions
We all have those moments when we’re halfway through cooking, and realize we’re missing an ingredient. No worries! Here are some smart substitutions to keep your dessert dreams alive!
- Coconut Milk: If coconut milk isn't your jam, almond milk, or oat milk can work too. It might not be as rich, but still gives a lovely flavor!
- Sweetener Alternatives: Swap sugar for honey or agave syrup if you’re looking for a natural sweetener. Just remember: you might need less if you’re using a liquid form!
- Thickness Rescue: No cornstarch? Try using mashed avocado for a creamy texture in a pinch.
Kitchen Equipment Essentials
So, onto the tools. You don’t need a full Top Chef style kitchen; just a few must haves!
- Medium Saucepan: This will be your best friend essential for cooking up that pudding.
- Whisk: A good whisk is crucial! It helps break up lumps and blend your ingredients smoothly.
- Mixing Bowls: Have at least two on hand. One for gathering your dry goods and the other for your wet mix.
- Rubber Spatula: Great for scraping down every last bit of that yummy pudding.
When it comes to storage, use airtight containers to keep your puddings fresh. you can make them ahead for a busy week just remember to chill them for at least 30 minutes.
Wrapping It Up
Alright, so now you’ve got the lowdown on the essential ingredients, smart swaps, and a few handy tools. next up, we’ll get right into making your creamy dairy-free banana pudding delight trust me, it’s a total game changer.
Picture this: ripe bananas, velvety coconut milk, and a little bit of vanilla all whipped together to create a dessert that’s perfect for any occasion.
Are you ready to dive into these easy pudding recipes ? Let’s get cooking!
From Kitchen Novice to Pro: Your Guide to Mastering Cooking Techniques
Alright, friends! let’s get real. cooking can be super intimidating sometimes, can’t it? but let me tell you, once you get the hang of some professional cooking methods, it’s like riding a bike.
You’ll wonder how you ever managed without these game changing skills. today, we’re diving into some essential preparation steps, a step-by-step process, expert techniques, and a few success strategies that’ll elevate your culinary game.
So, grab your apron, and let’s cook!
Essential Preparation Steps
Mise en place fancy french words for "everything in its place." before you start cooking anything, chop, measure, and gather your ingredients.
You don’t want to be scrambling around mid-recipe looking for that one ingredient, trust me! set aside 15 minutes to get everything ready.
Your future self will thank you.
Now, let’s chat about time management . set a timer, and don’t let your focus waver. if you’re making that heavenly dairy-free banana pudding , you’ll want to keep an eye on the clock, especially when your pudding needs to chill for 30 minutes .
Plan your tasks so you’re not rushing like a headless chicken!
Organization is key, folks. use bowls and containers to keep your workspace tidy. a messy kitchen can throw you off your game.
So, get a few containers, label them, and separate your dry from wet ingredients. that’ll save your sanity, trust me.
And hey, don’t forget about safety considerations ! Use cutting boards to protect surfaces, and keep your fingers outta the way of those sharp knives. Safety first, my friends!
step-by-step Process
Listen up because here comes the meat of the matter literally! Here’s a clear, numbered process to follow for a delicious pudding that’ll wow the whole family:
Prepare the bananas : Slice two ripe bananas and set them aside.
Mix dry ingredients : In a saucepan, whisk together 1/4 cup of sugar , 1/4 cup of cornstarch , and a pinch of salt.
Add coconut milk : Gradually pour in 2 cups of full fat coconut milk and whisk until combined.
Cook it up : Over medium heat, continuously whisk until the mixture thickens. This should take about 5 minutes . Keep whisking until it coats the back of a spoon.
Flavor town : Remove from heat and stir in 1 teaspoon of vanilla extract .
Banana time : Gently fold in the sliced bananas.
Chill out : Pour the pudding into bowls, cover them, and chill for at least 30 minutes .
Serve and enjoy : Top with more banana slices and your favorite dairy-free whipped cream.
Expert Techniques
Want to take your cooking from “meh” to “wow”? you gotta embrace some expert techniques. for one, know your temperature control points cooking at the right heat ensures nothing gets burnt or stays raw.
For our pudding, medium heat is perfect!
Timing precision ? oh yeah. learn how long to cook each ingredient so everything is perfectly done. and always keep an eye on those visual cues! if it looks thick and creamy, you're golden.
Success Strategies
So, what are you going to do if things don’t go according to plan? common mistakes include not whisking continuously, which can lead to lumps.
And no one wants that in their pudding, am i right?
Make sure to taste and adjust as you go. Don’t be afraid to tweak the sweetness or add a pinch more salt. This is your creation!
Lastly, consider make-ahead options . you can whip up your dairy-free banana pudding a day in advance. just pop it in the fridge and you’ll have a delightful, creamy vegan pudding waiting for you.
Prep and chill, folks!
Conclusion
There you have it! with these tips rolling in your mind, you’re all set to tackle not just a dairy-free banana pudding but any dish that comes your way.
Practice these professional cooking methods, and before you know it, you’ll be whipping up dairy-free desserts , gluten-free pudding , and everything in between like a pro!
Whether you’re keen on healthy banana pudding or a savory dish, keep experimenting and enjoying the process! and now, let’s transition into some additional information on alternative milk desserts that can elevate your cooking even more.
Pro Tips & Secrets
Let’s spill some secrets about making the creamy dairy-free banana pudding delight that’ll have your kitchen smelling like a southern bakery! first things first, go for those really ripe bananas .
I’m talkin’ spots galore those babies are where the sweetness is at. honestly, you could ride a flavor roller coaster without ‘em.
Oh, and time savers? if you want to look like a kitchen rock star, use a whisk while cooking the pudding.
It’s a game changer! keeps things lump free and thickens super quickly. mix that with a pinch of salt, and boom you’ve got yourself a base that’s as rich as a chocolate cake at a birthday party!
When it comes to enhancement, don’t forget the vanilla extract! a splash will kick up the flavor and make it pop.
And of course, presentation matters, so drizzle a bit of dairy-free whipped cream on top. it adds that touch of fancy to your laid back dessert.
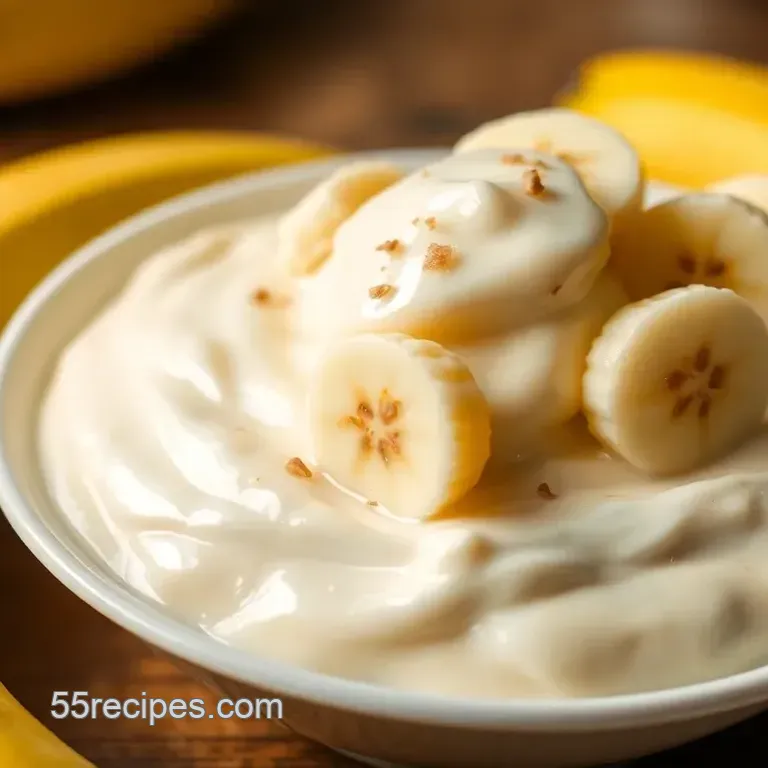
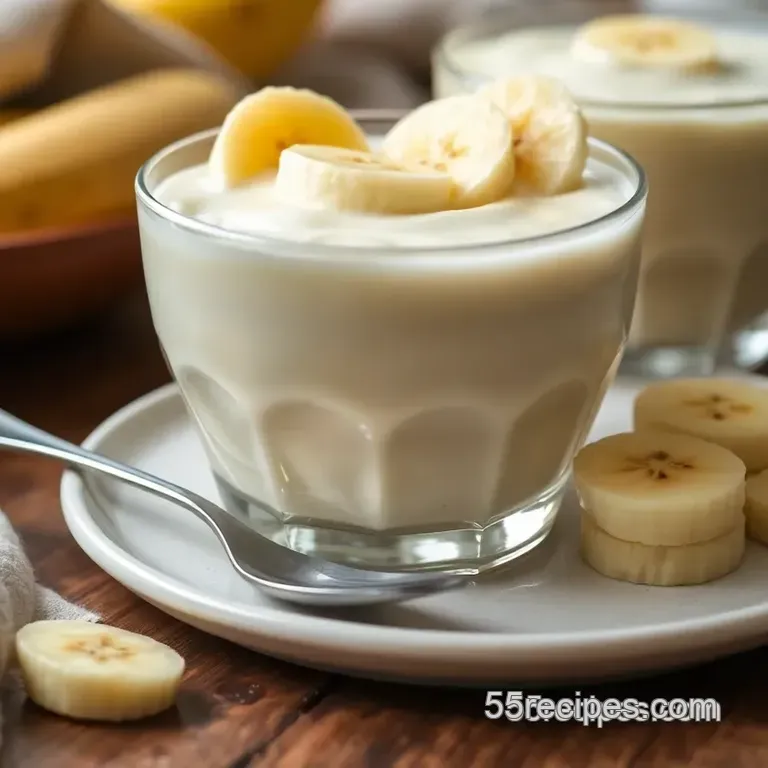
Perfect Presentation
Speaking of presentation, let’s talk about plating techniques. you want to serve this in something pretty! think wide rimmed bowls or glasses that show off those delicious layers.
Layer your pudding with additional banana slices for a pop of color. feeling adventurous? throw in some crushed dairy-free cookies for a little crunch.
Color combinations are a big deal too. the bright yellow bananas against the creamy white pudding look spectacular. try adding slices of strawberries or a sprig of mint for a vibrant twist.
Trust me, your friends will be snapping pics before they even dig in!
Storage & make-ahead
Now, i get it sometimes you just want things to be easy peasy. so, here’s the good news: you can make this dairy-free banana pudding a day ahead! just pop it in the fridge for up to 3 days .
If you’re thinking about storage, keep it in an airtight container to keep it fresh. and when it’s time to serve, if you notice it thickening a little too much, just stir in a tad of more coconut milk to bring that creaminess back.
For reheating, only do this if you want it warm, which isn’t the norm for pudding, but hey, why not? microwave it for 15-20 seconds on low, stirring in between.
But honestly, this pudding is dreamy straight from the fridge!
Creative Variations
Feeling a little adventurous? let’s shake things up with some creative variations ! if chocolate’s your jam, whip in some cocoa powder and instantly transform it to a chocolate banana pudding recipe .
Trust me; it’ll knock your socks off!
If you're looking for a fall twist, consider some maple syrup or cinnamon . it’s like hugging a tree with flavors! for those with nut allergies, substitute the almond butter for sunflower seed butter instead.
And hey, why not dive into the season? you can load this puppy up with fresh berries during summer for a light and refreshing delight.
It’s such a versatile recipe; you’ll never get bored!
Complete Nutrition Guide
Alright, so here’s where we get real about eating clean. this healthy banana pudding is not just a sweet treat; it’s packed with nutrients and can be a part of your clean eating lifestyle.
You’re getting all the potassium from those ripe bananas and the healthy fats from the coconut milk .
Roughly, if you scoop out a serving, you’re looking at around 210 calories , which makes it pretty guilt free if you ask me.
Keep an eye on portion sizes, especially if you layer it like a pro. enjoy every bite but maybe save some room for those family friendly dessert recipes you plan to whip up next!
Expert FAQ Solutions
I’ve been asked all sorts of questions about dairy-free desserts , and you might have some too! common ones include “can i use different milk?” and yes, just keep in mind, the thickness may vary.
Trouble with lumps? No biggie! Just whisk like you mean it. Want it sweeter? Maybe try a natural sweetener for a lower glycemic index.
Conclusion
So there you have it, folks! this dairy-free banana pudding recipe is more than just a dessert; it's a way to level up your cooking game while keeping it healthy and delightful.
Whether you’re whipping it up for a sunny picnic or a cozy family dinner, it’s sure to impress. so roll up those sleeves and get ready to make some refreshing summer desserts .
You got this!
Creamy dairy-free Banana Pudding Delight

Ingredients:
Instructions:
Nutrition Facts:
| Calories | 210 |
|---|---|
| Protein | 2g |
| Fat | 9g |
| Carbs | 36g |
| Fiber | 2g |
| Sugar | 18g |
| Sodium | 20mg |
