Cookie Butter Ice Cream: the Biscuit Blitz Rich Custard Recipe

- Diving Deep into the Dreamiest Cookie Butter Ice Cream
- The Science of Scoop: Why a Custard Base Makes the Best Ice Cream
- Essential Components for Your Rich Cookie Butter Ice Cream
- From Custard to Churn: Step-by-Step Ice Cream Mastery
- Troubleshooting Your Churn: Expert Tips and Common Custard Mistakes
- Storing Your Homemade Treat: Achieving That Perfect Scoop Consistency
- Elevating the Dessert: The Best Ways to Serve Cookie Butter Ice Cream
- Recipe FAQs
- 📝 Recipe Card
Diving Deep into the Dreamiest Cookie Butter Ice Cream
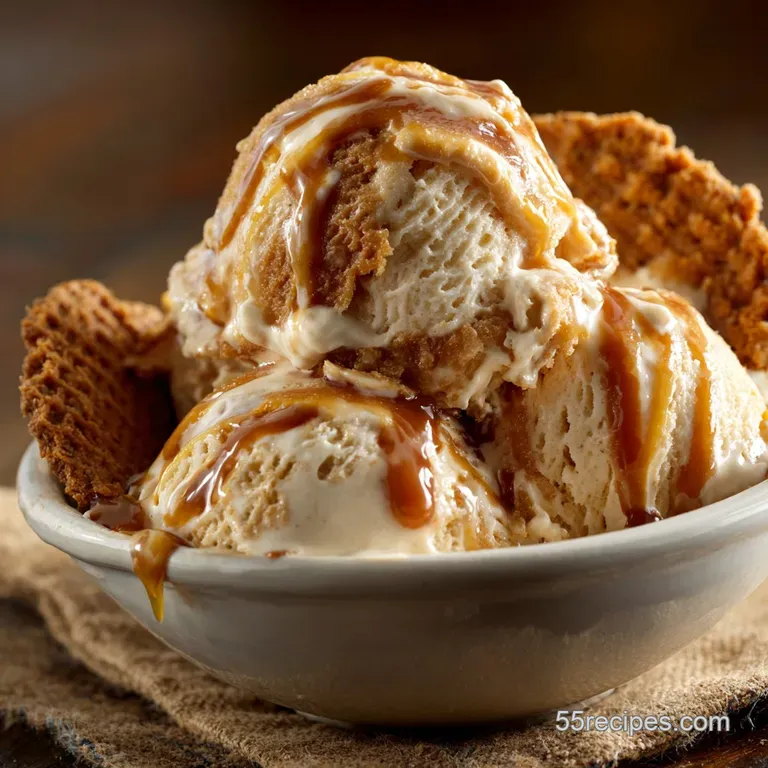
You know that moment when you open a jar of cookie butter? That warm, caramel spice smell hits you, and suddenly you absolutely need it on everything. This rich custard cookie butter ice cream captures exactly that magic, swirling those familiar caramelized biscuits into the creamiest, dreamiest frozen scoop imaginable.
It's the ultimate tea-time spice blend, smoothed out and chilled down.
Forget those icy, sad containers from the supermarket; making homemade cookie butter ice cream is actually way easier than you think. Yes, it takes patience for chilling, but the active cooking time is quick, and the payoff a truly dense, luxurious texture is massive and always worth the effort.
Plus, it’s significantly cheaper than the fancy scoop shop.
We are going full French custard here, my friends, because a proper yolk rich base is the key to achieving that perfect, scoopable density. If you’ve been nervous about tempering eggs, stop worrying right now.
Grab your thermometer, trust the process, and let's churn up the best biscoff ice cream recipe you’ll ever taste.
The Science of Scoop: Why a Custard Base Makes the Best Ice Cream
What Makes Speculoos the Star Flavour Profile?
Speculoos, or Biscoff, cookies have that distinctive caramelised sugar and potent spice blend usually heavy on cinnamon, nutmeg, and sometimes cardamom. We integrate the spread directly into the cooked base, which allows the subtle spice notes to bloom beautifully when heated.
This technique deepens the flavor profile, making the final creamy homemade ice cream taste richer than if you just mixed the spread into cold cream.
French Custard vs. Philadelphia Style: Why We Temper Yolks
Most quick recipes use the Philadelphia style, which is just cream, milk, and sugar. It’s fine, but it tends to freeze harder. We opt for the French crème anglaise (custard) base because the egg yolks are powerful emulsifiers; they hold fat and water together perfectly.
This results in an incredibly dense, smooth, and naturally lower overrun (less air) texture that resists crystallization.
Recipe Snapshot: Time Commitment and Difficulty Breakdown
The hardest part of this entire recipe is waiting for the base to chill overnight, seriously. While the technique of tempering the yolks lands this recipe in the Medium difficulty bracket, the active cooking time is only about 30 minutes tops.
You must allow for the mandatory 4 12 hour chill time. Don't skip the chill.
Preventing Crystallization: The Role of Egg Yolk Emulsifiers
If you’ve ever had crunchy, icy homemade ice cream, it’s because the water molecules separated and froze into large crystals. The egg yolks, combined with the high fat heavy cream, prevent this.
The fat and lecithin in the yolks interrupt crystal formation, ensuring the resulting cookie butter ice cream stays silky smooth, even after days in the freezer.
Deepening the Flavour: Cooking the Base Before Churning
Heating the cream, milk, and sugar together, then cooking the eggs into the mixture (the tempering process), helps dissolve all the sugar completely. This process also slightly cooks the starches and proteins, creating a slightly thicker, richer mouthfeel right out of the gate.
We stir in the first portion of the cookie butter while the base is warm so the spices fully integrate.
Optimizing Overrun: Churning Speed and Volume Increase
Overrun is just a fancy word for how much air is incorporated. store-bought ice creams can have 50 100% overrun! Since we are using an electric ice cream maker , and a rich custard base, we control the air intake, keeping our overrun low.
This is why homemade ice cream feels so dense and luxurious compared to the supermarket fluffy stuff.
Essential Components for Your Rich Cookie Butter Ice Cream
This recipe is simple, but the quality of your dairy makes a huge difference. Don't skimp on the fat content if you can help it.
Dairy Depth: Choosing the Right Heavy Cream and Milk Fat Ratio
We need heavy cream (double cream) with at least 35% fat. This is where the richness comes from. I always combine heavy cream with whole milk (3.5% fat) to keep it pourable and to regulate the final texture.
| Ingredient | My Recommendation | Quick Substitute |
|---|---|---|
| Heavy Cream | 35% or higher fat content | Use Half and Half (but increase yolks to 6) |
| Whole Milk | Full fat dairy is essential | Use 2% milk only if you must, but avoid skim |
| Granulated Sugar | Standard white sugar | Use half brown sugar for deeper molasses notes |
The Power of the Egg Yolk: Ensuring a Silky Texture
Five large egg yolks are mandatory here save the whites for an easy meringue or a simple batch of my Cake Mix Chocolate Chip Cookies: Chewy, Easy, 10 Minute Prep Recipe . The yolks are the non-negotiable insurance policy against an icy texture. Use the freshest eggs you can find.
Cookie Butter vs. Speculoos Spread: Ingredient Notes
Cookie butter is the hero! Whether you grab the well-known Biscoff brand or Trader Joe's Speculoos, it doesn't matter, just make sure it’s smooth. We are using it in two stages: melted into the warm base and solid, chilled chunks for the swirl.
Sugar Alternatives and Spice Adjustments
This recipe is already sweet due to the cookie butter, so I don't recommend increasing the sugar. If you need a deeper spice flavor, stir in an extra ¼ teaspoon of ground cinnamon and a pinch of cardamom into the cream mixture before heating. Trust me, that cardamom hint is stunning.
From Custard to Churn: step-by-step Ice Cream Mastery
Tempering Technique: Creating the Crème Anglaise Base
Tempering is easy: you are gradually warming the yolks so they don't seize when they hit the hot liquid. Whisk your yolks in a separate bowl. Slowly pour about one cup of the hot cream mixture into the yolks, whisking constantly and fast! Then, pour that warmed yolk mixture back into the main pot of cream.
If you follow this gradual warming, you won't scramble the eggs.
The Ice Bath Check: Rapid Cooling and Holding Temperatures
Once the custard reaches that beautiful, coating consistency (around 178°F), you have to stop the cooking immediately. The easiest way? Pour the strained custard into a metal bowl nestled inside a larger bowl of ice and water (an ice bath).
Stirring the custard in the ice bath for 5 minutes brings the temperature down rapidly, stopping the cooking process dead in its tracks.
Ripening the Base: The Essential Overnight Chill
This isn't a suggestion, it’s a rule. You cannot churn warm or even slightly cool ice cream base. It must be bone chillingly cold, ideally below 40°F (4°C). Chilling the base overnight (or at least 8 hours) allows the dairy fats to fully firm up, ensuring a much smoother, richer texture when churned.
We call this 'ripening'.
Incorporating the Cookie Butter Swirl Post Churn
If you add the solid cookie butter swirl too early, your churning machine might break it down completely, and you’ll lose the delicious pockets of pure spread. Wait until the last two minutes of churning to add any mix-ins, or layer them manually in your freezer container.
This ensures those beautiful, distinct swirls.
Chef's Note: For the best swirl texture, use chilled, but still pliable, cookie butter for the layering stage. If it’s frozen solid, it will turn into hard ice chips.
Troubleshooting Your Churn: Expert Tips and Common Custard Mistakes
Dealing with a Base That Scrambles (Overcooked Yolks)
If you cooked your custard too fast or didn't stir enough, you might end up with tiny cooked egg lumps. Don't panic! This happens to the best of us (I once had to strain an entire batch into the sink because I checked my phone for five seconds).
Always strain the custard immediately after cooking, even if you think you did it perfectly. If you have big, egregious chunks, discard those, but straining usually saves the day.
Ensuring a Smooth Swirl: Preventing Hard Cookie Butter Pockets
Cookie butter contains less water and more fat/sugar than the base, so it freezes harder. To prevent rock hard pockets in your homemade cookie butter ice cream , only use the melted portion in the base.
The solid portion you swirl in should be added when the ice cream is already partially frozen, and keep the pieces small.
The Freezing Dilemma: When Your Ice Cream Won't Harden
If your machine runs for 30 minutes and you still have thick soup, your base wasn't cold enough, or your machine bowl wasn't fully frozen. Your ice cream maker bowl needs a minimum of 24 hours in a truly cold freezer.
If your freezer can’t hold the bowl below 0°F, you need to upgrade, or chill the base even longer.
Storing Your Homemade Treat: Achieving That Perfect Scoop Consistency
The Two-Stage Freeze: Hardening After the Machine
The ice cream coming out of your churner is soft serve . It’s delicious, but not scoopable. You must transfer it to an airtight container and freeze it for another 4– 8 hours. This final freeze is the "curing" stage that develops the proper firm consistency.
Longevity and Freezer Burn Prevention
Homemade cookie butter ice cream is best consumed within 10 days, though it can last up to a month. The key to long term storage is eliminating air. Use a proper plastic container with a tight fitting lid, and lay a sheet of plastic wrap directly onto the surface of the ice cream before sealing the lid.
This prevents freezer burn and stops those weird, dry ice patches.
Elevating the Dessert: The Best Ways to Serve Cookie Butter Ice Cream
Perfect Pairing: Sauces and Crumbled Biscuit Toppings
If you really want to go over the top, you need texture. Crushed Speculoos biscuits are a must, providing a delightful crunch against the creamy base.
We also love serving this with a warm sauce. A simple homemade caramel sauce is classic, or perhaps try drizzling some melted white chocolate over the top. The pairing of creamy cookie butter and tangy white chocolate is surprisingly addictive. This treat is also amazing served alongside a quick cookie like my Cake Mix Chocolate Chip Cookies: Chewy, Easy, 10 Minute Prep Recipe — a double cookie whammy!

Recipe FAQs
Why is my Cookie Butter Ice Cream icy instead of smooth and creamy?
Icy texture usually means the base wasn't churned cold enough or there is too much water content relative to fat. Ensure the finished custard is chilled to below 40°F (4°C) for several hours before churning, and check your recipe measurements to ensure the fat-to-sugar ratio is correct.
For guaranteed smoothness, you can add one tablespoon of a neutral spirit (like vodka) to lower the freezing point, making the final product softer.
My custard base looked lumpy after heating. Did I curdle the eggs?
Yes, a lumpy base indicates the eggs were cooked too quickly and curdled, often because the milk mixture was too hot when added to the yolks (poor tempering). If the lumps are small and few, you can rescue the base by passing it through a fine mesh sieve, or blending the cooled custard mixture briefly with an immersion blender.
If the custard resembles scrambled eggs, unfortunately, you will have to restart the base.
What is the best way to incorporate the cookie butter swirl so it doesn't freeze into hard chunks?
To achieve a soft, flowing ripple, the cookie butter needs to be slightly drizzly but not hot. Melt the spread gently until pourable, and then only add it during the last minute of churning, or fold it in manually during the layering process as you transfer the finished ice cream to the storage container.
If the cookie butter is too cold or thick when added, it will harden into unpleasant solid bits when frozen.
Can I use a Philadelphia style (no-egg) base instead of this rich custard recipe?
While you can certainly use a simpler Philadelphia style base, the resulting ice cream will be lighter, less dense, and may melt faster. The egg yolks are fundamental to the "French style" custard, providing unmatched richness and acting as a natural emulsifier that prevents ice crystallization.
If you omit them, consider using a small amount of stabilizer like cornstarch or guar gum for texture.
How long will homemade Cookie Butter Ice Cream last in the freezer?
Homemade ice cream is best consumed within two weeks to retain optimal texture and flavour, although it can be stored safely for up to three months. Always store the ice cream in a deep, airtight container pressed with plastic wrap directly against the surface to minimize air exposure and prevent freezer burn.
Placing it towards the back of the freezer where temperatures are most stable will also help.
How do I prevent the final ice cream from becoming rock hard when fully frozen?
The high fat and sugar content in this custard style naturally resists freezing, but adding a little alcohol or invert sugar (like corn syrup or honey) can help maintain softness. Ensure you don't over churn the base, as too much incorporated air will make the final product brittle once frozen.
Allow the ice cream to temper on the counter for 5 to 10 minutes before scooping.
Can I add whole or crushed Speculoos cookies (biscuits) as a mix-in?
Absolutely, adding crushed Speculoos biscuits is highly encouraged for texture! Incorporate the crushed pieces during the last five minutes of the churning process to ensure they are evenly distributed but do not break down into dust.
For the best flavour, you can slightly toast the crushed biscuits beforehand to enhance their crispness and caramel notes.
Custard Cookie Butter Ice Cream Recipe
Ingredients:
Instructions:
Nutrition Facts:
| Calories | 1060 kcal |
|---|---|
| Protein | 21.0 g |
| Fat | 65.3 g |
| Carbs | 98.3 g |
