Deliciously Dairy-Free Cupcakes: Vanilla Bliss
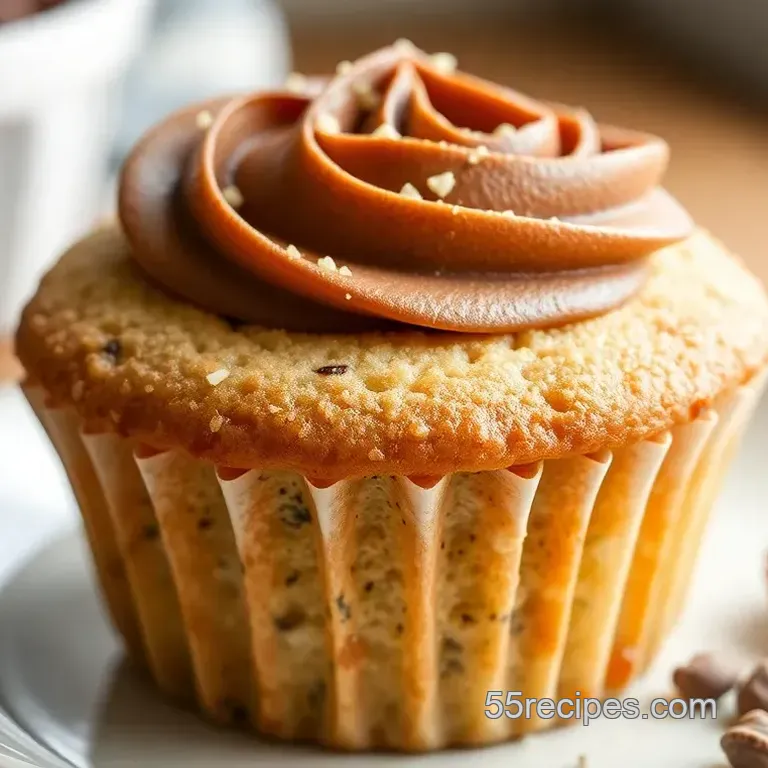
Creating Sweet Memories: My First dairy-free Cupcake Experiment
Oh my gosh! i remember my first attempt at baking a milk free cupcake like it was yesterday. i was having some friends over, and one of them had just switched to a vegan diet.
At first, i panicked. how do you bake without milk?! but then it hit me why not just try something new? spoiler alert: it was a huge hit! these cupcakes turned out soft, fluffy, and utterly delicious.
Honestly, we barely had any left for the next morning, and that’s saying a lot with a house full of dessert lovers!
A Sweet Journey Through Time
The milk free cupcake is more than just a trendy dessert; it’s got history. dairy-free dessert recipes started gaining traction when people began exploring alternatives for allergies and lifestyle choices.
Fast forward to now, these cupcakes are super popular across all sorts of 🌍 social events, cookouts, and birthday parties.
Making these delights doesn’t require a masterchef level of skill. they are labeled as easy while you might spend 15 minutes prepping, they only take about 20 minutes to bake.
Bam! that’s just 35 minutes of your time for a batch of 12 light and fluffy cupcakes .
Now for the wallet: this recipe is kind to your bank account. Simple ingredients like flour, vegetable oil, and almond milk mean you won’t be emptying your pockets to treat yourself.
Perks of Going dairy-free
Let’s get real one of the best parts about these cupcakes is that they are a fantastic option for everyone, not just those dodging dairy.
We’re talking about healthy cupcake alternatives here! rich in flavor, yet without the heavy dairy punch, they can fit into a wider range of diets.
Plus, the warm vanilla aroma wafting from your oven? pure heaven.
So, why should you whip up these tasty treats? Here are the highlights:
- Health Benefits: No dairy means less cholesterol, which is a win for heart health.
- Customizable Flavors: You can add fruit or spices to switch it up, making these simple cupcake recipes versatile and fun!
- Party Perfect: Birthdays, holiday treats, or just a Sunday afternoon these cupcakes fit any occasion. They always impress!
And let’s not forget there’s no need to worry if someone has dietary restrictions. these cupcakes can save you from awkward conversations about food at gatherings.
You know, the ones where someone’s like, “is there dairy in that?” total buzzkill, am i right?
Whipping Up the Fun: The Transition to Ingredients
Ready to dive in? it’s time to get to the nitty gritty of how to bake dairy-free. grab your mixing bowls and measuring cups because we’re about to create some vanilla bliss! with simple steps and a little bit of love, you’ll be treating yourself and your friends to something utterly delightful.
So gather your ingredients, and let’s whip up some delicious dairy-free cupcakes that are perfect for everyone!
Essential Ingredients Guide
Baking is like a love language, don’t you think? you want to speak fluently with the ingredients. knowing your premium core components is key! let’s break it down so you can whip up a mean batch of milk free cupcakes without a hitch.
Premium Core Components
When you're diving into baking, knowing the detailed measurements is crucial. for instance, in our milk free cupcake recipe, you’ll need 1 ½ cups (190g) of all-purpose flour, 1 cup (200g) of granulated sugar, and more.
Why is that important? because precision matters!
Now, let’s chat about quality indicators for each ingredient. Use fresh flour that isn’t clumpy and check that your baking powder isn’t expired. Trust me; stale ingredients can ruin your baking game.
Storage guidelines and shelf life ? easy peasy! keep flour in a cool, dry place; it can hang out for about six to eight months.
Sugar? indefinite, babe. just watch for clumps! for things like vegetable oil, it’s best stored in a cupboard and used within a year.
Freshness tips? Always smell your ingredients! You’ll be surprised how a sniff can tell you if something's off. And don’t forget about selection criteria go for unsweetened almond milk or oat milk for that healthy cupcake alternative!
Signature Seasoning Blend
Ah, seasonings! they’re like the spice of life, literally. for cupcakes, your essential spice combinations typically include a pinch of salt for balance.
You’ll also want to think about herb selections and pairings for even more flavor. ever tried adding a dash of lemon zest? game changer!
Flavor enhancers are another must. a splash of vanilla extract can elevate your baked goodies to heavenly status. and hey, don’t forget about regional variations.
In the south, a touch of buttermilk adds tang, but in our dairy-free realm, almond milk shines instead.
Smart Substitutions
Let’s be honest; cooking isn’t always perfect. that’s where smart substitutions come in hot! maybe you run out of flour or need a gluten-free cupcake recipe.
Try a 1:1 gluten-free blend. it’s that simple.
Got dietary restrictions? Don’t sweat it! There are emergency replacements with staple ingredients. Remember: eggless cupcake recipes can be just as airy with applesauce or flaxseed. You’ll hardly miss the eggs!
And hey, seasonal options? I’m all about baking with what's fresh. Think pumpkin spice cupcakes in the fall or fruity toppings in the summer for a cool twist!
Kitchen Equipment Essentials
Now onto kitchen gear let’s talk about must have tools . A mixing bowl, whisk, and cupcake pan, sweet friend, are your best buddies. You don’t need fancy gadgets; simplicity shines through!
No cupcake pan? No problem! An alternative is using muffin tins just adjust your baking time. A quick note on preparation? Preheat that oven to 350° F ( 175° C) before you race to the mixing bowl!
After baking, storage solutions come into play. Stash your cupcakes in an airtight container for up to three days at room temperature. It’s all about keeping them moist and fluffy.
So, whether you’re tackling vegan baking substitutes or nailin’ that easy dairy-free frosting , you’re set!
Now, are you as ready to dive into some cupcake magic as i am? in the next section, we'll get into a delightful recipe that'll have you celebrating dairy-free and loving every bite.
Keep the aprons handy because it's time to roll up your sleeves and bake!
Mastering the Art of Professional Cooking: Your Guide to dairy-free Delights
When you think of professional cooking, you might picture chefs in tall hats flipping pans like it’s a magic mike dance routine.
Honestly, that’s only part of it! great cooking is about preparation, organization, and some fun techniques. today, i’m diving into all of this, but we’ll focus on something utterly scrumptious milk free cupcakes .
If you're like me, you often find yourself craving those light, fluffy, sweet delights that tickle your taste buds, but you might have dietary restrictions or just want to whip up a healthier version.
Let’s get cookin’!
Essential Preparation Steps
Before we jump into baking those vanilla bliss cupcakes, let’s chat about mise en place . french for “everything in its place,” this is the first tip every pro chef swears by.
Get all your ingredients measured and ready before you start. trust me, it makes everything easier.
Time management ? huge. read through your recipe first. then, break down your tasks by prepping all your ingredients. inevitably, there's that moment when you're halfway through and realize you forgot to preheat the oven.
So, let's avoid that, shall we?
And oh, let’s talk safety considerations . make sure you wash your hands, especially after handling any raw ingredients! i mean, no one wants helicoptering cupcakes flying out of the pan and dealing with the food police later.
step-by-step Process
Alright, let's get serious. When you’re ready to mix, follow these clear, numbered instructions :
- Preheat your oven to 350° F ( 175° C) . Your cupcakes can’t rise in a cold oven!
- Mix your dry ingredients in one bowl flour, sugar, baking powder, baking soda, and salt.
- In a separate bowl, combine your wet ingredients —vegetable oil, apple cider vinegar, vanilla extract, and unsweetened almond milk .
- Now, whisk those wet goodies into the dry until just combined. Seriously, don’t overmix! Lumpy batter is okay; it keeps your cupcakes moist and tender.
- Fill your lined cupcake pan, about 2/3 full (don’t drown them).
- Bake for 18- 20 minutes until a toothpick comes out clean. Temperature control is key!
- Let cool in the pan for 5 minutes; then, transfer to a wire rack.
Visual cues for doneness ? Look for a slight golden color around the edges. This is where your patience pays off.
Expert Techniques
You might be thinking, “How do I make these suckers really shine?” Here’s the scoop. Quality checkpoints matter. Make sure your baking powder is fresh not that dusty stuff in the back of your pantry!
For expert troubleshooting tips , if your cupcakes sink in the middle, it’s likely that you didn’t bake them long enough or overmixed.
No worries, though! a mishap in the kitchen is just a chance for culinary creativity!
Success Strategies
We all make mistakes, right? Here are some common traps to dodge:
- Overmixing leads to density avoid it.
- Incorrect measuring can ruin your sweet dreams. Invest in a good scale and measuring cups.
- Frosting : Good news, you can whip up an easy dairy-free frosting that’s just heavenly! Use dairy-free margarine and powdered sugar mixed until creamy. Add almond milk to get that perfect texture.
And here's the kicker: you can totally make these in advance! Bake your milk free cupcakes a day ahead, and store them in an airtight container. Frost before serving for that just baked feel!
Setting the Stage for Sweet Success
Remember, baking is about fun too! So, don’t be shy about trying different cupcake variations . Feeling adventurous? How about swapping in cocoa powder for a chocolate twist or adding a splash of lemon for that zing?
With all these dairy-free dessert recipes and tips, you’re on your way to impressing friends, family, and your own taste buds with light and fluffy cupcakes .
In the world of baking, there’s no one size fits all, and that’s the beauty of it!
So what’s next? If you want to dig deeper, check out our Additional Information section for more insights on customizing these treats and finding the best baking methods! Happy baking, folks!
Additional Recipe Information for Your Milk Free Cupcake Adventure
Alright, folks! if you’re diving into the world of milk free cupcakes , you’re in for a treat. let’s chat about some pro tips, perfect presentation, storage ideas, creative variations, nutrition, and those pesky faqs that pop up when you're baking.
Trust me, these insights will make your baking experience a piece of cake, or should i say, a cupcake?
Pro Tips & Secrets
Oh my gosh, let’s kick this off with some of my personal insights ! first things first, when you’re making vegan vanilla cupcakes , don’t overmix your batter less is more, trust me! mix just until everything’s combined; some lumps are okay.
You want those cupcakes light and fluffy.
Now, about time saving techniques . if you’re in a hurry, pre-mix your dry ingredients ahead of time. just pop ‘em in a jar for later! and for flavor enhancement, don’t skimp on the vanilla.
A splash of pure vanilla extract goes a long way!
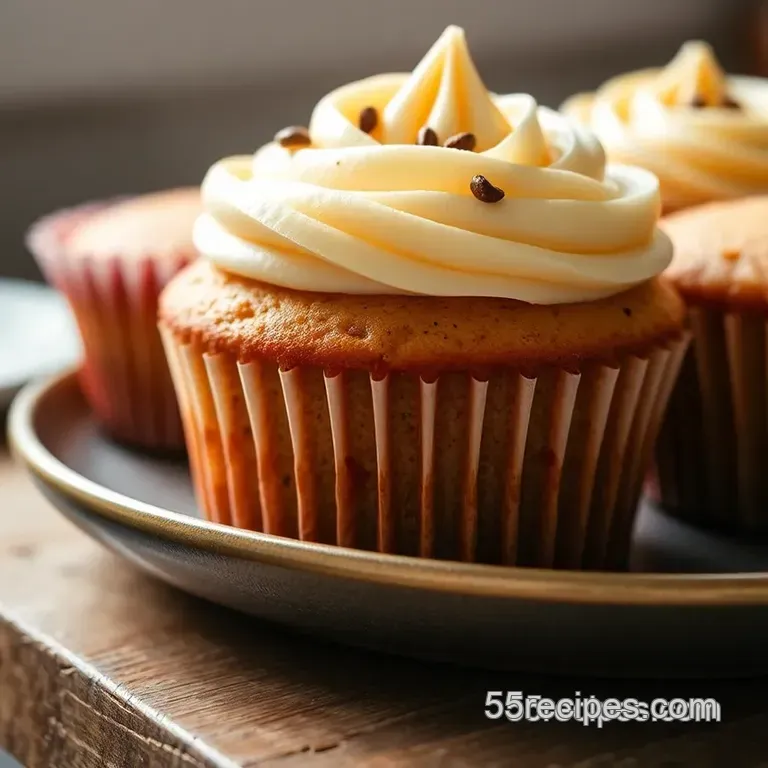
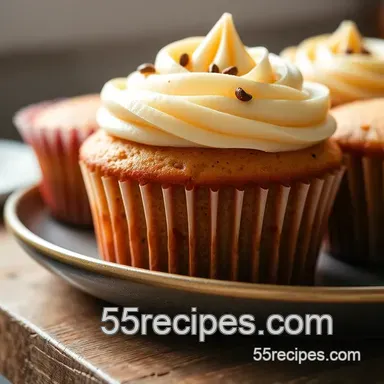
When it comes to presentation advice , color is key! I love to use colorful cupcake liners and sprinkle some vibrant toppings on top. A little shimmer never hurt anyone.
Perfect Presentation
You know what they say: we eat with our eyes first, right? For plating techniques , use a cupcake stand if you have one. It's a great way to elevate your dessert!
Think about garnish ideas like fresh berries or a drizzle of easy dairy-free frosting . just a little something extra to make your milk free cupcakes pop! and let’s not forget about those color combinations.
Pastel sprinkles on a vanilla cupcake? yes, please!
For visual appeal, try arranging your cupcakes in a rainbow pattern on a platter. It’s a feast just waiting to happen!
Storage & make-ahead
Alright, let’s talk about storage guidelines ! once your moist cupcake recipe is baked and cooled, store them in an airtight container at room temperature for up to 3 days .
But honestly, they never last that long in my house!
If you want to make these ahead of time, you can freeze the baked cupcakes for up to 3 months . Just make sure to thaw them completely before frosting.
For reheating instructions , a quick 10 seconds in the microwave will make them taste freshly baked. Just keep an eye on them; we don’t want cupcakes exploding on our watch!
Creative Variations
What i love about this cupcake recipe is how customizable it is. wanna spice things up? try a chocolate milk free cupcake by simply swapping a quarter cup of flour for cocoa powder.
Or go citrusy with some lemon zest. endless possibilities, right?
When it comes to dietary modifications , make these gluten-free cupcake recipes by using a gluten-free blend. And don’t forget about plant based cupcakes —you can go nut-free too!
Feeling adventurous? Add a pinch of cinnamon or swap out the almond milk cupcake recipe for coconut milk. It gives a lovely coconut twist!
Complete Nutrition Guide
Let’s get real for a second. these cupcakes are not just a delightful dairy-free dessert recipe ; they can also be a bit healthier.
Depending on your substitutions like using low sugar cupcakes or homemade frosting without dairy you can enjoy a sweet treat without the guilt.
But here’s my tip: always balance sweets with something healthy like a side of fruit salad. You’ll feel good enjoying your sweet treats.
Expert FAQ Solutions
I know it can be tricky sometimes, so here are some common questions answered.
What do I do if my cupcakes sink in the middle? Oh honey, that usually means they were underbaked or overmixed. Keep an eye on your oven temp and baking time!
Can I replace the apple cider vinegar? Yes! You can use lemon juice instead. It’ll give the same acidity you need to activate the baking soda.
Encouraging Conclusion
Who knew making milk free cupcakes could be such a journey? with these tips, tricks, and variations in your back pocket, you’re totally ready to impress your friends and family at the next shindig.
So get to baking, celebrate your dairy-free lifestyle, and enjoy those delicious cupcakes! after all, sweet treats are meant to be enjoyed.
Happy baking, my friend!
Deliciously dairy-free Cupcakes Vanilla Bliss
Ingredients:
Instructions:
Nutrition Facts:
| Calories | 180 |
|---|---|
| Protein | 2g |
| Fat | 7g |
| Carbs | 28g |
| Fiber | 0.5g |
| Sugar | 14g |
| Sodium | 120mg |
