Easy Tea Maker Cleaner: Powerful & Quick Solution
Keeping Your Tea Maker Sparkling Clean: An Easy Cleaning Solution
You know the joy of that first cup of tea in the morning? it’s like a warm hug in a mug! but oh my gosh, what if that bliss is disrupted by a stale, bitter taste? yikes! i learned the hard way that a messy tea maker can ruin even the fanciest blends.
I’ll never forget the time i brewed a perfect cup of earl grey, only to be met with a gross mineral taste.
Talk about a mood killer! that’s when i stumbled across the easy tea maker cleaner powerful & quick , and oh boy, did it change the game!
Why You Should Care About Tea Maker Maintenance
It’s not just about brewing tea; it’s about keeping your tea maker in tip-top shape for every delightful sip. a dirty tea maker can lead to buildup , both in mineral deposits and stubborn stains, affecting the quality of your tea.
Trust me, you want fresh tea flavors every time you brew! this cleaning diy is not only simple but uses common kitchen ingredients no need for fancy store-bought cleaners.
Historically, folks used vinegar for cleaning (yes, my grandma was a big proponent of that!), and its effectiveness is still celebrated today.
The process takes roughly 20 minutes, and guess what? anyone can do this! easy like sunday morning.
The Lowdown on Easy Tea Maker Cleaning
So, what's great about this cleaning solution? first off, it’s quick and cost effective . you can whip this up in just 5 minutes! imagine being able to keep your tea maker sparkling clean without breaking the bank who wouldn’t want that?
all you need are a few household staples like vinegar and baking soda.
Speaking of cost, this cleaner won’t hit your wallet hard! literally, just a few cents for a batch that ensures your tea maker is ready for action.
Just think about it one cleaning session yields a freshly maintained tea maker, ready to serve up your favorite brews without any gross aftertaste.
Health Benefits of a Clean tea Machine
Cleaning your tea maker isn't just about aesthetics; it has health benefits too! a clean machine keeps your tea hygienic after all, who wants remnants of last week's tea floating around? regular maintenance reduces harmful bacteria and keeps your tea tasting its best .
Think about special occasions too, like a cozy brunch or a relaxed afternoon tea with friends. you definitely want your equipment looking spick and span! plus, a well maintained tea maker means those fresh herbal infusions can shine, enhancing their flavor.
Best Practices for Cleaning Your Tea Maker
Alright, let’s get to the good stuff. Maintaining your tea maker doesn't have to be a tedious chore. Here are some quick cleaning hacks to follow:
Monthly Cleaning Cycles: Just pop it into your calendar. Schedule monthly cleanings to be sure you don’t forget!
Natural Cleaning Agents: Replace harsh chemicals with non-toxic cleaning methods . Vinegar is a classic, but you can try citrus juice for a fresh scent too!
Stubborn Stains Removal: For those particularly stubborn stains let that vinegar and baking soda sit for a bit before rinsing.
From my personal experience, I’ve realized that when you keep your kitchen appliances in check, you’ll ultimately improve the taste of your brews. Clean appliances mean clearer flavors trust me on this one!
Let’s Gather Those Ingredients!
Now you know why keeping your tea maker clean is essential, let's jump into the ingredients for that easy tea maker cleaner powerful & quick .
Get your measuring cups ready, and prepare to give your tea maker the love it deserves!
Get the Lowdown on Essential Ingredients

When it comes to cooking, having the right premium core components can make or break your dish. we'll break it down and make it approachable.
Plus, i’ll toss in some fun tips along the way!
The Basics: Quality is Key
First things first, let’s talk about measurements . whether you’re working with us cups or metric grams , having an accurate measurement is crucial.
A little too much sugar can turn your sauce from sweet to sickly, you know? for reference : 1 cup of flour is about 120 grams.
Easy peasy!
Next, how do you know if your ingredients are top-notch? look for quality indicators . for herbs, the color should be vibrant.
Spices should smell like they just rolled out of a spice factory! if it’s lost its punch, toss it. nobody wants bland food, right?
On to storage guidelines & shelf life ! most spices keep for about 6 months to a year if stored in a cool, dark place.
So save those glass jars! they can help maintain freshness. oh, and don’t forget to check the dates on your oils.
Rancid oil is a serious flavor buster.
Secrets from the Spice Rack
Now, let’s dive into my favorite part the signature seasoning blends ! i swear, the right spices can transform a dish from “meh” to “wow.
” you’ll want to stock up on basics like garlic powder, paprika, and cumin .
Pair these with herbs like basil, oregano, and parsley, and you’re golden! Personal fave? A pinch of red pepper flakes in pasta yum!
Regional variations matter too! If you’re cooking Indian, go for garam masala; if you’re feeling Italian, a blend with Italian seasoning is dreamy.
Substitutions: Cook’s Best Friends
Sometimes, we run out of that one ingredient that would perfectly finish the dish. No worries, I got your back with smart substitutions .
For instance, if you’re out of buttermilk, you can mix milk and a splash of vinegar or lemon juice quick home remedies! if you're trying to eat healthier, substitute white rice with cauliflower rice.
It’s a game changer!
And don’t forget about seasonal options . Swap out fresh basil for arugula or spinach when they’re more abundant in your garden.
Gear Up: The Right Tools Matter
Let’s not underestimate kitchen tools. here’s a lowdown on essential kitchen equipment you need. a sturdy cutting board is crucial, and trust me, you want a good set of knives.
Your chef knife can feel like an extension of your hand you’ll be slicing and dicing like a pro in no time.
If you're in a pinch, I say grab whatever you have, like a potato peeler for dicing! But for long term success, invest in a good peeler and a solid can opener.
Speaking of “investing,” don’t let messy drawers get you down; consider tidy storage solutions for your tools. I use drawer dividers keeps everything neat and handy!
Tea Maker TLC
And hey, don’t let me forget about your tea maker maintenance ! after whipping up tasty dishes, you gotta ensure your gadgets stay clean.
An easy tea maker cleaner powerful & quick recipe is a lifesaver. it’s as simple as mixing vinegar and baking soda! not only does it prevent mineral buildup , but it also keeps your tea tasting fresh.
For tough stains, let that mixture soak a bit. Rinse thoroughly afterward and you’ll be good to go. What a relief, right?
Wrap Up
Alright friends, you’re ready to dive into the nitty gritty of cooking with ample tips and insight on ingredient quality, substitutions, and must have tools.
As we prepare to jump into the actual cooking instructions , keep maintaining your kitchen vibes, and don’t forget to show a little love to your appliances and your taste buds will thank you! Now, let's get cooking!
Professional Cooking Method: Mastering Your Kitchen Skills
Cooking like a pro doesn’t have to be intimidating. honestly, it’s all about a few essential preparation steps combined with some great techniques.
If you ever hear chefs talking about “mise en place,” that’s their fancy way of saying, “get your stuff together before you start cooking.
” so, let’s dig into the heart of professional cooking and make it accessible!
Essential Preparation Steps
Mise en Place: The Secret Sauce
Mise en place is all about having everything ready to roll. chop those veggies, measure out your spices, and line it all up like soldiers on parade.
This will save you from that last minute panic when the timer’s ticking, and you can’t find the garlic. trust me, you don’t want your meal turning into a chaotic kitchen disaster!
Time Management Tips
Ever burnt something because you’re distracted? yeah, me too. the trick is to plan your cooking time. start with the longest cooking process and work your way down.
If you’re baking something that takes 45 minutes , start it before prepping your quick sautéed greens.
Organization Strategies
A clean workspace is crucial. keep your tools, cutting boards, and ingredients in a tidy area. a messy space can confuse you and lead to mistakes.
So, keep your cooking zone organized like your sock drawer (if you’re weird like me, you arrange them by color).
Safety Considerations
Be cautious with knives, hot pans, and cooking oils. use a thermometer to keep meat at the right temperature 165° f for poultry is a must! and don’t forget to wash your hands.
No one likes foodborne illness, so keep your kitchen squeaky clean!
step-by-step Process
1. Prep Your Ingredients
Start your cooking journey by preparing everything you need. This includes chopping, dicing, and measuring.
2. Temperature Control Checkpoints
Make sure you know the right temperatures. for instance, when sautéing veggies, you want that pan nice and hot around 400° f .
This gives your food a lovely sear, which adds flavor and texture.
3. Timing Precision
Each ingredient has its cooking time. for perfect pasta, cook it for about 8 10 minutes until al dente.
Keep that trusty timer handy because it’s your best friend in the kitchen.
4. Visual Cues for Doneness
Know when your food is done by sight. Chicken should be golden brown; veggies should look vibrant and slightly tender. If something smells funky, trust your nose better safe than sorry!
Expert Techniques
Professional Methods
Don’t shy away from techniques like blanching or sous vide if you’re feeling adventurous! they might sound fancy, but they just require a bit of practice.
For instance, blanch those green beans for that gorgeous green color just 3 minutes in boiling water before tossing them into ice water.
Quality Checkpoints
Always taste as you go. This way, you can adjust seasoning and get the balance just right. If your sauce is too acidic, a pinch of sugar can fix it, like magic!
Troubleshooting Tips
If a dish doesn’t turn out as expected, don’t fret. Maybe it’s under seasoned? A sprinkle of salt can work wonders. Don't let kitchen mishaps ruin your vibe just adjust and move forward!
Success Strategies
Common Mistakes to Avoid
Forgetting salt is a big no-no. It brings out the flavors, folks! Also, let your meat rest before slicing to keep it juicy.
Quality Assurance Tips
Use fresh ingredients; they make a difference. And don’t skip on cleaning your kitchen tools regular maintenance keeps your appliances working great.
Perfect Results Guide
Follow recipes for guidance, but feel free to tweak them. Cooking is an art, after all. Experiment with spices and flavors until you find what you love!
make-ahead Options
Not everything has to be done at the last minute. You can prep ingredients or even set some meals in advance. Hello, meal prep!
And while we’re at it, maintaining your kitchen appliances like a tea maker is vital too. i can’t stress enough the importance of using an easy tea maker cleaner powerful & quick .
Cleaning your tea maker regularly with simple solutions, like vinegar, keeps your brews tasting fresh. if you deal with stubborn stains, try a mix of baking soda and water.
It’s a game changer!
Additional Information
So there you have it your simple guide to mastering professional cooking at home. remember, the heart of cooking is not perfection; it’s about enjoying the process and sharing delicious meals with those you love.
Whether for a family dinner or just a cozy meal for one, channel your inner chef, and let the flavors flow! happy cooking!
Revitalize Your Tea Maker: A Powerfully Easy Cleaner for Quick Maintenance
Oh my gosh, folks! do you ever take that first sip of your tea and think, “yikes! what is that funky taste?” well, it might be time to give your tea maker some tlc.
Keeping your tea maker in tip-top shape can make all the difference. and let me tell you, i've got the easy tea maker cleaner powerful & quick solution that'll have your machine shining like new.
Pro Tips & Secrets
First off, let’s talk about some pro tips . one of my favorite go-to methods involves common household items you probably already own.
Combining white vinegar and baking soda is a game changer! not only is this an eco-friendly cleaner , but it also zaps those stubborn stains like a champ.
Seriously, don’t underestimate them!
Time is always of the essence, right? quick cleaning hacks can save you precious minutes. aim to give your tea maker a deep clean once a month.
It works wonders for flavor and hygiene. this simple cleaning routine helps in mineral buildup removal , making sure you enjoy fresh tea flavors every time.
Perfect Presentation
Now, let’s not forget about presenting that delicious brew! after you've put in the elbow grease to clean your tea maker, you can really shine at serving time.
Try pouring your tea into a clear glass teapot or a fancy cup. garnishing is key! toss in a slice of lemon or a sprig of mint for that colorful touch.
It raises the ante in visual appeal and makes your tea time feel like a royal occasion.
Storage & make-ahead
Cleaning can be a hassle, but proper tea maker maintenance makes a huge difference. once you've got that clean, make sure to store your tea maker where it won't gather dust.
For any leftover cleaning solution? just toss it! it’s not the kind of concoction you want hanging around.
If you want to make-ahead, store your tea in a cool, dark place. don’t worry about the freshness of your tea.
high-quality brands usually stay good for a week in proper conditions.
Creative Variations
Feeling adventurous? spice up your cleaning routine with some creative variations . if you don’t want to use vinegar, citrus cleaner benefits can come into play! steep some citrus fruits in hot water, and voila! you’ve got an all-natural cleaner.
Plus, your machine will smell like a sunny day.
Dietary mods? For those who prefer herbal teas, you can brew a gentle herbal infusion as your cleaning solution. Trust me, your taste buds will thank you later!
Complete Nutrition Guide
Now, let’s just get clear: this cleaning recipe isn’t about calories. but wow, is it packed with health benefits when it comes to making sure your tea is fresh and delicious! you'll be amazed at how much flavors can change with a freshly cleaned tea maker.
Simple hygiene in your kitchen appliance care routine can also promote better immunity and hydration.
Expert FAQ Solutions
If you're thinking, “can i really use vinegar?” the answer is yes! just know that some fancy machines advise against it.
Always check your appliance’s manual. got stuck stains? let your cleaning solution sit for a bit. don’t be shy about giving your tea maker a good scrub; it's not going to hurt!
A Final Word on Maintenance
So here’s the bottom line. keeping your tea maker clean is an essential kitchen tip to elevate your tea experience.
With this cleaning solution recipe , you’ll be saying goodbye to those pesky stains and funky smells. it’s all about feeling good when you brew.
Remember, a clean tea maker equals better tasting tea ! it’s often overlooked, but a little effort can go a long way.
So, put on your cleaning gloves and try this quick solution. you'd be surprised at the difference in flavor once you take the time to care for your gear.
Happy brewing, my friends!
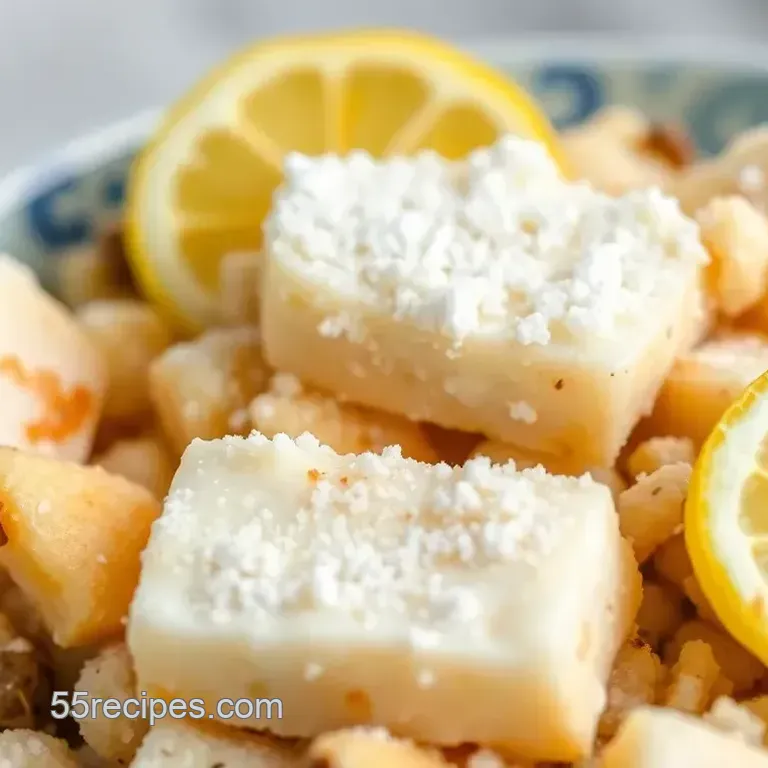
Easy Tea Maker Cleaner Powerful Quick

Ingredients:
Instructions:
Nutrition Facts:
| Protein | 0g |
|---|---|
| Fat | 0g |
| Carbs | 0g |
