Flaky & Simple Easy Pie Crust
- Putting Together a Flaky & Simple Easy Pie Crust
- Essential Ingredients Guide: Pie Crust Edition
- Professional Cooking Method: Mastering the Art of Pie Crust
- Pro Tips & Secrets for a Perfect Pie Crust
- Perfect Presentation
- Storage & Make-Ahead
- Creative Variations
- Complete Nutrition Guide
- Wrapping It Up
- Frequently Asked Questions
- 📝 Recipe Card
Putting Together a Flaky & Simple Easy Pie Crust
The First Slice: A Personal Connection
So, let me take you back to my first real pie-making experience. it was a chilly autumn afternoon, and i was trying to impress my friends with my cooking skills.
I had my heart set on a classic apple pie, but guess what? the pie crust became my nemesis! i swear i spent more time wrestling that dough than i did baking the apples.
Ever been there? if you're shaking your head, trust me you’re not alone! that's why this easy pie crust recipe is a game changer.
It takes you from a kitchen battle to a pastry party in no time.
The Scoop on This Recipe
Now, if you think pie crust is reserved just for pros or your grandma, think again! this recipe has roots in classic french pastry techniques, but it’s been updated for home cooks who want something simple and delicious.
This crust is buttery, flaky, and versatile perfect for sweet desserts or savory delights. you can whip it up in about 15 minutes and let it chill for another 30 minutes .
Not bad, right? and it doesn’t require any fancy ingredients. just your basic pantry staples.
The Costs and Results
You might wonder, "what’s it gonna set me back?" well, not much! the yield is a standard 9 inch pie crust , enough for about eight slices , depending on what you fill it with.
Honestly, you can treat yourself to a homemade pie without breaking the bank. with just a few ingredients, you’ll find that this crust is wallet friendly too!
Why This Pie Crust Rocks
Ah, let’s talk benefits! first off, health benefits . sure, we're working with butter, but you can use alternative fats if you want a vegan pie crust hello, coconut oil! not to mention, if you look closely at this method, you’ll realize it’s a great mix of fun and nutrition .
Plus, it’s a must have for special occasions like birthdays, holidays, or cozy family gatherings. everyone loves pie, and trust me the dough can make or break the experience.
This pie crust stands out among similar recipes because it’s all about ease. how to avoid a soggy pie crust? blind baking! yep, that little step keeps moisture at bay when using custard fillings.
And let’s be real, there's nothing worse than slicing into what should be a delicious pie only to find a mushy disaster, right?
With this homemade pie shell , you’ll impress your guests and become the go-to pie guru among your friends. honestly, once you master this basic pie crust method , you’ll find yourself experimenting with pie dough preparation like a pro.
Whether it's sweet or savory, the possibilities are endless, from herb infused pie crusts to nutty pie crust alternatives .
Time to Roll Up Your Sleeves!
Okay, enough chatting. are you ready to tackle your first pie crust? gather your baking essentials for home cooks , and let’s dive into some quick pie crust ideas ! plus, make sure to chill that dough it’s one of my golden rules for making this crust flaky and delicious.
Stay tuned for the ingredients and step-by-step instructions. trust me; you’re gonna want to make this your taste buds will thank you later!
Essential Ingredients Guide: Pie Crust Edition
If you're diving into the world of pie making, getting to know your essential ingredients is key. let’s break down what you absolutely need to whip up an amazing easy pie crust and everything that goes with it.
You’ll impress your friends and family in no time!
Premium Core Components
First things first, let’s talk about those premium core ingredients for your pie crust. for a flaky crust that’s melt-in-your mouth good, you need 1 ½ cups of all-purpose flour (190g), a ½ teaspoon of salt , and ½ cup of unsalted butter (113g) that’s really cold.
Too easy, right?
Now, don’t forget about storage guidelines . keep that flour sealed tight in a cool, dry place to extend its shelf life.
Butter? it should be in the fridge until you're ready to use it (and trust, you’ll want to use it fast).
If you notice any strange smells or textures, toss ‘em. freshness is crucial!
Quality Indicators
How do you know you’ve got good ingredients? your butter should be a nice creamy white with no funky aftertaste.
And flour? fresh is best! a sniff test can be a lifesaver here. you want to smell... flour, not anything musty.
Signature Seasoning Blend
While butter and flour are staples, let’s not forget the secret ingredient: seasonings! a bit of sugar (just 1 tablespoon is optional), can elevate your crust, especially if you’re going sweet.
And while we’re on the subject, consider adding herbs . rosemary or thyme mixed into your pie dough? heck yes! talk about flavor town!
Flavor Enhancers
And don’t be shy about aromatics! vanilla extract can sneak in some lovely warmth for dessert pies. thinking about trying something different? maybe swap out vanilla for almond extract in a peach pie.
Just wow!
Smart Substitutions
Now, life happens. sometimes you don’t have all the right stuff on hand. so smart substitutions are a game changer.
Got a vegan friend coming over? use coconut oil instead of butter. or stuck without flour? a gluten-free pie crust blend might just save the day.
Need something quick? In a pinch, you can even use leftover tortilla for a super simple pie shell. No shame in that game!
Kitchen Equipment Essentials
Alright, let’s shoot straight to your kitchen tools. you really don’t need a fancy schmanzy setup, but a few must have tools will make your life a whole lot easier.
Grab a mixing bowl and a rolling pin . a pastry cutter or fork works wonders for mixing in the butter.
And please, don’t skip the 9 inch pie pan it’s essential for those classic dessert recipes we all love.
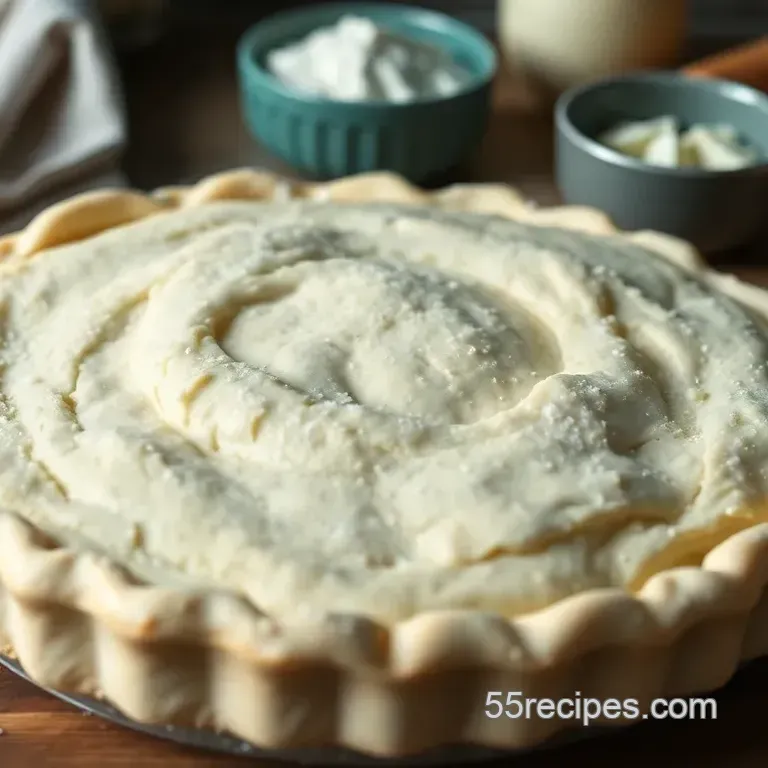
If you want to really impress, consider investing in pie weights for blind baking , which keeps your crust from getting all soggy. Pro tip? Dried beans work just as well!
Rolling Out Dough Tips
When it comes to rolling out dough , remember to keep your surface and rolling pin floured. it helps avoid stickiness.
Plus, after you’ve got your dough ready, don’t forget the chilling at least 30 minutes in the fridge for that buttery goodness.
You want a flaky pie crust, not a sad one!
Wrap-Up for the Next Steps
By now, you’re starting to see the magic behind a simple pie crust tutorial and everything that goes into it.
Whether you're whipping up a savory quiche or a sweet cherry pie, understanding variations and substitutions makes it even easier.
Let’s get those taste buds tingling and head straight into the instructions . Your easy pie crust awaits, and trust me, you’re going to love what you create next!
Professional Cooking Method: Mastering the Art of Pie Crust
If you're looking to up your baking game, there’s no better place to start than with a simple pie crust tutorial .
Honestly, mastering the easy pie crust can be a total game changer in your kitchen. so, let’s dive into some professional cooking methods that will help you whip up a pie crust worthy of a bakery!
Essential Preparation Steps
First off, let’s get organized. you’ve probably heard the phrase “mise en place,” right? it’s basically about having everything in its place before you start cooking.
Measure out 1 ½ cups of all-purpose flour and get your ½ cup of chilled butter ready. trust me, you don’t want to be scrambling for ingredients once you’re in the zone.
Now, let’s chat about time management . prepping the crust will take about 15 minutes , plus some chilling time. while that dough chills for a solid 30 minutes , how about you kick back with a coffee? it makes the wait more bearable.
Being organized is key! keep your workspace clear and have all your tools, like a rolling pin and pie pan, nearby.
Oh, and don’t forget about safety considerations . always keep your fingers away from sharp edges and clean up spills to avoid any slip ups.
step-by-step Process
Alright, here’s the fun part! Let’s walk through a classic pie crust in simple steps. Follow these numbered instructions, and I promise you’ll be golden.
Combine Dry Ingredients : Start by mixing together flour, salt , and opt for a bit of sugar if you want that hint of sweetness.
Cut in Butter : Use a pastry cutter or fork (whichever you vibe with) to mix in that cold butter until you have crumbs. You want it to look like coarse sand.
Add Ice Water : Gradually add 4-5 tablespoons of ice water . Mix just until it all comes together overworking it can lead to a tough crust, and we don’t want that!
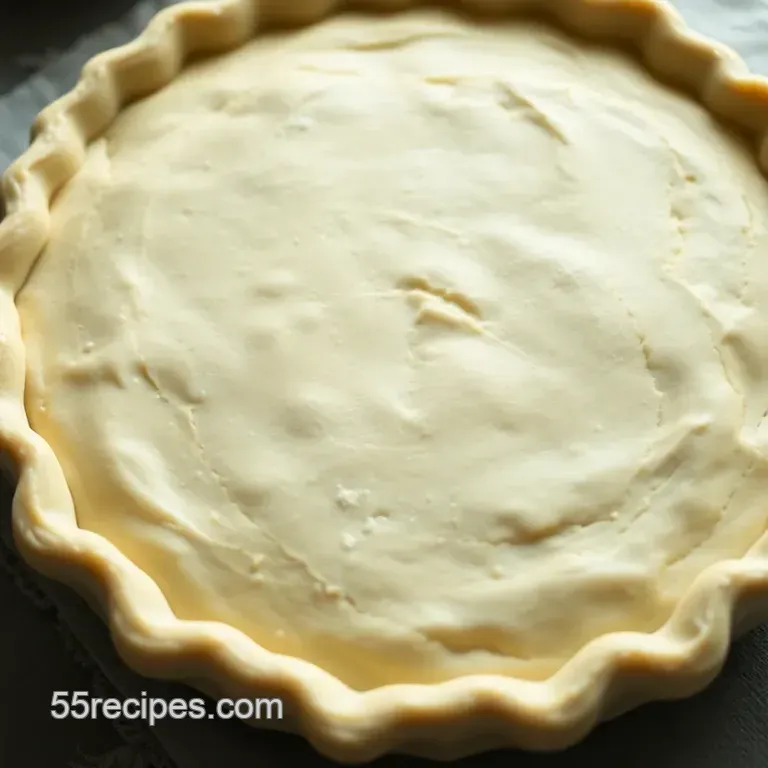
Form the dough : shape your dough into a ball, then flatten it into a disk. wrap it up in plastic wrap and stick it in the fridge for at least 30 minutes .
Roll Out the Dough : Time to roll! Get a lightly floured surface and roll out your dough till it’s about 12 inches in diameter .
Transfer to Pie Pan : Carefully place your dough in a 9 inch pie pan and trim any excess. You need that overhang for later.
Blind bake if needed : if your recipe calls for it, blind bake the crust by covering it with parchment and filling it with pie weights.
Bake at 375° f for 15- 20 minutes , till it’s lightly golden. this step is crucial to avoid a soggy bottom!
Cool Down : Let that crust cool before filling it with your favorite goodies!
Expert Techniques
Now for some professional methods that’ll elevate your pie-making. First, use cold ingredients for flakiness. Second, consider using a pastry cutter vs. fork for cutting in butter each tool has its charm!
Check for quality with visual cues: the butter should look like small peas mixed into the flour. and if things start going sideways, remember it’s totally okay to add a touch more water or flour if the dough feels too crumbly or wet.
Success Strategies
We all mess up sometimes, so here’s how to avoid common mistakes. make sure to chill the dough before rolling it out to keep everything in control.
If you’re aiming to avoid a soggy pie crust, blind baking techniques are your best friend.
For quality assurance, always look for golden color after baking if it’s too light, it might need more time. and hey, if you want to prepare ahead of time, you can always make the crust and freeze it.
Awesome, right?
Wrapping It Up
So there you have it the secrets to creating a stellar easy pie crust ! whether it's a classic sweet apple pie or a savory quiche, this flaky crust will steal the show.
Next time you reach for that pre-made crust, remember you’ve got the skills to make something truly homemade.
And if you’re itching for more pie inspiration, stay tuned! We’re about to dive into some additional information that'll keep your baking fresh and fun!
Pro Tips & Secrets for a Perfect Pie Crust
Making a great easy pie crust can feel like an art, but trust me, it’s more like a science! here are some of my chef secrets to mastering this basic pie crust method.
First off, don’t overwork that dough! seriously, you want to mix just enough until everything comes together. over mixing can turn your crust tough, and we’re going for flaky, not chewy.
I learned the hard way i was all excited and ended up with a sad, gummy mess. ugh!
Next up, chill, chill, chill! after mixing, wrap that dough and give it at least 30 minutes in the fridge .
This isn’t just for fun; it helps keep the butter cold and makes rolling it out a breeze. ice water is your best friend here too! it keeps the dough from getting warm while you’re handling it.
Lastly, if you're making a custard pie, blind baking is a must. just line your crust with parchment paper and add some pie weights or dried beans.
Bake it for 15- 20 minutes until it’s lightly golden. this won't only help you avoid that dreaded soggy bottom, but it also gives you a sturdy base for your delicious filling.
Perfect Presentation
Alright, let’s talk about making your pie look as good as it tastes. plating techniques can totally amp up your dish, and trust me, we eat with our eyes first.
A simple, rustic look is often all you need!
A sprinkle of powdered sugar or a light whipped cream dollop adds some pizazz. you can also use fresh fruits as garnishes for a pop of color.
Think sliced strawberries or maybe some mint leaves. color combinations are key. a little green with red or yellow makes everything more appealing.
Pro tip? Use a fork to crimp those edges. Not only does it look fancy, but it gives an extra bit of tasty crunch. Plus, it’s super satisfying to do.
Storage & make-ahead
If you’re like me, you probably want to make a bunch of pies at once, right? so here’s the deal on storage tips for pie crust .
You can make your easy crust recipe ahead of time. just wrap it tightly in plastic and keep it in the fridge for up to three days .
Want to freeze it? absolutely! shape your dough into discs, wrap them in plastic, and toss them in the freezer.
When you’re ready to bake, just thaw it overnight in the fridge before rolling it out. it’ll be fresh and ready for any spontaneous pie cravings!
When it comes to reheating, that’s easy. Just pop it back in the oven for a few minutes at 350° F , and you’ll have that crispy goodness all over again.
Creative Variations
Here's where you can really have fun! the versatile pie crust is just the beginning. want a nutty flavor? add some ground nuts right into your dough.
How about a savory twist? try an herb infused pie crust by mixing in some fresh chopped herbs; rosemary or thyme work wonders.
For those of you with dietary restrictions, there are vegan pie crust options by swapping butter for coconut oil or margarine.
And if gluten is your enemy? there are many gluten-free pie crust blends that will work just as well. just remember that each variation might need slight adjustments to liquids or baking times.
Complete Nutrition Guide
A homemade pie shell can be a sweet or savory delight, but how does it fit into your diet? on average, one slice of our flaky, easy pie crust comes in at around 150 calories .
Packed with about 8 grams of fat and only 2 grams of protein , it's a treat, not your dinner mainstay.
For health conscious options, incorporating whole wheat flour can give you added fiber. if you’re watching what you eat, keep the servings in mind.
A slice is perfect with a side of fresh fruit or maybe a salad if you're going the savory route.
Wrapping It Up
In the end, making an easy pie crust is all about enjoying the process. whether you're whipping it up for a weekend family gathering or just a cozy night in, don’t stress too much.
It’s your kitchen, your rules.
Remember, practice makes perfect! and trust me, there’s nothing like the satisfaction of pulling out your homemade pie, all flaky and golden brown.
Let your creativity shine, and don’t be afraid to experiment with fillings or crust variations. enjoy the journey, and happy baking!
Frequently Asked Questions
How do I make an easy pie crust that doesn't fall apart?
To ensure your easy pie crust holds together, be sure to handle the dough gently and avoid overmixing. Chilling the butter and the dough before rolling helps maintain the crust's integrity.
Additionally, letting it rest in the fridge for at least 30 minutes will help it firm up, reducing the chance of it breaking when you're transferring it to the pie pan.
Can I freeze the easy pie crust for later use?
Absolutely! You can freeze your easy pie crust before or after blind baking. If freezing raw dough, wrap it tightly in plastic wrap and place it in a freezer bag, where it can last up to three months. Just remember to thaw it in the refrigerator before rolling out for best results.
What are some variations I can try with this easy pie crust recipe?
There are many fun variations for your easy pie crust! You can add herbs like rosemary for savory pies, use ground nuts for a nutty flavor, or substitute part of the all-purpose flour with whole wheat flour for a heartier texture. For a gluten-free option, consider using a gluten-free flour blend.
What should I do if my easy pie crust is too sticky to roll out?
If you find that your easy pie crust is too sticky, it’s likely that it needs a bit more flour. Dust your work surface and rolling pin with a little all-purpose flour while rolling out the dough. Alternatively, you can chill it for an additional 15-30 minutes to make it easier to handle.
How can I ensure my easy pie crust is flaky?
To achieve a flaky texture in your easy pie crust, always use very cold butter and incorporate it into the flour until pea-sized crumbs form. Avoid overworking the dough, and apply ice water gradually just until the dough comes together.
Chilling the dough before baking also helps retain those flakiness wonderful layers.
What is the nutritional information for this easy pie crust?
Each slice of this easy pie crust (based on an 8-slice yield) contains approximately 150 calories, with 2g of protein, 8g of fat, and 18g of carbohydrates. Always remember that the nutritional content may vary depending on specific ingredient substitutions and fillings used, so check accordingly if you are tracking your intake.
Flaky Simple Easy Pie Crust

Ingredients:
Instructions:
Nutrition Facts:
| Calories | 150 |
|---|---|
| Protein | 2g |
| Fat | 8g |
| Carbs | 18g |
| Fiber | <1g |
| Sugar | 0.2g |
| Sodium | 120mg |
