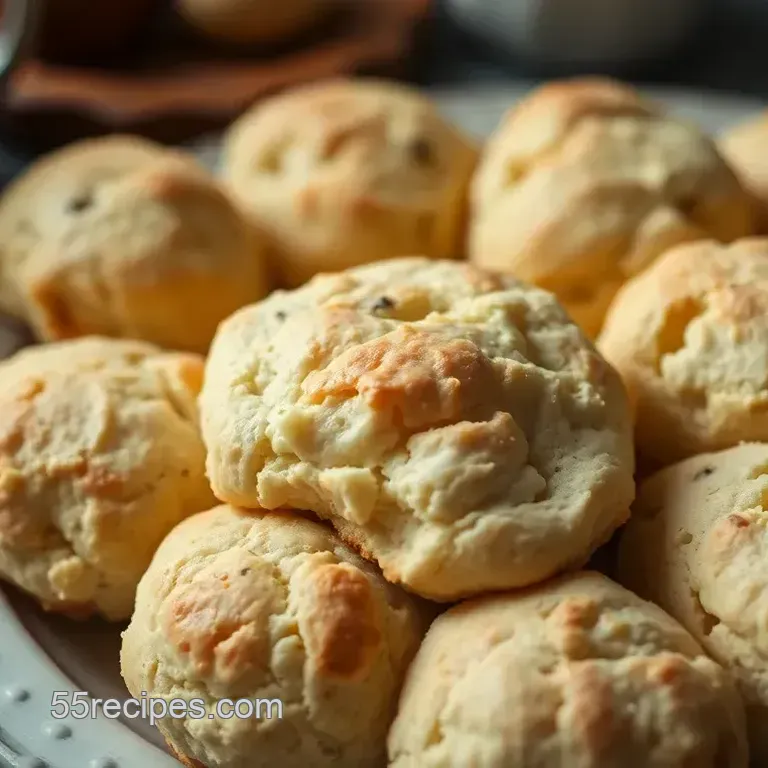
Fluffy Buttermilk Scones for a Perfect Afternoon Tea
Let’s look into into Buttermilk Scones
Oh my gosh, i still remember the first time i tried to make scones. i was about 12, and my mom asked me to whip up something for our weekend tea party.
I thought, “how hard could it be?” and dove into a “quick recipe.” spoiler alert: my “scones” turned out more like dry hockey pucks than light, fluffy pillows of deliciousness.
Fast forward to today, and i’ve learned the magic of the recipe scones with buttermilk . these babies won’t just make you look like a baking genius; they’ll soften your heart and fill your home with a heavenly aroma.
A Quick Scone History Lesson
Scones have a rich history , tied to britain and afternoon tea since the 19th century. can you picture it? ladies in fancy hats, sipping tea with tiny sandwiches and fluffy scones slathered with clotted cream and jam? yes, please! nowadays, these treats are all the rage in both fancy tea rooms and cozy homes.
With only 30- 35 minutes from prep to plate, you’ll get that “wow” factor without spending all day in the kitchen.
And trust me, you won’t break the bank either it’s a budget friendly way to impress guests or indulge yourself on a lazy sunday morning.
Why You Should Bother With Buttermilk Scones
Now, onto the good stuff. why are these buttermilk scones the bee's knees? well, for starters, they are incredibly moist and flaky thanks to that rich buttermilk.
Unlike many other scone recipes that can be dry or crumbly, these babies are a nice contrast of tenderness and slight crispiness.
Plus, you can play around with sweet and savory variations think dried fruit, citrus zest, or cheese and herbs for a unique spin!
You might also be surprised to learn how healthy these scones can be. with simple ingredients like flour, butter, and buttermilk, you can whip up something nutritious.
Not to mention, having homemade scones at your next tea party makes for a perfect snack and a conversation starter! they are ideal for everything from brunch gatherings to holiday celebrations.
Picture it: an elegant spread with freshly baked scones , warm tea, and laughter all around.
One of the best things about these scones is the versatility. you can dress them up or down, and they pair beautifully with various toppings.
Go for that dollop of clotted cream and dollop of strawberry jam if you're feeling traditional, or try a drizzle of honey and fresh lemon zest for a refreshing twist.
Trust me, once you get those fluffy scones out of the oven, you won’t want them to sit for long!
Ready to Bake?
Now that you’re practically drooling with anticipation about baking your own batch of homemade scones , you might want to gather your ingredients.
With yummies like butter, flour, and of course, buttermilk, you’re only a few steps away from creating something truly delightful.
Whether you’re making a simple scone recipe for a quiet afternoon or looking to impress at a tea party, this buttermilk scone recipe is your ticket.
So grab your apron, preheat that oven, and let’s get baking! The ingredient list is right around the corner. You're not going to want to miss it!
Your Essential Ingredients Guide for Scones
Oh my gosh, if you’re like me and love whipping up some fluffy scones for that perfect afternoon tea, you’re in for a treat! Knowing your ingredients can make or break your bake, right? So let’s dive into the essentials, and I promise it’ll be a breeze!
Premium Core Components
First off, let’s chat about those premium ingredients you gotta have. Here are the detailed measurements you’ll need:
- All-Purpose Flour : 2 cups (240g)
- Granulated Sugar : 1/4 cup (50g)
- Baking Powder : 1 tablespoon
- Salt : 1/2 teaspoon
- Butter : 1/2 cup (115g), cold and cubed
- Buttermilk : 3/4 cup (180ml)
Now, how can you tell if these ingredients are top-notch? quality indicators like fresh flour and unsalted butter are key.
And don’t forget keep your baking powder stored well and check its expiration! pro tip: storage guidelines say keep unopened baking powder and flour in a cool, dry place.
Once opened, use them within 6 months for best results!
Signature Seasoning Blend
Next up is all about flavors. You wanna make your scones sing? Spice it up with a signature seasoning blend !
- Think essential spice combos, but for scones, we’re keeping it simple. Add a dash of nutmeg or a sprinkle of cinnamon for a festive touch.
- Herbs like rosemary can give a savory kick. Can you imagine making savory scone options with hints of cheese and chives? Yum!
- Oh! And don’t forget about citrus zest in baking , like lemon or orange zest to brighten flavors!
Smart Substitutions
Life happens, and sometimes you don’t have everything in your pantry. That's cool! Here are some smart substitutions :
- No buttermilk? No worries! Mix 3/4 cup of milk with 1 tablespoon of lemon juice or vinegar and let it sit for 5 minutes. Voila! Instant buttermilk!
- Got dairy restrictions? You can even try nut milk if you’re desperate. Baking is about being creative, right?
- If you catch yourself short on sugar, raw honey works wonders too!
Kitchen Equipment Essentials
Alright, before we dive into the actual baking, let’s chat about some kitchen equipment essentials . Here’s what you’ll need:
- Mixing bowls
- Baking sheet (line it with parchment paper for easier cleanup)
- A pastry cutter or fork to cut in that butter
- A pastry brush (to give your scones that glossy finish)
If you don’t have one of these, don’t sweat it! A regular fork can do the trick.
Baking Tips for Scones
Last but not least, i’ve got to share some baking tips for scones . don’t overmix! you want those cute lumps in your dough; that’s what makes them moist and fluffy .
And remember, cold butter = flakiness. keep it cool, friends!
Baking is an adventure, and you want it to be fun. think of it as your own little tea party at home, where you’re the star.
And hey, homemade scones make for the best tea party snacks .
Now that you’re armed with all this know how, you’re definitely ready to take on that buttermilk scone recipe . the next step is turning all this into the perfect bake.
Can you hear the kettle boiling? let’s get into those instructions and make some classic english scones ! get ready for freshly baked goodness that pairs splendidly with your fave jam and a dollop of clotted cream.
Cheers to that!
Mastering the Art of Professional Cooking: From Scones to Safety
So, you’re diving into the realm of professional cooking, huh? buckle up, my friend! it’s a wild ride filled with flour clouds, sizzling pans, and oh-so-sweet aromas.
Let’s break it down step-by-step, making sure you know all the ins and outs to create dishes that’ll knock socks off like a buttermilk scone recipe that brings british afternoon tea to your kitchen!
Essential Preparation Steps
Before you whip up those fluffy scones , let’s talk about mise en place . this french term just means “everything in its place.
” seriously, it’s a gamechanger! gather all your ingredients first: flour, buttermilk, butter you name it. trust me; digging through the pantry halfway through a recipe is a recipe for disaster (pun intended!).
Now, let’s hit on time management . set a timer, not just for baking, but for each step. like, 15 minutes to prep and 20 for baking is what we’re aiming for.
Keep it moving, or you’ll find yourself with dry, sad scones. to stay organized, i like to keep my ingredients in the order they appear in the recipe.
It makes things flow smoother than a cup of earl grey!
And hey, don’t skip the safety considerations ! always keep a fire extinguisher handy and make sure your hands are clean.
I once had a near disaster with flour flying everywhere! it could’ve ended badly, but instead, it was just a funny story to tell my friends.
step-by-step Process
Let’s get into the good stuff! Here’s how to bake your scones like a pro.
- Preheat your oven to 400° F ( 200° C) and line your baking sheet. Seriously, don’t forget this step!
- Combine your dry ingredients: 2 cups of flour, 1/4 cup sugar, 1 tablespoon baking powder, and 1/2 teaspoon salt mix it up nice!
- Now, for the butter, cut in 1/2 cup cold, cubed butter until it looks like breadcrumbs. This is where you get that moist scone texture !
- Add your buttermilk gently. I cannot stress enough don’t overmix! That’s a kiss of death for flaky scones, my friends.
- Knead it gently. You just want to bring it together, not whip it into submission!
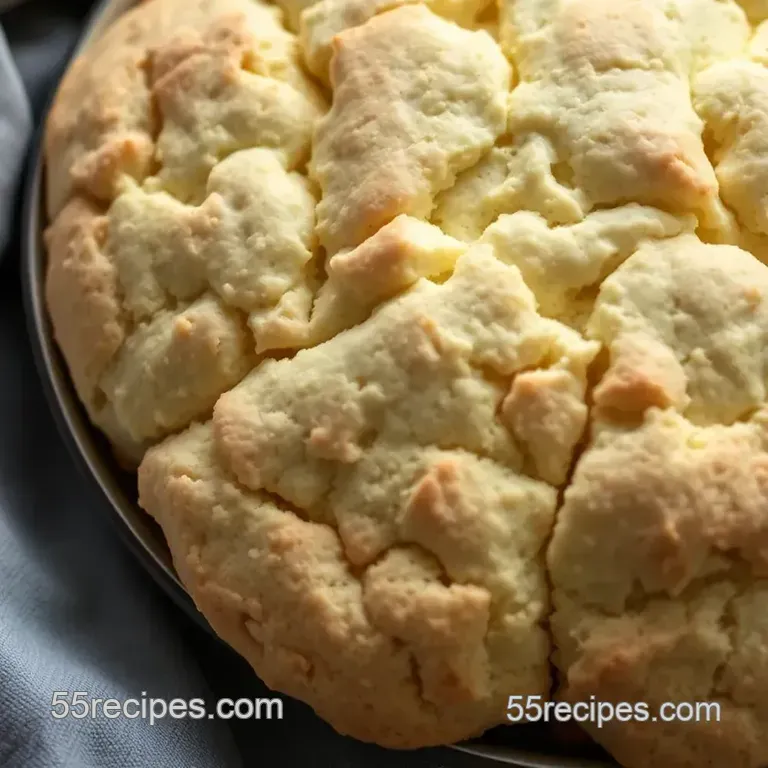
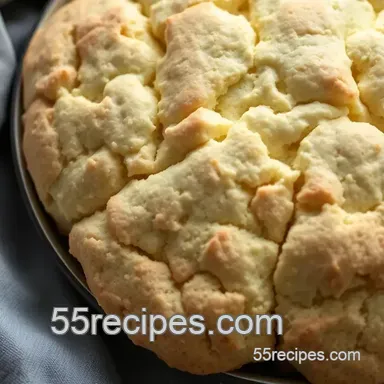
- Now, cut them into wedges or circles. Bake them for 15- 20 minutes until golden brown, and drumroll, please —check with a toothpick for doneness.
Expert Techniques
Okay, amateur chefs, let’s sharpen those skills. here’s a secret: critical steps to getting the best results. keep your butter cold; it’s crucial for flaky goodness.
As for those quality checkpoints ? your scones should rise beautifully and be golden brown.
If you run into trouble, like your scones not rising, look at the leavening agents. Check your baking powder outdated powder is a classic culprit.
Success Strategies
Now, it’s time to fine tune your technique! Avoid common mistakes like overmixing the dough or rolling it out too thin. Those bits of butter need space to create pockets of flakiness.
For quality assurance , try one of my favorite tips: make a test scone! It’s really not that crazy, and it’ll help you nail it before your big brunch.
And let’s not forget about make-ahead options! You can prepare the dough and freeze it. Just slice and bake whenever a scone craving strikes.
Feeling more confident about diving into your baking adventure? i sure hope so! there’s something magical about the smell of freshly baked scones wafting through your kitchen, especially when you pair them with a delightful jam and clotted cream.
So, what’s next on our journey?
Additional Information...
There’s a world of scone flavors waiting for you think sweet scone variations , like chocolate chip or savory bites with cheese and herbs! each twist brings its own charm, so keep your baking hat on.
You know you’re just one great recipe away from an amazing scone that’ll make your next tea party one for the books.
Happy baking!
Additional Recipe Information: All You Need to Know About Buttermilk Scones
Let’s dive into the nitty gritty of baking fluffy buttermilk scones . if you’re all set to whip up these beauties, i've got several pro tips, storage advice, and variations that can take your scone game from basic to absolutely delicious.
Are you ready? let’s go!
Pro Tips & Secrets to Success
First off, let’s talk about some chef's personal insights that will make you feel like a pro. one crucial tip? chill your butter! seriously, cold butter makes for the flakiest, most tender scone texture.
Oh, and don’t be shy about the mixing part; you want a few lumps in that dough because over mixing is the enemy of scones!
Time saving techniques ? if you want to look like a baking magician , prepare your dry ingredients ahead of time.
Just store them in an airtight container. then, when you're ready to bake, things will move pretty quickly.
For flavor enhancements , consider adding citrus zest like lemon or orange. It brings a lovely brightness that dances on your tongue.
As for presentation advice , serve your scones with a variety of toppings. think clotted cream, homemade jams, or even a sprinkle of powdered sugar .
Smattering those toppings adds a pop of color and makes your afternoon tea table look like it came straight out of a pinterest board!
Perfect Presentation
Now that you’ve got your buttermilk scones baked to perfection, it’s time to plate them up!
Use a plating technique that showcases height and texture. instead of stacking them, lay them out on a platter, sort of leaning against each other.
This gives a casual, homemade vibe that feels welcoming.
For garnish ideas , consider sprigs of mint for color and freshness. You could even arrange a few juicy strawberries or blueberries around your scones just imagine how gorgeous that would look!
Color combinations matter, too. The golden brown of your scones will look perfect against the deep red of raspberry jam or the vibrant green of a mint leaf.
And if you want to take it further, aim for that visual appeal . A clean white plate can really make the scone's colors pop!
Storage & make-ahead
Okay, let’s be real. Sometimes you just can’t eat all the scones in one go.
For storage guidelines , place your scones in an airtight container. they should stay fresh for about 3 days at room temperature.
You could also pop them in the fridge , but they might dry out quicker than you’d like.
If you want to savor them later, consider preservation methods like freezing. wrap them individually in plastic wrap, and they’ll last up to 3 months .
Just remember to thaw them in the fridge overnight before enjoying.
Reheating instructions? You can toss them in a 350° F oven for about 10- 12 minutes to bring back that freshly baked feel and flavor.
Creative Variations
We're talking endless possibilities for your scone game!
Want to jazz things up? Flavor adaptations include adding chocolate chips, or swapping out traditional dried fruits with cranberries or even bacon bits for a savory twist.
If you’re feeling seasonal, try incorporating spices like cinnamon or nutmeg in the fall for a cozy touch or fresh herbs in the summer .
For those on special diets, dietary modifications are totally doable. You can use gluten-free flour, or sub in non-dairy milk for buttermilk (just make your own with some vinegar and regular milk).
Complete Nutrition Guide
Gotta keep it real, right? here’s a quick nutrition breakdown so you know what’s up with your scones. each scone comes in at about 180 calories .
They’re not just tasty; they offer a good balance of fats, carbohydrates, and a bit of protein.
As you think about your portions, a good tip is to enjoy them as part of a larger afternoon tea spread. This turns a simple treat into an event !
Encouraging Conclusion
There you have it! you’re now armed with everything you need to make utterly delightful recipe scones with buttermilk . look into into the kitchen, get your hands a little floury, and create some homemade scones that will knock everyone’s socks off.
Trust me, baking is all about sharing and nothing brings folks together quite like a plate of freshly baked scones .
So, go on! Make those scones, get cozy with a cup of tea, and enjoy the simple pleasure they bring. Happy baking, my friends!
Frequently Asked Questions
What makes buttermilk scones different from regular scones?
Buttermilk scones, like the ones in this recipe, are incredibly moist and tender due to the acidity in buttermilk. This acidity not only adds a unique tang but also helps to create that delightful flaky texture that makes scones so irresistible.
It’s a bit like having a cup of tea with the Queen classic and divine!
Can I make this recipe scones with buttermilk ahead of time?
Absolutely! You can prepare the dough in advance and chill it for up to 24 hours before baking. Just remember to add a bit more flour if the dough feels too sticky from the refrigerator.
This way, you’ll get lovely fresh scones whenever you fancy them, just like a surprise visit from a friend you haven't seen in ages!
How do I store leftover buttermilk scones?
To keep your scones fresh, store them in an airtight container at room temperature for up to 2 days. If you want to keep them longer, you can freeze them for up to 3 months. Just pop them in the oven straight from the freezer to warm them up; it's like unearthing treasure on a rainy day!
What can I serve with buttermilk scones?
Buttermilk scones are fantastic with clotted cream and jam strawberry or raspberry works a treat! You can also enjoy them with a lovely bit of butter or even lemon curd. Pairing them with a good cup of Earl Grey or a strong brew can make it a proper tea-time experience.
Think of it as a delightful escape to a picturesque English tearoom!
Can I use regular milk if I don’t have buttermilk?
If you don’t have buttermilk on hand, no worries! You can quickly make a substitute by mixing 3/4 cup of regular milk with 1 tablespoon of lemon juice or vinegar, letting it sit for about 5 minutes. This will give you a similar acidity that’s needed for those lovely light scones.
It’s like finding a hidden gem in your pantry!
What are some variations I can try with this scone recipe?
You can experiment with various add-ins, such as fresh berries like blueberries or strawberries for a fruity flare. Alternatively, a sprinkle of cheese and fresh herbs can make a delicious savory scone. Think of it as adding a little twist to a classic, like reimagining a traditional British dish with a modern touch!
Fluffy Buttermilk Scones For A Perfect Afternoon
Ingredients:
Instructions:
Nutrition Facts:
| Calories | 180 |
|---|---|
| Fat | 8g |
| Fiber | 1g |
