Cooking Steak on Gas Grill: Two-Zone Method
- Time: Active 15 mins, Passive 52 mins, Total 1 hour 7 mins
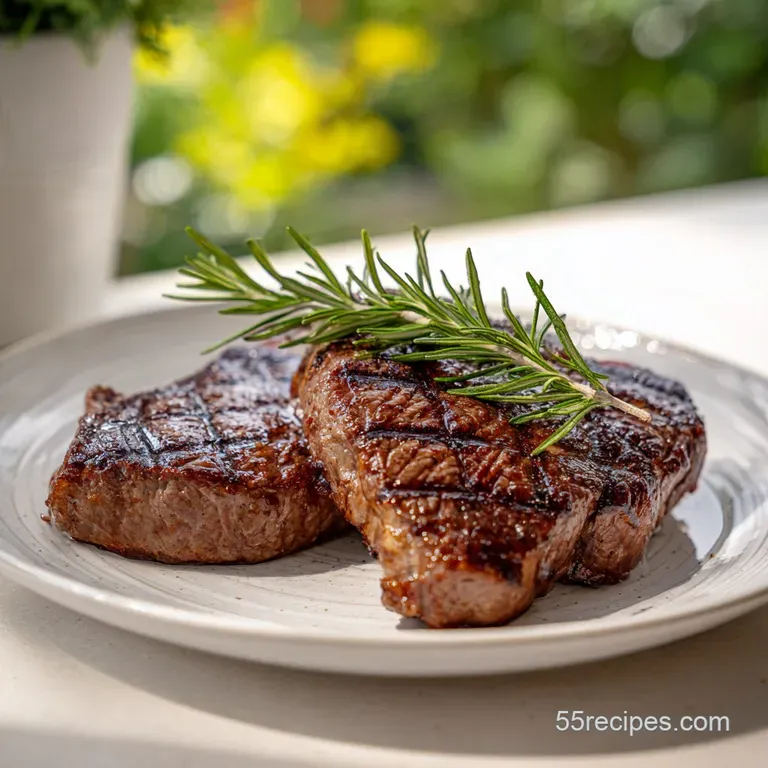
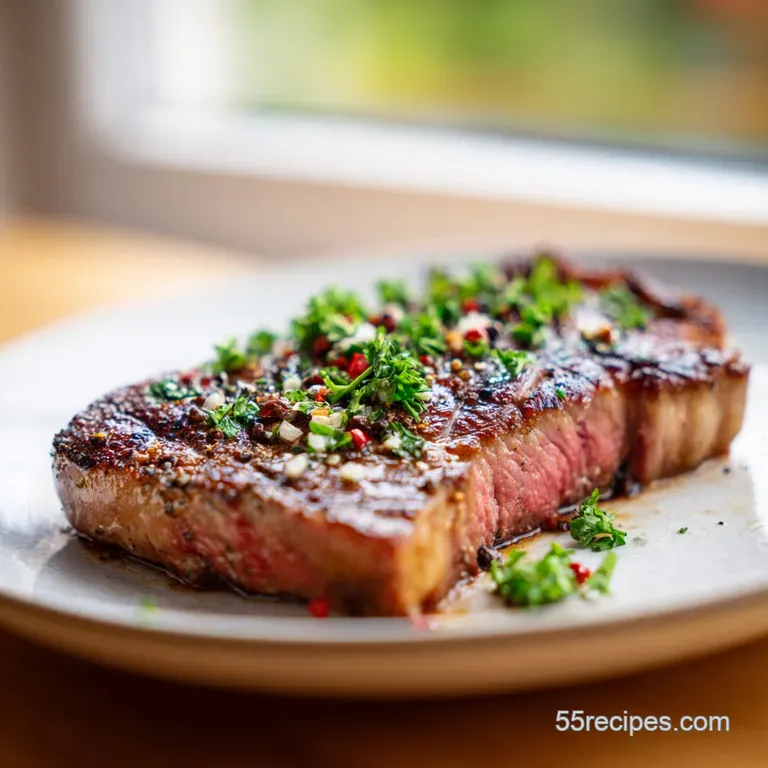
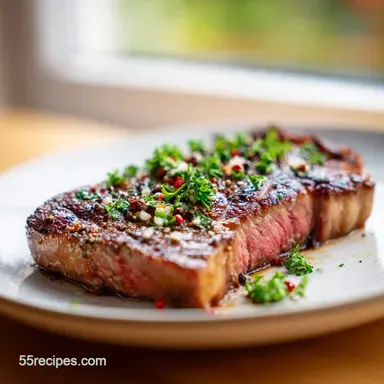
- Flavor/Texture Hook: A shatter crisp outer crust with a velvety, butter basted finish.
- Perfect for: A high impact date night dinner or a fuss free weekend cookout.
- Mastering the Science of Cooking Steak on Gas Grill
- Essential Timing and Yield for Perfectly Grilled Steaks
- Simple Ingredients for a Quality Steakhouse Experience
- Minimal Tools Required for Successful Gas Grilling
- Step by Step Guide for Grilling Juicy Ribeyes
- Fixing Common Mistakes When Grilling Over Propane Heat
- Creative Flavor Variations for Your Next Backyard Cookout
- Smart Storage and Zero Waste Ideas for Leftovers
- Classic Pairings and Presentation for Your Grilled Masterpiece
- Critically High in Sodium
- Recipe FAQs
- 📝 Recipe Card
Mastering the Science of Cooking Steak on Gas Grill
Remember that first time you fired up the grill, heart full of hope, only to pull off a piece of meat that looked gray on the outside and felt like a rubber tire? I’ve been there. The sizzle was there, the smoke was rising, but the results were just sad.
It took me a dozen ruined dinners to realize that cooking steak on gas grill isn't about just cranking the knobs to high and walking away.
The real magic happens when you hear that rhythmic hiss of fat dripping onto the flavorizer bars, sending up tiny puffs of aromatic smoke that season the meat naturally. It’s about the transformation from a raw, soft texture to something with a crust that actually has a bit of a shatter to it when your knife hits the surface.
Once you nail the temperature control, you'll never look at your propane tank the same way again.
I used to think gas grills were the "cheating" version of BBQ, but I was wrong. They offer a level of precision that charcoal just can't touch, especially when you're trying to get that perfect medium rare finish without burning the house down.
Trust me, once we get these zones set up, you are going to feel like a backyard hero.
The Thermodynamics of the Sear
Science: High heat triggers the Maillard reaction, rearranging amino acids and sugars into hundreds of flavor compounds. For this to happen effectively, the steak's surface must be bone dry so the energy goes into browning rather than evaporating moisture.
Chef Tip: Freeze your butter for 10 minutes before the final baste. When the cold fat hits the hot steak at the very end, it creates a much thicker, more velvety emulsion with the meat juices.
Three Exact Numeric Checkpoints
- Thickness: Ensure your Ribeye or New York Strip is exactly 1.5 inches thick for the best heat to crust ratio.
- Surface Temp: Your "hot zone" grates should reach 500°F (260°C) before the meat touches the metal.
- Final Pull: Remove the meat from the heat when the internal temperature hits 130°F (54°C) for a medium rare result after resting.
Comparison of Methods
| Method | Prep Time | Crust Quality | Success Rate |
|---|---|---|---|
| Fresh Dry Brine | 45 minutes | Superior shatter | 95% |
| Straight to Grill | 0 minutes | Soft/Steamed | 40% |
| Frozen to Flame | 0 minutes | Charred/Raw | 10% |
Essential Timing and Yield for Perfectly Grilled Steaks
This recipe is designed specifically for 2 servings, making it ideal for a quiet evening where quality matters more than quantity. We are looking at a total time of 1 hour 7 mins, though most of that is just the meat hanging out in the fridge getting salty and delicious. If you are looking for a more hands on technique for different cuts, you might enjoy learning about this Skirt Steak recipe which focuses on rapid, over high heat searing.
The Science of the Dry Brine
When you apply Kosher salt to the meat 45 minutes before cooking, it initially draws moisture out. But then, a cool thing happens - the salt dissolves into a brine and is reabsorbed into the muscle fibers.
This seasons the meat deeply and breaks down tough proteins, making every bite feel much more tender than a standard "salt and sear" approach.
The Two Zone Heat Strategy
Gas grills often have hot spots, but we want to create them on purpose. By lighting only one side of the grill, you create a "safe zone" where the steak can finish cooking gently without the outside turning into carbon. This mimics the professional steakhouse method of searing on a range and finishing in an oven.
The Carryover Cooking Factor
Steak is like a thermal battery. Even after you take it off the grill, the heat on the surface continues to travel toward the center. This is why we pull the meat early. If you wait until it looks done on the grill, it will be overcooked by the time it reaches your plate.
| Thickness | Internal Temp | Rest Time | Visual Cue |
|---|---|---|---|
| 1 inch | 130°F | 5 mins | Pink center, warm |
| 1.5 inch | 130°F | 8 mins | Deep pink, juicy |
| 2 inch | 130°F | 10 mins | Edge to edge red/pink |
Simple Ingredients for a Quality Steakhouse Experience
Choosing your meat is the most important part of this journey. For this specific method, we are using 2 thick cut Ribeye or New York Strip steaks, weighing in at about 450g each. You want to see plenty of white flecks of fat - that's the marbling that melts during the cook to keep everything moist.
- 2 thick cut Ribeye or New York Strip steaks (approx. 450g each) Why this? Thick cuts allow for a heavy sear without overcooking the center.
- 2 tsp Kosher salt Why this? Large grains provide even coverage and better moisture draw than table salt.
- 1 tsp coarse black pepper Why this? Larger pieces of pepper won't burn as easily under high heat.
- 1 tbsp avocado oil Why this? High smoke point means it won't turn bitter or smoky in the house.
- 2 tbsp unsalted butter Why this? Adds a rich, nutty finish during the resting phase.
- 2 sprigs fresh rosemary or thyme Why this? Aromatics infuse the fat and scent the crust beautifully.
- 1 clove garlic, smashed Why this? Subtle pungency that complements the beefy flavor perfectly.
| Ingredient | Science Role | Pro Secret |
|---|---|---|
| Kosher Salt | Protein Denaturation | Apply 45 mins early to let the salt penetrate the core. |
| Avocado Oil | Heat Transfer | Lightly coat the meat, not the grates, to prevent flare ups. |
| Unsalted Butter | Fat Emulsification | Use cold butter at the end to create a glossy, thick sauce. |
Minimal Tools Required for Successful Gas Grilling
You don't need a massive kit to get this right. In fact, fewer tools usually mean less clutter and a better focus on the meat itself. A reliable gas grill with at least two burners is the only major requirement. If you are new to this world, checking out a general How to Cook recipe for grilling can help you get familiar with your specific equipment.
Essential Grilling Gear
- Instant read thermometer: This is the only way to guarantee doneness. Guessing by touch is for people who like gambling with expensive meat.
- Long handled tongs: Keep your hands away from the 500°F (260°C) grates.
- Wire rack and baking sheet: Essential for the dry brining process to allow air to circulate around the entire steak.
Chef Tip: Use a heavy cast iron press or even a foil wrapped brick to press the steak down during the first 2 minutes of searing. This ensures maximum contact with the grates for those beautiful, dark grill marks.
step-by-step Guide for Grilling Juicy Ribeyes
1. The Dry Brine Prep
Pat your 2 thick cut Ribeye or New York Strip steaks completely dry with paper towels. Season both sides and the edges generously with 2 tsp Kosher salt. Place them on a wire rack over a tray and slide them into the fridge for 45 minutes.
Note: This allows the surface to dry out completely for a better sear.
2. Setting the Zones
Fire up your gas grill. Turn one side to high and leave the other burners off. Close the lid and let it preheat for 15 minutes until the thermometer reads at least 500°F (260°C).
3. Final Seasoning
Remove the steaks from the fridge. Rub them with 1 tbsp avocado oil and sprinkle with 1 tsp coarse black pepper. Don't add the pepper before the brine, as it can block the salt's path into the meat.
4. The over High heat Sear
Place the steaks directly over the lit burners. Grill for 3 mins until the meat releases easily from the grates with a dark crust. Flip and repeat for another 3 mins.
5. The Gentle Finish
Move the steaks to the unlit side of the grill. Close the lid. This "indirect" heat will finish the interior without burning the outside.
6. Temperature Check
Insert your thermometer into the thickest part of the steak. Cook for another 4-6 mins until the internal temperature reaches 130°F (54°C).
7. The Butter Baste
While the steak is in its final minutes, place 2 tbsp unsalted butter, 2 sprigs fresh rosemary, and 1 smashed garlic clove into a small heat proof dish on the grill to melt and infuse.
8. The Essential Rest
Transfer the steaks to a warm plate. Pour the infused herb butter over them. Let them sit, undisturbed, for 8-10 mins until the juices have redistributed throughout the meat.
Fixing Common Mistakes When Grilling Over Propane Heat
Even with a gas grill, things can get rowdy. Flare ups are the most common enemy, usually caused by fat hitting the burners and igniting. If you see yellow flames licking the meat, don't panic. Simply move the steak to the cool side of the grill until the flames subside.
Why Your Steak Looks Gray
If your steak comes off looking like boiled wool instead of a charred masterpiece, the culprit is usually moisture. If the meat is wet when it hits the heat, it steams instead of searing. That's why that 45 minute fridge rest is so vital; it dries the "skin" of the steak perfectly.
| Problem | Root Cause | Solution |
|---|---|---|
| Excessive Flare ups | Too much surface oil or fat | Trim excess hanging fat and move meat to indirect zone. |
| Tough, Chewy Meat | Skipping the rest period | Let the steak rest for at least 8 mins to relax fibers. |
| Uneven Doneness | Cooking cold meat | Ensure the dry brine happens at room temp or fridge temp consistently. |
Common Mistakes Checklist
- ✓ Pat the meat bone dry before adding oil to prevent steaming.
- ✓ Never crowd the grill; leave space for air to move between the steaks.
- ✓ Don't flip the meat constantly; let it sit for at least 3 minutes to develop a crust.
- ✓ Always use a thermometer rather than the "poke test" for accuracy.
- ✓ Resist the urge to cut into the steak immediately after it leaves the heat.
Creative Flavor Variations for Your Next Backyard Cookout
While the salt and pepper combo is a classic for a reason, you can easily tweak the flavor profile without changing the core technique. Since the gas grill provides a clean heat, it's a great canvas for different aromatic additions.
The Cowboy Crust
Instead of just pepper, add half a teaspoon of finely ground coffee and a pinch of brown sugar to your dry rub. The sugar carmelizes into a deep mahogany crust, and the coffee brings out the natural earthiness of the beef. This works especially well with the New York Strip.
The Herb Butter Twist
You can swap the rosemary for fresh sage or even a bit of blue cheese mixed into the butter. The funkiness of the cheese melting over a hot ribeye is something every steak lover should experience at least once.
Scaling the Recipe
- Down (1 person): Use a single steak but keep the preheat time the same. You still need that reservoir of heat in the grates.
- Up (4-6 people): Work in batches for the searing phase. Sear 2-3 steaks at a time, move them to the indirect zone, then sear the next batch. This prevents the grill temperature from plummeting.
- Large Groups: Increase the Kosher salt proportionally, but only use 1.5x the amount of herbs and garlic for the basting butter so it doesn't become overpowering.
Smart Storage and Zero Waste Ideas for Leftovers
If you happen to have leftover steak, consider yourself lucky. It stays fresh in the fridge for up to 3 days when wrapped tightly in foil or stored in an airtight container. I don't recommend freezing cooked steak, as the texture becomes quite spongy when thawed.
Zero Waste Tip: Don't throw away those rosemary sprigs or the garlic clove from the butter. Toss them into a freezer bag with other veggie scraps. Next time you make a beef or vegetable stock, throw them in for an extra layer of grilled, aromatic depth. Also, that leftover herb butter in the pan?
Save it! It's incredible when spread on toast or used to sauté mushrooms the next morning.
Classic Pairings and Presentation for Your Grilled Masterpiece
Presentation is everything when you've put an hour of effort into a meal. Slice the steak against the grain to ensure maximum tenderness in every bite. If you’re serving the Ribeye, look for the "cap" (the outer, ultra marbled muscle) and make sure each person gets a piece of it.
The Steakhouse Presentation
Serve the steaks on a large wooden board rather than individual plates. This keeps the meat warmer for longer and allows everyone to see that beautiful crust. Garnish with a fresh sprig of thyme and a light sprinkle of flaky sea salt right at the end to make those flavors pop.
If you want X, do Y
- If you want a smokier flavor: Add a small foil packet of wood chips (hickory or mesquite) over the lit burner 10 minutes before cooking.
- If you want a thicker crust: Apply the salt 24 hours in advance and leave the steak uncovered in the fridge overnight.
- If you want a leaner meal: Opt for the New York Strip over the Ribeye and skip the final butter baste, using a squeeze of fresh lemon instead.
Kitchen Myths
A common myth is that searing meat "seals in the juices." Science tells us this isn't true; moisture is lost no matter how hard you sear. The real reason we sear is for the Maillard reaction - that incredible flavor and texture. Another myth is that you must bring meat to room temperature before grilling.
In reality, a cold steak actually allows you to get a better sear without overcooking the inside, which is why our fridge dry-brine method works so well.

Critically High in Sodium
2180 mg mg of sodium per serving (95% of daily value)
The American Heart Association recommends limiting sodium intake to about 2,300mg per day for overall cardiovascular health.
Sodium Reduction Tips for Your Steak Recipe
-
Reduce Salt Usage-25%
Halve the amount of kosher salt used to season the steaks. Start with 1 tsp instead of 2 tsp, and adjust to taste after cooking.
-
Use Fresh Herbs Generously
Enhance the flavor with more fresh rosemary or thyme. Fresh herbs provide aromatic depth without adding any sodium.
-
Garlic Powder Alternative-5%
Consider using garlic powder instead of smashed garlic as it allows for a more even flavor profile with potentially less need for salt. It's important to read the labels and make sure to purchase garlic powder without any added salt.
-
Spice It Up!-5%
Introduce heat with a pinch of red pepper flakes or a dash of smoked paprika. These additions can distract from the need for high salt levels, adding more flavor for palatability.
-
Acidic Brightness-5%
A squeeze of fresh lemon juice or a splash of balsamic vinegar after cooking can elevate the flavors and reduce the desire for more salt. Acidity balances savory flavors and provides a satisfying finish.
Recipe FAQs
How long should you cook a steak on a gas grill?
It depends entirely on thickness and desired doneness. For a standard 1.5 inch steak aiming for medium rare (130°F), budget about 3 minutes per side over high heat for the sear, followed by 4 6 minutes over indirect heat.
What is the 3-3-3 rule for grilling steaks?
No, the 3-3-3 rule is not the best guideline for gas grilling. This rule (sear 3 minutes per side, move to lower heat for 3 minutes) is too simplistic; always rely on an instant read thermometer for accurate results based on your specific grill's heat output.
What is the 3 3 2 2 rule for grilling steaks?
This rule generally applies to grilling 1 inch thick steaks over high heat only. It suggests 3 minutes searing on the first side, 3 minutes on the second, 2 minutes on the third side, and 2 minutes on the fourth side for a uniform cook.
Do you grill steaks on a gas grill with the lid open or closed?
Use the lid closed during the indirect finishing phase. Keep the lid open only during the initial high heat sear for about 6 minutes to maintain maximum grate temperature, then close it to allow the radiant heat to cook the interior evenly.
Should I let my steak come to room temperature before grilling?
No, this is a common misconception for thick steaks. Grilling cold meat actually helps you develop a deeper, darker sear on the outside before the center overcooks; the 45-minute dry brine in the fridge accomplishes the necessary surface dryness and seasoning without fully warming the core.
What is the secret to getting a great crust on a gas grill?
Ensure the surface is completely dry and the grates are screaming hot. Pat the meat bone dry after salting, then place it only on grates that have preheated to 500°F or higher; mastering this high heat transfer is similar to the intense searing technique used in our Recipe for Delmonico Steak.
What internal temperature should I pull the steak off the heat?
Pull the steak when the internal temperature is 5°F below your target doneness. For a standard medium rare, remove the steak from the grill at 130°F, as the temperature will continue to rise 5 10 degrees while resting.
Gas Grill Steak Mastery
Ingredients:
Instructions:
Nutrition Facts:
| Calories | 1198 kcal |
|---|---|
| Protein | 84.6 g |
| Fat | 94.2 g |
| Carbs | 0.8 g |
| Fiber | 0.2 g |
| Sugar | 0.1 g |
| Sodium | 2180 mg |
