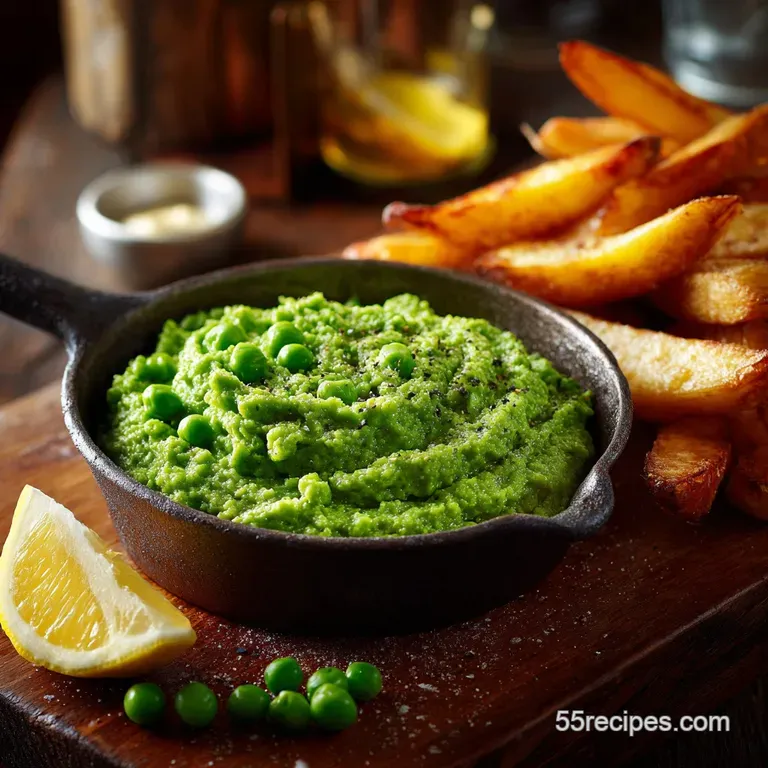
Mushy Peas: the Proper British Chip Shop Recipe
- The Ultimate Guide to Proper Chip Shop Mushy Peas
- Essential Ingredients for Traditional Mushy Peas
- Achieving the Authentic Mushy Texture: The Science of Marrowfat Peas
- Method: From Dried Pea to Emerald Comfort
- Troubleshooting Your Mushy Peas: Tips for Success
- Keeping the Green Goodness: Storage and Reheating
- Perfect Pairings: What to Serve With Mushy Peas
- Recipe FAQs
- 📝 Recipe Card
The Ultimate Guide to Proper Chip Shop Mushy Peas
When I smell that distinct, earthy aroma of simmering marrowfat peas, I’m instantly transported to a rainy Friday night, clutching a parcel of steaming hot fish and chips. This isn't just food; it’s a national landmark.
Forget everything you know about standard, sweet frozen peas; the texture here is completely different, almost fudgy, dense, and incredibly comforting.
Honestly, the chip shop classic is one of the cheapest, simplest things you can master at home. It’s perfect comfort food when you need something hearty, fast, and satisfyingly green. Seriously, if you've been skipping making them because you think they are difficult or require special machinery, stop right now.
I spent years making mushy peas that were either too pale, too hard, or strangely soapy. The secret is knowing the exact role of one specific chemical helper and the timing. We're going to crack on with the real recipe now the one that will make you swear off canned versions forever.
The History of the British Chippy Classic
Mushy peas are totally inseparable from the British chippy experience. They didn't start as a glamorous dish; they were born from necessity, using dried, preserved pulses that kept well through the winter.
This tradition evolved, and now they are the essential, slightly sweet, salty, and earthy counterpoint to crispy battered fish. It’s the ultimate culinary harmony.
Why Marrowfat Peas are Non-Negotiable
If you try to make these with regular green peas, you'll end up with a smooth, sweet purée, not true, thick mushy peas. Marrowfats are mature, dried green peas left on the vine until starchy. They have a tougher coat and a higher starch content, meaning they need the help of the soaking agent to break down properly into that distinctive, fluffy, textured mash. I’ve tried the shortcut with frozen peas, and trust me, it fails spectacularly every time. You might as well just be making Easy Sugar Snap Peas Recipe Lemon Mint Perfection — a fine dish, but not this dish.
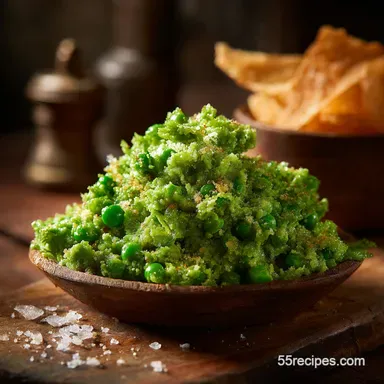
A Note on Colour: Achieving that Perfect Emerald Green
The natural colour of cooked marrowfat peas is usually a muted olive green. That shocking emerald green you see in the chip shop? That's often from artificial colouring (or a huge dose of bicarb).
We can achieve a beautiful, vibrant, natural colour boost by adding a tiny pinch of bicarb near the end of the cooking process it reacts beautifully with the chlorophyll, bringing out the vibrant green without the need for dyes.
Essential Ingredients for Traditional Mushy Peas
I love recipes that rely on four or five simple, honest ingredients. This recipe is proof that complex flavour doesn't need a huge list.
| Ingredient | Role | Viable Substitution |
|---|---|---|
| Dried Marrowfat Peas | The essential base, providing starch and texture. | Dried Green Split Peas (Requires shorter soak/cook time). |
| Bicarbonate of Soda (Baking Soda) | The non-negotiable chemical tenderizer. | None. Do not skip; it breaks down the pea skin. |
| Water/Stock | Cooking liquid and flavour foundation. | Use Vegetable or Chicken Stock for deep flavour. |
| Butter | Adds richness, optional but recommended. | Olive oil or vegan butter for a vegan version. |
| Mint Sauce | Traditional finishing flavour. | Finely chopped fresh mint, or a tiny squeeze of lemon juice. |
Achieving the Authentic Mushy Texture: The Science of Marrowfat Peas
This isn't just boiling peas; this is precision cooking. Like mastering the perfect grain of rice or even Cooked Quinoa The Foolproof Method for Fluffy NeverMushy Grains , mushy peas require respect for the starch.
Sourcing Quality Dried Marrowfat Peas
You’ll usually find these in the dried pulse aisle or sometimes labelled specifically for "mushy pea" making. Make sure they are recent and not ancient peas lurking at the back of the pantry, as older peas require even longer soaking times.
Seasoning Adjustments: Salt, Pepper, and Mint Ratios
Peas are earthy and love salt; don't be shy about it. I always start with half a teaspoon of fine sea salt and adjust right at the end. Mint is traditional, but go light . Too much mint sauce can overpower the delicate pea flavour and make it taste like toothpaste.
Water Quality and Consistency Notes
Tap water is fine, but if you want that deep savouriness, use vegetable stock. You need just enough liquid to cover the peas during simmering, allowing them to absorb the moisture slowly without drowning them.
The Importance of Soaking Time
This step is mandatory. You cannot skip it. Soaking for 12 to 24 hours rehydrates the peas and drastically cuts the cooking time. More importantly, it prepares them for the next crucial step.
The Role of Bicarbonate of Soda in Breakdown
The bicarb (baking soda) is the magic here. It increases the pH level of the water, which helps to soften the pectins in the outer layer of the pea. This is what allows the pea to break down into a mush rather than just remaining hard or turning into a tough paste.
It must be thoroughly rinsed off afterward, or your peas will taste like chemicals.
Why Gentle Simmering Creates the Fluff
Once they are soaking wet and softened by the bicarb, they need low heat. If you boil them vigorously, they will burst open unevenly and stick to the bottom, resulting in a scorched, gluey, heavy mess. We want a gentle, happy burble.
Method: From Dried Pea to Emerald Comfort

Preparation: The Overnight Soak and Rinse
- Rinse and Soak: Rinse the 9 oz (250 g) marrowfat peas, then place them in a large bowl. Cover them completely with cold water they will swell hugely! Stir in the 1 teaspoon of bicarbonate of soda until dissolved. Leave them alone for 12– 24 hours.
- The Double Rinse (Crucial Step): Drain the soaked peas completely in a colander. Rinse them vigorously under cold running water for a good two minutes. This eliminates the soapy flavour from the bicarb soak.
Simmering to Perfection: Timing and Water Level
- Start Cooking: Transfer the rinsed peas to your heavy bottomed pan. Add 2 cups of fresh water or stock. The liquid should cover the peas by about an inch.
- Boil and Reduce: Bring the pan to a full, rolling boil over medium high heat. Immediately drop the heat down to the absolute lowest setting. We want the mixture barely bubbling a gentle simmer.
- The Countdown: Cover the pan loosely and let it simmer for 45 to 60 minutes. Stir gently every 10– 15 minutes to ensure nothing is sticking and scorching on the bottom.
Chef's Note: If the peas look too dry, add a splash of hot water or stock during the last 20 minutes. If they are swimming, uncover and let some liquid evaporate.
The Final Mash: How Hard to Go for Ideal Consistency
- When the peas are tender and fully broken down, remove the pan from the heat. The mixture should look thick, creamy, and collapsed.
- Use a potato masher or the back of a wooden spoon to quickly mash the mixture to your preferred texture. I like mine about 80% smooth, leaving a few recognizable chunky bits.
Tasting and Adjusting the Seasoning
Stir in the butter (if using), salt, pepper, and the tiny teaspoon of mint sauce. Taste it! Does it need more salt? Go for it. Serve piping hot.
Troubleshooting Your Mushy Peas: Tips for Success
Making mushy peas is simple, but simple means there are fewer places to hide mistakes. Here are the common pitfalls I made when I first started.
"My Peas Won't Go Mushy!": Addressing Hard Peas
If your peas remain stubbornly hard after 60 minutes, two things likely happened: A) You didn't use enough bicarb in the soak , or B) Your peas were old and needed a longer soak.
You can save them by adding a small pinch (¼ teaspoon) of bicarb and a splash of water, then continuing to simmer gently for another 15 minutes.
Preventing Excessively Thick or Gluey Texture
This happens when you boil too hard or let the water completely evaporate and the starches condense too much. The fix: Take the pan off the heat immediately and stir in hot water or stock, 2 tablespoons at a time, until the consistency loosens up to that gorgeous, fluffy mush.
Achieving the Ideal Minty Hint (Less is More)
We want freshness, not overpowering mint. If you're using store-bought mint sauce, it’s often very sweet and vinegary. Start with half a teaspoon and taste before adding any more. Fresh, finely chopped mint is always superior if you have it.
Keeping the Green Goodness: Storage and Reheating
These are a fantastic batch cook item. I often make a massive pot just to freeze.
Fridge Life: Storing Leftover Mushy Peas Safely
Once completely cooled, transfer them to an airtight container. They keep beautifully in the fridge for up to 3 days . They will solidify significantly when cold due to the starch.
Best Practices for Freezing Large Batches
Yes, they freeze brilliantly! Portion the cooled peas into freezer safe containers or large freezer bags. Lay the bags flat on a tray until solid, then store them upright to save space. They are good for about 3 months.
Reheating Without Losing Texture
The key is moisture and low heat. Empty the peas into a saucepan and reheat gently over low heat, stirring often. You will definitely need to add a splash or two of water or stock to restore the smooth, fluffy texture they lost when they tightened up in the cold. Do not microwave them unless you like rubbery peas!
Perfect Pairings: What to Serve With Mushy Peas
I mean, the classic is obviously fish and chips. But these peas are sturdy enough to stand up to robust flavours.
- The Traditionalists: Nothing beats them next to a massive piece of golden, crispy cod or haddock.
- Hearty Comfort: They are perfect served alongside savory pies, like steak and kidney, or under some proper bickering sausages (Bangers and Mash).
- Unexpected Uses: Try using them as a vibrant green base on toast, topped with some crispy bacon or a fried egg. They can even make a colourful side for a homemade pizza night if you’re using my recipe for Easy Peasy Recipe for Bread Maker Pizza Dough: My Family's Favorite! . They lend a great earthy note!

Recipe FAQs
Why are my marrowfat peas still hard after cooking for a long time?
This is often due to either insufficient soaking time or hard water. Ensure the peas are soaked for a full 12 to 18 hours. If your water is very hard, adding a tiny pinch of bicarbonate of soda (baking soda) to the soaking water can help soften the pea skins, allowing them to break down properly during cooking.
Can I use regular frozen peas instead of dried marrowfat peas?
While you can certainly make a mashed pea side dish using frozen peas, it will not yield authentic mushy peas. Marrowfat peas have a high starch content essential for achieving that characteristic dense, fluffy texture that holds its shape. Frozen peas will simply become a loose purée.
How do I achieve that vibrant emerald green color typical of chip shop peas?
The intense color is usually achieved by adding a small amount of food grade coloring, which is standard in commercial preparations. Alternatively, ensuring you use the recommended pinch of bicarbonate of soda during the simmer helps maintain the natural green hue rather than letting it fade to olive or brown.
Can I make Mushy Peas ahead of time, and how should I store them?
Yes, Mushy Peas are excellent for making ahead and storing. Keep them in an airtight container in the refrigerator for up to three days. To reheat, simply warm them gently on the stove, adding a spoonful of water if they have become too thick.
Are cooked Mushy Peas suitable for freezing?
Mushy Peas freeze very well for up to three months without significant loss of texture or flavor. Allow them to cool completely before portioning them into freezer safe containers or bags. Thaw them overnight in the refrigerator before reheating.
I don't like mint sauce. What can I use as a savory alternative seasoning?
Mint is highly traditional but optional. For a savory finish, try mixing in a squeeze of fresh lemon juice or a dash of malt vinegar, which pairs wonderfully with the saltiness. A knob of butter or a swirl of high-quality vegetable oil can also add richness and depth.
Are these traditional Mushy Peas naturally vegan or vegetarian?
Yes, when made according to the traditional recipe using only peas, water, salt, and bicarbonate of soda, they are entirely vegan. If you choose to finish the recipe with butter for extra richness, simply substitute it with a plant based margarine or a good quality olive oil to maintain the vegan status.
Proper Chip Shop Mushy Peas
Ingredients:
Instructions:
Nutrition Facts:
| Calories | 166 kcal |
|---|---|
| Protein | 8.0 g |
| Fat | 4.0 g |
| Carbs | 20.0 g |
