Shake It Up Ice Cream in a Bag
Recipe Introduction
Quick Hook
Remember making ice cream in a bag as a kid? I do! It was so much fun! This easy ice cream recipe is a simple way to make a delicious treat.
It's creamy, sweet, and ready in minutes!
Brief Overview
The "ice cream in a bag" method is a classic bit of Americana. It's a brilliant science experiment dessert that is also a tasty treat.
The homemade ice cream recipe is super easy and takes about 20- 25 minutes. This recipe makes one serving so it’s perfect for an individual treat.
Main Benefits
This recipe is not only fun but also educational! Plus, it is no churn ice cream . It's the perfect kids ice cream activity for a hot day.
What makes this recipe special is how quick and easy it is!
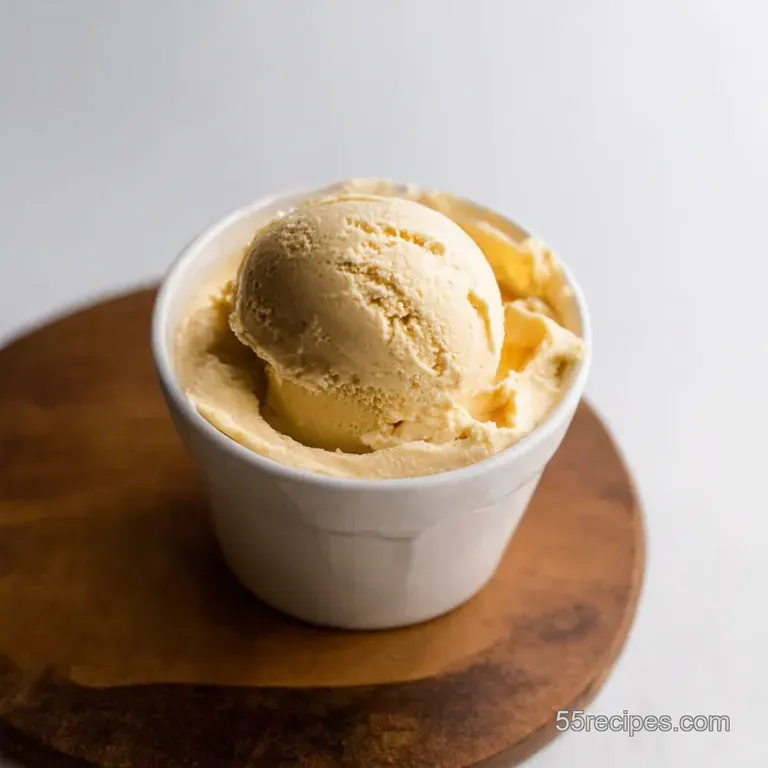
Shake It Up! Ice Cream in a Bag
Ever reminisce about those lazy summer days making ice cream in a bag at your grandma's? This is a speedy, totally rad update! Forget the old homemade ice cream recipe .
This combines creamy sweetness with a dash of salt. And, of course, a whole lotta shaking to create your own quick ice cream dessert .
It’s a science experiment and a dessert!
What you Need for Ice Cream in a Bag Ingredients
To get started, you'll need a few simple things. For the ice cream itself, grab a cup (240 ml) of heavy cream.
You'll also need 2 tablespoons (25 g) of sugar. Don’t forget a 1/2 teaspoon (2.5 ml) of vanilla extract, and a pinch of salt.
Then, for the freezer bag fun, get about 3 cups (approx. 700 g) of ice. Last thing is 1/2 cup (approx.
140 g) of rock salt. Now, let's jump in!
Level Up Your Ice Cream Bag Variations
Okay, so you've mastered the classic. What's next? How about a little chocolate boost? Add 2 tablespoons of cocoa powder for a rich chocolate freezer bag ice cream .
Feeling adventurous? Use full fat coconut milk for a vegan twist on this DIY ice cream bag .
Ingredients & Equipment
Alright, let's dive into what you need for ice cream in a bag . It is proper easy peasy. This homemade ice cream recipe is the ultimate quick treat.
It is also a fun kids ice cream activity . Ready to get started?
Main Ingredients for your DIY ice cream bag
Here's the lowdown on what you'll need. We have both US and metric. Getting the ice cream in a bag ingredients right is important.
- Heavy Cream: 1 cup (240 ml) . Proper lush, this is what makes it creamy. Go for proper thick stuff, not the watery kind.
- Granulated Sugar: 2 tablespoons (25 g) . Adds the sweetness, innit?
- Vanilla Extract: 1/2 teaspoon (2.5 ml) . Adds that classic flavour, simple as.
- Salt: Just a pinch. Balances the sweetness. It's like magic, honest!
Seasoning Notes to use in your Easy ice cream recipe
Fancy jazzing it up? Try a dash of cinnamon. Or maybe a tiny bit of almond extract. You could even chuck in some cocoa powder.
Get creative, mate! If you don't have vanilla, use almond extract. A tiny bit will do. Honestly, a pinch of nutmeg will work too.
What Equipment is Needed for No churn ice cream
This is the easy ice cream recipe . You need a few bits from your kitchen:
- Small Zip-Top Freezer Bag: A sandwich bag is ideal. Make sure it seals properly.
- Large Zip-Top Freezer Bag: A gallon size bag. Big enough for the ice and the small bag.
- Measuring Cups and Spoons: Got to get the measurements right, yeah?
- Gloves or a Towel: This gets seriously cold! Protect your hands.
Fancy a quick ice cream dessert ? It is a science experiment dessert , and it tastes great too! I remember once trying this with my little cousin.
She was amazed. The ice cream bag variations are endless. Experiment and have fun. This is the best freezer bag ice cream ever.
Shake It Up! Ice Cream in a Bag
Remember making homemade ice cream recipe the old-fashioned way? This is way faster and honestly, just as fun! It's a totally rad, no-churn ice cream update! Think creamy sweetness with a little salt and a whole lotta shaking! It's a science experiment and dessert all in one.
Let's get started on this easy ice cream recipe !
Prep Like a Pro
First up, essential mise en place . Get your 1 cup (240 ml) heavy cream, 2 tablespoons (25 g) sugar, 0.
5 teaspoon (2.5 ml) vanilla extract, and a pinch of salt all lined up. Then, grab two zip-top freezer bags: one small (sandwich size) and one large (gallon size).
Don't forget 3 cups (approx. 700 g) of ice and 0.5 cup (approx. 140 g) of rock salt. Time saving tip: measure everything before the kids get involved.
Trust me! And hey, safety first, yeah? Rock salt can sting any cuts, so maybe keep bandages nearby, and warn the littles not to eat the rock salt!
DIY Ice Cream Bag: Shake, Shake, Shake!
This is where the magic happens.
- Mix it up: In the small bag, dump in your heavy cream, sugar, vanilla, and salt. Seal it tight , like your life depends on it!
- Ice bath time: Fill the big bag with ice and rock salt.
- Bag-ception: Pop the little bag inside the big bag. Seal the big bag!
- Shake, rattle, and roll: Now, shake vigorously for 15- 20 minutes . Your arms will feel it, promise!
- Check it out: Peek inside. Is it ice cream yet? If not, keep shaking!
- Mix-ins: Stir in your goodies, chocolate chips, sprinkles...go crazy!
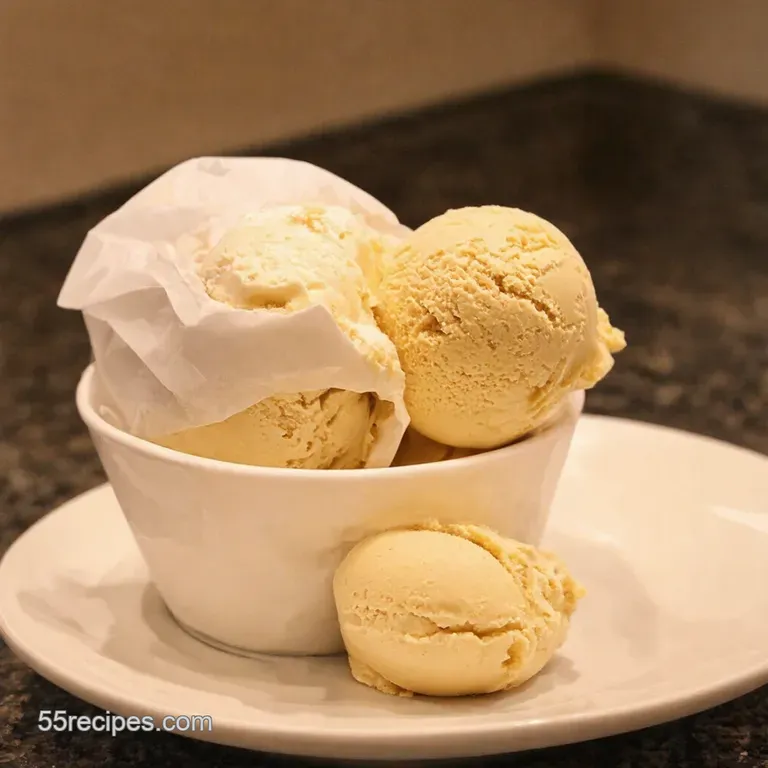
- Serve it up: Eat it straight from the bag. You deserve it!
Quick Ice Cream Dessert: Pro Tips and Tricks
Use rock salt , not table salt. It makes a huge difference! The secret is keeping the ice bath super cold.
Shaking consistently is also the key. The more you shake, the smoother your ice cream in a bag will be.
Protect those hands! This gets really cold, so wear gloves or use a towel. Speaking of hands, ever get that weird freezer burn feeling? Yeah, avoid that!
Oh, and common mistakes to avoid : Not sealing the bags properly. Leaky ice cream is no fun! Want to get ahead? Sadly, there are no make-ahead options here folks.
This is a now kinda treat!
This kids ice cream activity can be an awesome science experiment dessert . There are tons of ice cream bag variations you can try!
Recipe Notes: Shake It Up! Ice Cream in a Bag
Alright, let's talk deets about this awesome ice cream in a bag recipe. It is super fun. It is also super easy! Think of these as your pro tips for a perfect DIY ice cream bag experience.
Serving Suggestions: Get Creative!
Wanna make this easy ice cream recipe extra special? I used to serve it in little waffle cones for my friend's kids ice cream activity .
It was the perfect size for a treat. You could also layer it in a glass with some crushed Oreos.
Honestly, a simple scoop in a bowl is great. Maybe add a cheeky drizzle of chocolate sauce. Or how about pairing it with some warm brownies.
A refreshing glass of lemonade goes so well.
Storage Tips: Quick Eats Only
Ok, so homemade ice cream without all the fancy stabilizers does melt fast. This isn’t one to keep for days.
Enjoy it right away. This quick ice cream dessert is best consumed immediately after making. I do not recommend freezing it.
Variations: Swirl It Up!
Want to switch things up? Totally doable!
- For a chocolate ice cream bag variation , add cocoa powder. I add around 2 tablespoons. Start small, then taste.
- Feeling fruity? Throw in some berries when you are done shaking. You can even use coconut milk for a dairy-free twist.
Nutrition Basics: Just the Facts, Ma'am
Let's be real. This isn't exactly health food. But it is a fun treat. One serving has around 300 calories.
There's also about 25 grams of fat and 15 grams of carbs. Remember, this is just an estimate. This no churn ice cream is something special.
Honestly, the best part about this science experiment dessert is the smiles. So get shaking, and enjoy every delicious spoonful.
With these ice cream in a bag ingredients you will have some freezer bag ice cream that is sure to put a smile on your loved ones faces!

Frequently Asked Questions
Why do I need to use rock salt for ice cream in a bag? Can't I just use regular table salt?
Rock salt, also known as ice cream salt, lowers the freezing point of the ice more effectively than regular table salt. This creates a colder environment, which is essential for the ice cream base to freeze properly and quickly.
Think of it as giving your ice cream the ultimate chilly challenge to become the best it can be!
How long does it really take to make ice cream in a bag? My arm is getting tired!
While the recipe suggests 15-20 minutes of shaking, it can sometimes take a bit longer, especially if your ice is not as cold or your rock salt isn't doing its best. The key is consistent shaking! You'll know it's ready when the mixture in the small bag has solidified into a soft serve consistency.
If it's still too liquid after 20 minutes, shake for another 5-10 minutes and see if that makes a change!
Can I make ice cream in a bag dairy-free or vegan?
Absolutely! For a dairy-free version, substitute the heavy cream with full fat coconut milk. Make sure to refrigerate the coconut milk overnight; this helps the fat solidify and creates a creamier texture. You can also use other plant based milk alternatives, but the results may vary.
Consider adding a touch of coconut extract for extra flavor!
My ice cream in a bag turned out icy. What did I do wrong?
Icy ice cream can be a bit of a bummer, innit? This usually happens when the ice cream freezes too slowly. Make sure you're using enough rock salt, and that your ice is very cold. Also, consistent shaking is key, so don't give up! Ensure the bag is sealed tight, so no moisture gets in and impacts the final product.
What kind of mix-ins work best for ice cream in a bag?
The beauty of "ice cream in a bag" is that you can customize it however you like! Chocolate chips, sprinkles, crushed cookies, chopped fruit (like strawberries or bananas), or even a swirl of peanut butter are all great options.
Just make sure to add them after the ice cream has mostly solidified to prevent them from sinking to the bottom. A little goes a long way, so don't overdo it!
How long can I store ice cream in a bag, and how should I do it?
Since this ice cream isn't made with stabilizers, it's best enjoyed immediately after making it. It will melt relatively quickly, but if you absolutely need to store it, transfer it to an airtight container in the freezer. Be warned, it will likely become quite hard, so let it thaw for a few minutes before serving.
Think of it like a posh ice lolly! It's generally not recommended to store it for more than a day or two, mate.
Shake It Up Ice Cream In A Bag
Ingredients:
Instructions:
Nutrition Facts:
| Calories | 300 |
|---|---|
| Fat | 25g |
| Fiber | 0g |
