Decadent Talenti-Style Chocolate Ice Cream: 7 Ultimate Variations
A Sweet Introduction to Talenti Style Chocolate Ice Cream
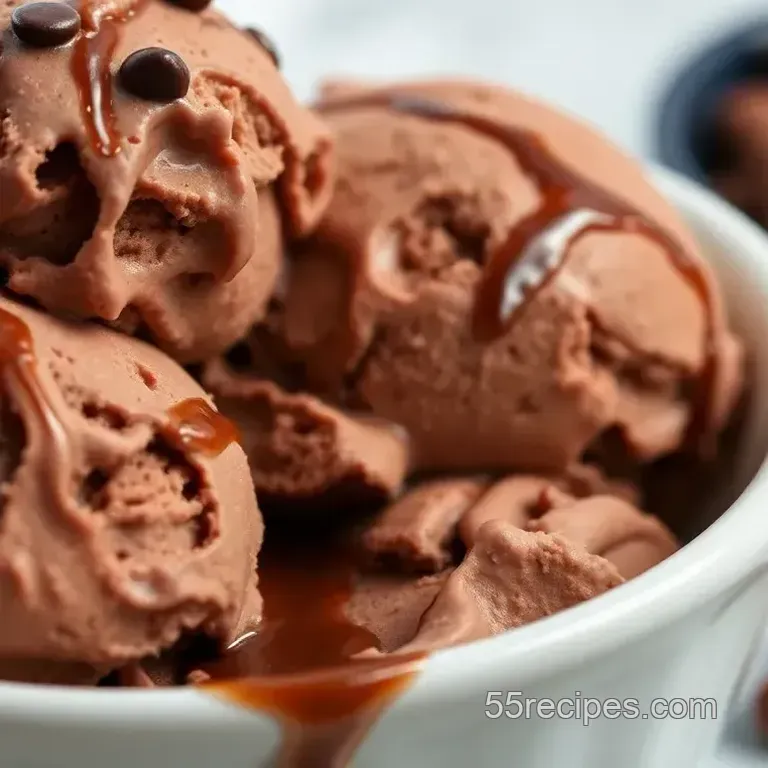
Oh my gosh, remember the first time you tasted that smooth , ultra chocolatey goodness of talenti chocolate ice cream? you know, the one that feels like a hug in a bowl? let me tell ya, i was hooked from the moment the spoon hit the pint! that rich, creamy texture has a way of turning any day around.
Well, get ready because i’m about to show you how to craft 7 ultimate talenti style chocolate ice cream delights . trust me, it’s a game changer, and you don’t need to break the bank to enjoy that gourmet experience right at home.
Recipe Overview: A Little Chocolate History
Did you know the love affair with chocolate ice cream dates back to the 1700s? that’s right! back in the day, it was an exclusive treat, enjoyed mostly by aristocrats.
Fast forward a few centuries, and chocolate ice cream is practically america's favorite frozen dessert. from birthday parties to sizzling summer nights, it’s always a hit.
This homemade chocolate ice cream is not just about indulgence; it’s also about creativity and personalization! with a little chill time, an ice cream maker, and about 5 hours, you can have a quart of pure delight, all for about the cost of that pint from the store.
Plus, you can tweak the flavors to suit your tastes!
Key Benefits of Crafting Your Own Chocolate Ice Cream
First off, let’s talk health for a sec. though it’s a treat, making your own homemade chocolate ice cream means you control the chocolate ice cream ingredients .
You can skip questionable additives and instead choose high-quality cocoa powder and fresh cream to whip up something not only delicious but also more wholesome.
You'll feel good about indulging in this decadent dessert recipe , especially with the nutritional highlights that come from real ingredients.
Now, let's not forget about the special occasions . imagine serving this creamy chocolate dessert at a birthday party, impressing friends with unique ice cream recipes that feature flavor variations! you can make funky mix-ins like peppermint or chocolate brownie pieces perfect for a warm summer evening.
Honestly, it’ll elevate any gathering.
What’s more, family friendly ice cream making means you can get the kids involved! they’ll love helping you with the step-by-step ice cream recipe .
It’s a fun opportunity for creativity and laughter in the kitchen.
So now that you know why making this ice cream is fabulous, let’s dive into what you’ll need. get ready to explore the chocolate ice cream with mix-ins because we’re about to whip up something truly special.
Ingredients The Building Blocks of Your Chocolate Dream
To get started on your Talenti style chocolate ice cream adventure, gather these goodies:
- 2 cups heavy cream
- 1 cup whole milk
- 3/4 cup granulated sugar
- 1 cup unsweetened cocoa powder (high-quality for the win!)
- 4 large egg yolks
- 1 teaspoon vanilla extract
- 1/4 teaspoon salt
And don’t forget your special flavors! Choose one or two from these fun variations:
- Mint Chocolate Chip
- Peanut Butter Swirl
- Chocolate Hazelnut
- Mocha
- Chocolate Brownie
- Chocolate Orange
- Spicy Chocolate
A Little Teaser Before We Churn
Now, if you’ve ever wondered how those artisanal ice cream makers create such smooth textures, the secret lies in technique.
With this easy chocolate ice cream recipe, you'll learn to create a traditional custard ice cream base . get your ice cream maker ready it’s about to become your best friend in the kitchen!
So, are you ready to dive in? Let’s get those ingredients together, and I'll guide you through creating your very own gourmet frozen treats !
Essential Ingredients Guide for Indulgent Chocolate Ice Cream
When you’re diving into homemade chocolate ice cream , it pays to know your ingredients. After all, the right elements can make or break your delicious creations. Let’s explore those essentials!
Premium Core Components
First things first: quality matters . you want to grab the best ingredients, especially if you’re crafting a rich chocolate ice cream that could rival your favorite artisanal brands.
Here are the core components:
- Heavy cream - 2 cups (480 mL): Look for a brand that doesn’t have artificial additives this is your base for that luscious texture!
- Whole milk - 1 cup (240 mL): Gives a creamy feel; steer clear of skim no one wants watery ice cream!
- Granulated sugar - 3/4 cup (150 g): Regular white sugar is fine, but don’t hesitate to experiment with alternatives if you’re feeling fancy.
- Unsweetened cocoa powder - 1 cup (120 g): A high-quality brand like Ghirardelli can take your ice cream to the next level.
- Egg yolks - 4 large: They’re the magic for that silky custard.
- Vanilla extract - 1 teaspoon: Always go for pure vanilla when possible.
- Salt - 1/4 teaspoon: Enhances flavors like you wouldn’t believe.
Signature Seasoning Blend
Now, let’s talk about spice well, less spice and more sweet flavor enhancers. They truly elevate chocolate ice cream ingredients !
You might want to mix things up a bit; think about pairing in some creative boosters. Here are a few ideas:
- Mint chocolate chip : Toss in 1 teaspoon of peppermint extract.
- Peanut butter swirl : Who can resist? Mix in half a cup of creamy peanut butter.
But don’t stop there! Spice it up with cinnamon or even a pinch of cayenne for a kick. Those creative ice cream flavors are all within your reach!
Smart Substitutions
Sometimes you’re halfway through a recipe, and you realize you’re out of something. Panic two words! Here are common alternatives for when you need them:
- Milk alternatives : Almond or coconut milk works well for non-dairy versions.
- Cocoa powder : In a pinch, melted dark chocolate can save the day.
- Sugar swap : Coconut sugar offers a more natural sweetener for a trendy twist.
Don’t let missing ingredients hold you back!
Kitchen Equipment Essentials
Alright, gear up! You’ll be needing some tools in your kitchen arsenal. Here’s a quick list of must haves for your ice cream making adventure:
- Ice cream maker : Seriously, this is a game changer. If you don't have one, don’t sweat it; you can use a blender for a quick fix.
- Medium saucepan and whisk : Basics that will help you create that silky custard base.
- Storage container : Go with something airtight to keep your cool treats fresh.
Finishing Touches
Lastly, don’t forget the fun! Think about serving suggestions and garnishes. Want to impress your friends? Serve with a drizzle of chocolate sauce or pair it with fresh summer berries.
Now that you’ve got the lowdown on each ingredient, you’re ready to make those decadent desserts ! buckle up for an exciting journey on how to craft 7 ultimate talenti style chocolate ice cream delights .
So, let’s get that ice cream machine buzzing and start cooking because a rich chocolate ice cream is just moments away!
Mastering the Art of Talenti Style Chocolate Ice Cream
Let's dive into the scrumptious world of homemade chocolate ice cream. it’s time to talk about how to craft 7 ultimate talenti style chocolate ice cream delights that will blow your mind!
whether you’re planning a summer gathering or just looking to satisfy your sweet tooth, this recipe is your ticket to gourmet frozen treats right from your own kitchen.
Essential Preparation Steps
Before you grab that ice cream maker, let’s tackle some essential prep. the french term mise en place might sound fancy, but it just means “everything in its place.
” get your ingredients ready and measured to make the cooking process smooth. you’d be shocked at how many mess ups happen just because you can’t find that damn sugar!
Next up, time management is key! this recipe can take a good chunk of your day, so plan those steps out.
You’ll want to allow around five hours total, but believe me, it’s worth every minute.
Stay organized too! keep your workspace clean. there's nothing worse than reaching for your cocoa powder and finding a pile of flour instead.
And don’t forget about safety: handle hot pans carefully to avoid getting burned. trust me, you don’t want to ruin this creamy chocolate dessert with a kitchen mishap!
step-by-step Process
Alright, let’s get into the nitty gritty.
Make your chocolate base: combine 2 cups of heavy cream , 1 cup of whole milk , 3/4 cup of sugar , and 1 cup of cocoa powder in a saucepan.
Heat this bad boy on medium until it’s warm and smooth totally about 20 minutes .
Temper the egg yolks: in a separate bowl, whisk 4 egg yolks . then, gently pour in about 1 cup of the warm chocolate mixture.
It’s all about that slow pour while whisking this will keep your yolks from scrambling!
Cook the custard: add the yolk mix back to the saucepan. cook it over medium low heat until the mixture thickens enough to coat the back of a spoon this usually takes about 5- 7 minutes .
Chill it out: pour the custard through a fine mesh strainer into a bowl. stir in 1 teaspoon of vanilla and let it cool completely in the fridge for a minimum of 30 minutes .
Churn Away: Once chilled, toss the mixture into your ice cream maker and churn it for 20- 30 minutes . Trust me, the cooler, the better!
Add Those Creative Variations: In the last 5 minutes of churning, mix in any extras you’ve chosen, like chocolate chips or orange zest .
Final Freeze: Spoon that luscious ice cream into a container and freeze for at least 4 hours until it's firm. Yep, patience is a virtue here!
Expert Techniques
Wanna get that artisanal chocolate ice cream texture? use high-quality cocoa powder seriously, go for the good stuff! and when you're adding mix-ins, try not to overdo it.
A little goes a long way, and you want that smooth ice cream texture to shine through.
As for troubleshooting? if your ice cream is too icy, it might not have been mixed well. a good churn helps incorporate air, keeping it creamy.
Oh, and if it’s a bit soft upon freezing, it may just need more time.
Success Strategies
Now for the common pitfalls! don't be tempted to rush the chilling process. if it’s not cold enough before churning, you’ll end up with an unremarkable product.
Also, avoid adding too much sugar. you want a rich, balanced flavor, not a sugar bomb.
When it comes to quality assurance, taste your mixture before churning. it’s easier to adjust sweetness now than to fix it later.
And hey, if you’re short on time, try making small batches; even ice cream lovers have to share the love!
Lastly, you can totally make this ahead! Just pull it out when you're ready to impress guests or treat yourself after a long day.
In the end, whipping up those indulgent chocolate desserts can be the highlight of your week. So go ahead, channel your inner MasterChef and get churning on this easy chocolate ice cream recipe!
Additional Information...
Get ready to explore the delightful variations awaiting in this creamy chocolate dream. want to learn about more unique ice cream recipes? or how to master those rich chocolate flavors? join me as we delve deeper into the art of homemade frozen desserts! trust me, the journey will be just as sweet as the destination.
Unlocking the Secrets of Talenti Style Chocolate Ice Cream Delights
Oh my gosh, let’s chat about ice cream! how to craft 7 ultimate talenti style chocolate ice cream delights is not just a mouthful; it’s like a delicious rollercoaster for your taste buds.
Making your own homemade chocolate ice cream can feel like magic - and trust me, once you start exploring these ice cream variations, you'll wonder why you’ve ever settled for store-bought.
Pro Tips & Secrets
Chef wisdom? oh, i've got a few! first off, use high-quality cocoa powder. this is your chocolate hero, and it makes all the difference.
Honestly, you don’t want your ice cream tasting like cardboard, right?
Time is of the essence. chill your mixture well before churning to help it become that smooth ice cream texture we all crave.
This little step can save you from ice crystal city. and if you're tempted to mix things up with creative ice cream flavors , go for it! try adding zesty orange peel for a fresh twist or a pinch of sea salt for a savory contrast.
When it comes to presentation, make it pop! Use colorful garnishes like fresh berries or a decadent chocolate drizzle. Remember, we eat with our eyes first!
Perfect Presentation
You know how they say we eat with our eyes? plating is key. for a stylish finish, use a swoosh of chocolate sauce on the plate and then place a scoop of your smooth homemade ice cream right on top.
Keep it simple yet chic. for a colorful plate, consider pairing it with bright fruits like strawberries or peaches these contrast beautifully with rich chocolate.
If you’re feeling fancy, play with garnishes! whipped cream, crushed nuts, or even a sprig of mint can elevate your dessert to gourmet status.
Trust me, it’s not just about taste; it’s about that visual appeal that screams, "look at me!"
Storage & make-ahead
Now, let’s get real about storage. if you’re like me, sometimes you whip up a batch and it disappears within hours.
But if there are leftovers (which is rare!), store that indulgent chocolate dessert in an airtight container. it’ll keep in the freezer for up to a month.
Freshness duration is key here; ice cream can lose its magic all icy and weird if left too long. if you plan to make it ahead, freeze it properly by letting it sit for about 4 hours or until completely firm.
Just remember, it’s not totally hard like a rock, so give it a few minutes to soften before serving.
Creative Variations
Get ready to unleash your inner ice cream artist! the beauty of this easy chocolate ice cream recipe is the variations.
Wanna go wild? make a mint chocolate chip by adding peppermint extract. it’s like taking a refreshing dip into a minty oasis!
If you’re feeling nutty, try the peanut butter swirl. just mix in some peanut butter during the churning. decadent, creamy, and oh-so-satisfying! and if you have a sweet tooth, the chocolate brownie version with chewy brownie chunks is pure bliss.
Seriously, indulge yourself.
Complete Nutrition Guide
Okay, let’s talk numbers! i know nutrition can seem dry, but it’s important. a serving (about 1/2 cup) of our talenti chocolate ice cream recipe is around 350 calories.
With 5g protein and a whopping 22g of fat , it’s definitely a dessert. but hey, it’s homemade, so at least you know what’s in it.
And let's not forget portion guidance. this stuff is rich! pairing it with something lighter, like a side of fresh fruit, can help balance it out.
After all, moderation is key even for decadent desserts.
In Conclusion
So there you have it! making your own gourmet ice cream at home is easier than you think, and oh-so-rewarding.
Whether you stick to the classic chocolate or go bold with a spicy chocolate twist, feel free to experiment. the best part? you get to impress friends and family while enjoying unique ice cream recipes without breaking the bank.
So, grab that ice cream maker and let freedom ring with your own creative ice cream flavors ! look into into the delicious world of chocolate ice cream, and remember, the only limits are your imagination.
Happy scooping!
Frequently Asked Questions
How to Craft 7 Ultimate Talenti Style Chocolate Ice Cream Delights?
You can craft these delightful ice cream variations by starting with the basic chocolate ice cream base and then adding different mix-ins during the last few minutes of churning. Choose from flavors like Mint Chocolate Chip or Peanut Butter Swirl, following the suggested amounts listed in the recipe for the best results.
What are some tips for achieving the creamiest chocolate ice cream?
To achieve a creamy texture, ensure your mixture is well chilled before churning, and don't overmix once you add your variations. Using high-quality heavy cream and cocoa powder helps enhance the richness and smoothness of the ice cream.
Can I make this recipe dairy-free?
Absolutely! You can substitute whole milk with almond or coconut milk and use a dairy-free cream alternative in place of heavy cream. Keep in mind that this may alter the texture, so look for non-dairy creams with a rich consistency for the best results.
How should I store leftover Talenti style chocolate ice cream?
Store your homemade chocolate ice cream in an airtight container to prevent ice crystals from forming. It will keep well in the freezer for about 2-3 weeks, but for optimal texture, consume within the first week after making it.
What are some delicious variations I can try with this ice cream base?
You can experiment with a variety of add-ins such as chocolate chip cookie dough, a swirl of caramel, or even unique flavors like spicy chocolate or chocolate orange. Just be sure to add the mix-ins during the last few minutes of churning to integrate them without overmixing.
What is the nutritional information for this chocolate ice cream recipe?
Each serving of this homemade chocolate ice cream is estimated to contain around 350 calories, with 5g of protein and 22g of fat. These values can vary based on the specific ingredients used and any variations added, so consider this as a guideline.
Talenti Chocolate Ice Cream Recipe Number 1 How
Ingredients:
Instructions:
Nutrition Facts:
| Calories | 350 |
|---|---|
| Protein | 5 g |
| Fat | 22 g |
| Carbs | 30 g |
| Fiber | 2 g |
| Sugar | 24 g |
| Sodium | 80 mg |
