Quick and Healthy Whole Wheat Oat Bars
- A Healthy Treat That Fits Your Life
- From Old School to New School: Oat Bars Evolution
- Why You’ll Love These Bars
- Next Stop: Gather Your Ingredients!
- Essential Ingredients Guide
- Professional Cooking Method: The Art of Baking Healthy Whole Wheat Oat Bars
- Pro Tips & Secrets for Your Oat Bar Masterpiece
- 📝 Recipe Card
A Healthy Treat That Fits Your Life
Oh my gosh, let me tell you about the first time i stumbled upon the idea of making bake healthy whole wheat oat bars quickly .
I was knee deep in chaos kids were running around, the dog was barking, and my hunger was hitting an all-time high.
I needed something quick, easy, and healthy that everyone would love. and that’s when i discovered oat bars!
Have you ever found yourself in that frenzy of snack cravings? you just want to grab something, but all you have are those overpriced, sugar laden bars from the store? trust me, i’ve been there.
But when i finally took the plunge to make my own healthy snack bars , i was a little amazed! these little beauties are not just tasty; they also pack in the goodness of whole grains and the natural sweetness your taste buds crave.
Let's dig into the recipe that changed my snacking game.
From Old School to New School: Oat Bars Evolution
So, here’s a fun fact: oat bars have roots in old-school snacks, dating back to when wholesome, hearty grains became a staple in diets.
Fast forward to today, and they’ve become the ultimate meal prep snacks in fitness circles and among busy families alike! who doesn’t need a quick and nutritious pick-me-up?
In under an hour, you can whip those bad boys up in the kitchen. not to mention, they’re beginner friendly, requiring no advanced techniques just some mixing and baking.
Perfect for every home cook, even if your only experience with baking is making cookies from a tube (and honestly, who hasn’t done that?).
Oh, and the cost? super low! you can stock up on oats, whole wheat flour, and a little honey, and you’re set.
Plus, this recipe yields about 12 bars , meaning you can feed the whole crew or stash a few for yourself.
Your future self will thank you!
Why You’ll Love These Bars
Alright, let’s get real about the benefits. first up, the health benefits are huge. oats are rich in fiber, making these bars not just your average nutritious energy bars , but also great for keeping your digestion in check.
If you or your kiddos have been craving something more low-sugar , these bars can easily fit the bill by using natural sweeteners instead of refined sugars.
But wait, there’s more! if you have special occasions coming up or just want to impress your pals with a wholesome treat, these bars are perfect.
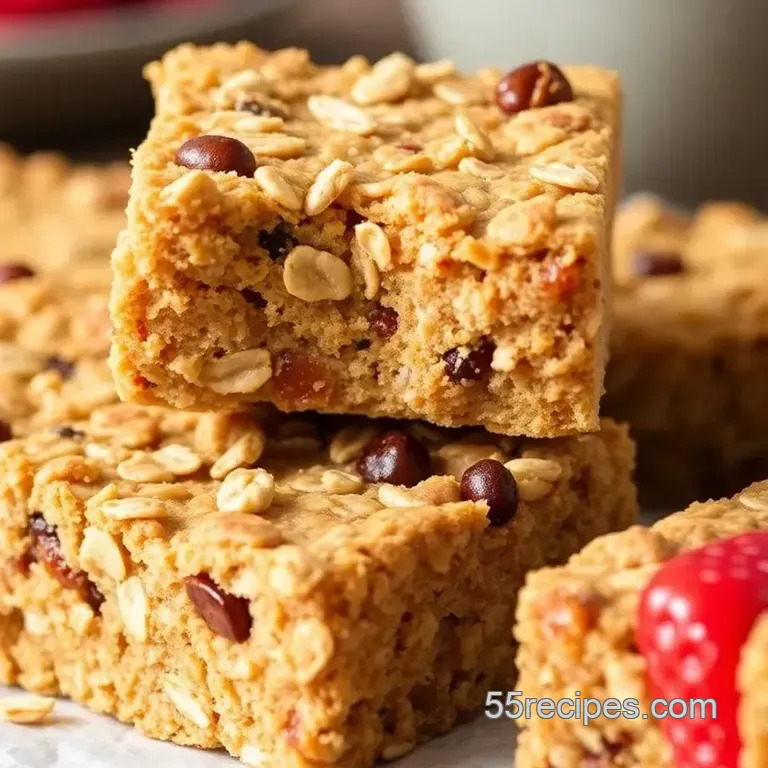
Want to customize? you can toss in your favorite nuts or mix-ins think chocolate chips or dried fruits. who said being healthy had to be boring?
And let’s not forget they're a far better choice than store-bought alternatives, which often pack preservatives and weird ingredients nobody can pronounce. You’re opting for real food, made with love!
Beyond being a good breakfast choice for busy mornings when you're sprinting out the door (another win for our breakfast on-the-go game), they’re also a fantastic alternative to heavier desserts.
Try serving them when you’re craving something sweet after dinner a sweet ending that feels good in your body!
Speaking of which, let’s talk about the ingredients that’ll make these bars so fantastic...
Next Stop: Gather Your Ingredients!
Ready to dive into the delicious world of homemade oat bars ? grab your apron, clean those countertops, and prepare for wholesome goodness! with just a few kitchen essentials for baking, you’ll be well on your way to creating delicious and healthy treats that everyone can enjoy.
Whether you stick to the classic recipe or tweak things with different mix-ins, I promise you’ll create something that keeps those cravings at bay! So, let’s corral those ingredients and get to baking your taste buds are waiting!
Essential Ingredients Guide
Every great recipe starts with the right ingredients. ingredients are the backbone of cooking , especially when you want to whip up something healthy and delicious, like my quick and healthy whole wheat oat bars.
These bars are a perfect snack or breakfast option that the whole family will love. let’s dive into how to pick the best items for your baking adventures!
Premium Core Components
When baking, having quality ingredients is crucial. For my oat bars, we’re using:
- 1 cup (100g) whole wheat flour : Look for a fine texture to ensure your bars are fluffy and not too dense.
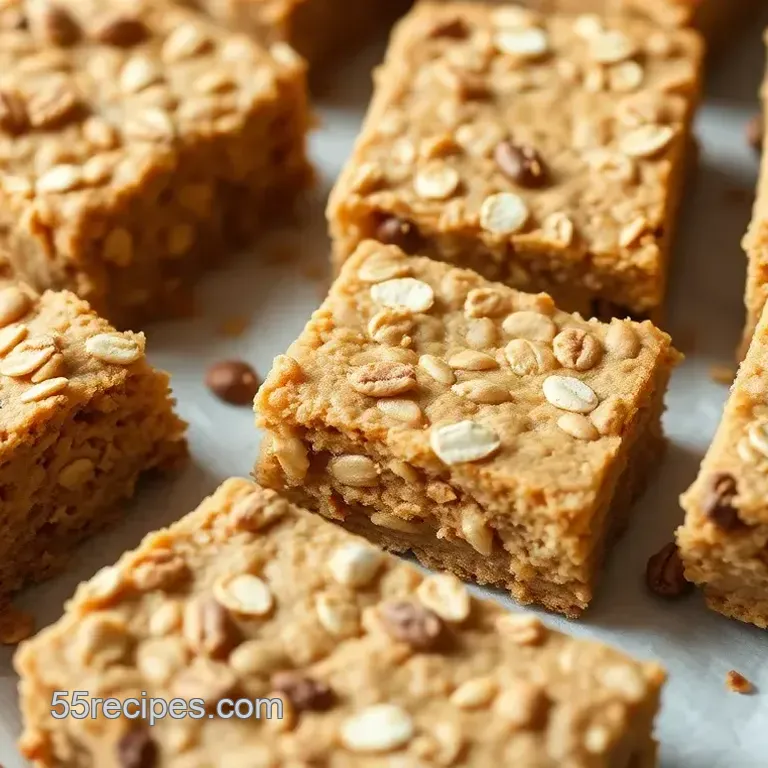
- 1 cup (90g) rolled oats : The heart of the recipe! Opt for old-fashioned oats for that chewy texture.
Storage tip : keep your flour and oats in an airtight container in a cool, dry place. they’ll have a shelf life of about 6-12 months.
To check freshness, give them a sniff. if they smell stale, toss 'em!
Signature Seasoning Blend
While our oat bars are simple, adding the right flavors can elevate them to super tasty levels. Think of:
- 1/2 cup (120ml) honey : It adds natural sweetness. Just make sure it’s pure honey; look for one that isn't overly processed.
- 1 tsp pure vanilla extract : Splurge a little here for that divine aroma.
A quick tip? Taste as you go! It’s like being your own taste tester, and who doesn’t love that?
Smart Substitutions
Sometimes life gets in the way. If you're out of honey, try using maple syrup instead. Here are other easy swappers:
- Unsweetened applesauce : This can also work as a sweetener and keeps your bars moist.
- Coconut oil? No problem! Sub with unsalted butter, and vice versa.
And if you're going vegan, you can skip the honey altogether. Many readers find creative solutions that still taste delish don’t be shy to experiment!
Kitchen Equipment Essentials
Baking isn’t all about the ingredients; it's also about having the right tools! For these easy oat bars , you’ll need:
- A mixing bowl and some measuring cups and spoons.
- A 9x9-inch baking pan (or any baking dish you have). If you don’t have parchment paper, grease the pan generously.
- A good rubber spatula or wooden spoon will make mixing a breeze.
Don’t worry if you don’t have all the fancy tools. A fork can do the job for mixing. It’s all about getting creative in the kitchen!
Wrapping It Up
Now that we’ve got our essential ingredients and tools sorted, are you ready to put them to work and bake healthy whole wheat oat bars quickly ? these little energy boosting bites not only hit the spot for those healthy cravings , but they’re also great as meal prep snacks or even for breakfast on-the-go.
Impress your friends and family with these homemade oat bars, and remember they’re totally customizable add chocolate chips or nuts for that extra zing! Next up, let’s jump into the step-by-step instructions to whip these up in no time!
Professional Cooking Method: The Art of Baking Healthy Whole Wheat Oat Bars
Cooking can sometimes feel overwhelming, but it doesn’t have to be! today, let’s dive into the professional cooking method while whipping up some delightful healthy whole wheat oat bars .
These bars are not just for breakfast but are perfect for any snacking occasion. ready to bake healthy whole wheat oat bars quickly? let’s do this!
Essential Preparation Steps
First things first: mise en place , y’all! this french term basically means “everything in its place.” gather all your ingredients before diving in.
We're talking 1 cup of whole wheat flour , 1 cup of rolled oats , 1/2 cup of honey , and more.
If you’ve got everything ready, you're halfway there!
Time management is also key. aim to spend about 10 minutes on prep work . while the bars are baking, usually 20- 25 minutes at 350° f ( 175° c) , you can clean up your kitchen or grab a mug of coffee.
Multi tasking like a pro!
Organization is your best friend in the kitchen. keep your workspace tidy and your tools in arm’s reach. no one wants to run around hunting for a spatula when they could be enjoying delicious homemade oat bars.
Lastly, safety first! remember to use oven mitts and be cautious with hot pans. you don’t want a kitchen mishap turning your baking adventure into a horror story.
Keep it chill and enjoy the process!
Step-by-step Process
Let’s break this down into easy peasy steps:
- Preheat the Oven : Start by preheating your oven to 350° F ( 175° C) .
- Prepare the Pan : Grease a 9x9-inch baking pan or line it with parchment paper. This helps with easy removal later.
- Mix Dry Ingredients : In one bowl, whisk together your dry stuff whole wheat flour, rolled oats, baking powder, and salt.
- Combine Wet Ingredients : In another bowl, go ahead and whisk your honey, applesauce, melted coconut oil, and vanilla. It's the good stuff!
- Mix It Together : Pour the wet mix into the dry mix and stir until it’s just combined. Don’t overthink it!
- Add Fun Mix-Ins : If you’re feeling adventurous, fold in some nuts or chocolate chips.
- Transfer to Pan : Spread the mixture evenly in your baking pan.
- Bake : Pop that pan into the oven and let it bake for about 20- 25 minutes , till the edges turn golden.
- Cool and Cut : After baking, cool it in the pan for about 10 minutes before transferring to a wire rack.
Note : The toothpick test is your best friend here stick one in the middle and it should come out clean for perfectly baked bars.
Expert Techniques
Now that you have the basics down, let’s level up. the quality of your bars can hinge on a few critical steps.
Always check your ingredient quality opt for natural sweeteners whenever possible. they not only enhance flavor but keep those nutritious energy bars lower in sugar.
When mixing, be careful not to over mix this can lead to tough bars. you want them to be chewy, not like cardboard! a quality checkpoint is the bake time keep an eye on them; burnt edges are a bummer.
If at any point things go sideways (hey, it happens), don’t panic! if the mix seems dry, add a splash of milk.
Too wet? a sprinkle of oats might fix it right up.
Success Strategies
So let’s talk success, shall we? One common mistake is not letting the bars cool completely. This makes them crumbly when cutting. Patience pays off trust me!
For quality assurance, always taste your mix before baking. if it’s too sweet, a dash of salt can balance things out.
Want to prep ahead? make them on sunday, and you’ll have handy meal prep snacks all week long.
Lastly, don't be afraid to experiment. You can swap ingredients based on what you have on hand, making these oatmeal snack bars super customizable.
By now, you should feel empowered to bake healthy whole wheat oat bars quickly perfect for your busy lifestyle. time to dive into the delicious world of baking and whip up some delicious and healthy treats .
Additional Information
These whole grain breakfast bars are not just tasty; they're packed with the goodness of oats, which are super versatile.
With rich fiber and energy boosting benefits, your body will thank you. whether it’s for a quick breakfast on-the-go or a guilt free afternoon snack, these bars deliver all the flavor without the fuss.
So grab those ingredients, preheat that oven, and let’s create some wholesome snack ideas that will keep your cravings at bay. Happy baking, my friend!
Pro Tips & Secrets for Your Oat Bar Masterpiece
Oh my gosh, let’s talk about quick and healthy whole wheat oat bars ! they’re not just super delicious but also incredibly easy to whip up.
Here are a few chef secrets that i've picked up along the way.
Start by prepping your ingredients ahead of time . this saves you a ton of hassle. if you can have your oats, honey, and whole wheat flour measured and ready to go, you're already winning! you know what? mixing in some chopped nuts or dried fruits can really elevate the flavor.
Seriously, don’t skimp on this!
If you’re looking to save a little time during the baking process, use a microwave to melt your coconut oil or butter while you measure your dry ingredients.
Multitasking is key. and hey, a sprinkle of cinnamon goes a long way in enhancing that flavor.
Perfect Presentation: Make ‘Em Pretty!
Now, let’s dive into the aesthetic part. because, let’s be real, we eat with our eyes first, right? when you cut your oatmeal snack bars , try to make them uniform.
A sharp knife works wonders for clean edges. once they're sliced, arrange them on a nice plate.
For a gorgeous finishing touch, consider a simple garnish like a few slices of fresh fruit or a sprinkle of powdered sugar .
Pair that with a colorful napkin, and you've got yourself a photo ready snack!
Color combinations are important too! Think golden brown bars against a vibrant garnish. This will make your creations pop and gain you some restaurant style presentation vibes right at home.
Storage & make-ahead Tips
Let's chat about storing these beauties. Once your bars are cooled, wrap them individually in parchment or cling film. Trust me, they’ll last longer this way, but best believe I can’t resist them for more than a few days!
You can store them in an airtight container for up to a week at room temperature. want to make a huge batch in advance? you can even freeze them! just toss them in a zip-top bag and, when you’re craving a snack, pull one out and let it thaw.
Super easy!
When it comes to reheating, a quick 30-second zap in the microwave makes them just as soft and tasty as the day you made them.
Creative Variations to Explore
Oh, the possibilities with these homemade oat bars are endless! if you’re feeling adventurous, why not take a chance with seasonal twists ? pumpkin pie spice for fall or dried cranberries for a holiday treat can make all the difference!
Swap the honey with mashed bananas for banana oat layer bars, and you’ve got a whole new flavor profile.
And if you’re sticking to a dietary plan, go ahead and modify! use almond butter instead of coconut oil for nut butter oat bars, or opt for a gluten-free flour blend for easy transitioning into gluten-free snacks.
Honestly, the world is your oyster here!
Complete Nutrition Guide for Snack Lovers
So, you might be wondering, what's in these easy oat bars? well, a bar is around 150 calories with 3 grams of protein and a good dose of fiber thanks, oats! and they’re also perfect for keeping those healthy cravings in check without the guilt.
When prepping for kids, these bars can easily be turned into nutritional bars for kids . just be sure to choose healthy mix-ins like nuts and seeds to keep it wholesome while cutting down on sugar.
Expert FAQ Solutions
Have questions? totally get it. one common query is, “what if my bars fall apart?” no worries! next time, just be sure to press the mixture firmly into your pan.
A little extra compression works wonders here. and for those who love a lower calorie option, the honey can be replaced with a natural sweetener.
Encouraging Conclusion
Honestly, baking healthy whole wheat oat bars quickly is a game changer. they’re not just a snack; they’re a lifestyle! with all these pro tips and creative roadmaps you have now, dive into your kitchen and make these delicious and healthy treats today!
Whether it's for a meal prep snack or breakfast on-the-go, you won’t regret it.
Happy baking, my friends!
Bake Healthy Whole Wheat Oat Bars Quickly

