Cooked Chicken Legs: the Proper Recipe for Shatteringly Crispy Skin
- The Proper Crispy-Skinned Roast Drumstick: The Ultimate Overview
- Essential Components for Perfect Drumsticks: Ingredient Selection Notes
- The Science of Crispness: Why Dry-Brining Elevates Cooked Chicken Legs
- Step-by-Step Guide to Perfectly Cooked Chicken Legs
- Troubleshooting and Professional Tips for Flawless Drumsticks
- Serving Suggestions: Sides and Simple Sauces That Complement the Crisp Skin
- Preparing and Storing Leftover Cooked Chicken Legs
- Recipe FAQs
- 📝 Recipe Card
The Proper Crispy Skinned Roast Drumstick: The Ultimate Overview
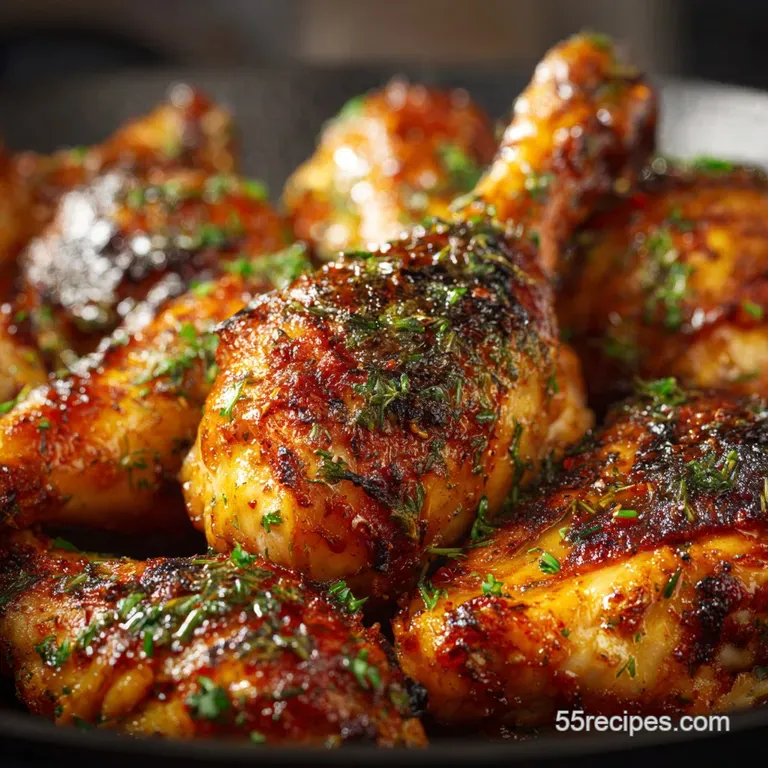
Oh my gosh, friend, you know how sometimes you just crave that deep, comforting, nostalgic dinner? For me, it’s always perfect cooked chicken legs straight out of the oven. This isn't your grandma’s soggy, pan-steamed poultry.
We are talking about skin that shatters with a satisfying crunch, meat that is impossibly dark and juicy, and an aroma that fills the entire house with savory goodness. It’s heaven on a plate, truly.
This recipe for cooked chicken legs in the oven is a total lifesaver because drumsticks are dirt cheap, infinitely forgiving, and require almost zero active fuss once the rub is applied.
It’s the perfect candidate for meal prep on a Sunday, meaning you have instant dinner available all week long. Seriously, these taste just as good cold as they do piping hot.
Today, we are ditching the guessing games and the flabby skin tragedy by employing one simple, non-negotiable technique: the dry-brine. Trust me, dedicating ten minutes tonight means achieving perfection tomorrow. Let’s get these drumsticks crispy.
Why Flabby Skin Is a Thing of the Past: Setting the Goal
The goal isn't just "done" meat, anyone can do that. We are aiming for a textural experience that rivals rotisserie crackling. The biggest enemy of crispy chicken skin is moisture, period.
What Makes This Recipe the 'Sunday Best' Leg
We use a two-pronged attack to conquer moisture and ensure supreme flavor. First, coarse salt draws moisture out of the skin and also acts as a subtle cure, leading to deeply seasoned meat right down to the bone.
Second, we use a rapid temperature change in the oven, starting high (425°F/220°C) to immediately render the fat and set the crisp shell, before dropping the temperature for a gentle finish. This answers the question: Is it better to bake drumsticks at 350 or 400? Neither!
We use both, kicking off at 425°F for 15 minutes. This dual temperature method is truly the best cooking method for chicken legs .
Anticipated Yield and Active Preparation Time Breakdown
This recipe is structured for minimal fuss, but it requires patience the oven does most of the hard work. We yield enough for four hungry people, maybe more if you load up on sides.
Chef's Note: The 10 minute prep time is accurate, but the 12 hour resting time is where the magic happens; do not skip this chilling phase if you want maximum crispness.
Essential Components for Perfect Drumsticks: Ingredient Selection Notes
We keep the seasoning simple here because the quality of the technique outweighs fussy ingredients. We want a deep, savory rub that complements the dark, rich flavor of the cooked chicken legs .
Selecting the Best Drumsticks: Size and Preparation
Always look for drumsticks that have intact skin and aren't overly trimmed near the bone joint. Before seasoning, the absolute most important step is aggressively patting them dry with paper towels. I mean aggressively —if the skin feels damp, you’ve already failed the crisp test.
The Ideal Rub: Achieving Deep Flavor Profiles Beyond Salt and Pepper
My go-to rub relies heavily on smoked paprika for color and a rich, slightly smoky background, which makes the drumsticks look fantastic even before they’re fully cooked. Pairing this with garlic and onion powder ensures the flavor adheres completely and evenly; granules are too chunky and often burn.
Substituting Oils for over High heat Roasting and Basting
I usually reach for simple olive oil, but really, any neutral oil with a high smoke point works perfectly well here. You want something that transfers heat efficiently to the dry skin without imparting a strong flavor of its own.
| Ingredient | My Recommendation | Quick Substitution |
|---|---|---|
| Kosher Salt | Coarse Kosher | Half the volume of standard Table Salt |
| Smoked Paprika | Spanish Sweet Smoked | Standard Paprika + a pinch of Cayenne |
| Olive Oil | Light Olive Oil | Canola, Grapeseed, or Avocado Oil |
| Dried Oregano | Dried Oregano | Dried Thyme or Marjoram |
The Science of Crispness: Why Dry-Brining Elevates Cooked Chicken Legs
Okay, quick science lesson don't worry, it's painless. Dry-brining is the only way to get true crackling skin. When you coat the cooked chicken legs recipe with salt and chill them uncovered, the salt first draws moisture out of the skin.
Then, over several hours, that saltwater is reabsorbed by the meat (seasoning it deep inside), leaving the surface skin parched and dehydrated.
When that dehydrated skin hits the oven at 425°F, there is almost no surface moisture left to create steam. Instead of steaming, the fat renders almost instantly, leading to that incredible, shattering crunch we crave. This step is the key difference between good drumsticks and amazing drumsticks.
step-by-step Guide to Perfectly Cooked Chicken Legs

Phase 1: The Overnight Dry-Brine Technique
- Prep and Pat: Take your 8 drumsticks and use a mountain of paper towels to pat the skin bone dry. Seriously, it needs to feel slightly tacky, not damp.
- Mix the Rub: Combine the kosher salt, smoked paprika, garlic powder, onion powder, oregano, and black pepper in a small bowl. Whisk until it looks like a consistent, gorgeous red powder.
- Season Heavily: Sprinkle the rub all over the drumsticks, getting every side and crevice. I use my hands here; it feels tactile and ensures good coverage. Do not use the oil yet.
- The Chill: Place a wire rack over a rimmed baking sheet. Arrange the seasoned cooked chicken legs on the rack, ensuring none of them are touching. Place the entire sheet, uncovered, into the fridge for a minimum of 4 hours, or ideally 12– 24 hours. Set a reminder!
Phase 2: Achieving the Initial over High heat Blast for Skin Setting
- Preheat: Take the chicken out of the fridge about 30 minutes before cooking. Preheat your oven to a fiery 425°F (220° C) . Use that time to catch up on texts or prep your sides.
- Oil Up: Just before they go into the oven, drizzle the legs lightly with olive oil and toss them briefly. The oil helps transfer the heat and encourages even browning.
- The Blast: Place the sheet pan, rack and all, into the preheated oven. Cook for exactly 15 minutes at 425°F. You should already see the skin tightening and bubbling up beautifully.
Phase 3: The Low and Slow Finish for Guaranteed Doneness
- Drop the Temp: Reduce the oven temperature down to 375°F (190° C) . Do not open the door! Continue roasting for an additional 20– 25 minutes. This lower temperature finishes cooking the meat through without incinerating that glorious skin we just set.
- Check the Temp: Use your instant read thermometer. Insert it into the thickest part of the meat, avoiding the bone. The cooked chicken legs temp needs to hit 165°F (74° C) . Since drumsticks are dark meat, some professionals prefer pulling them closer to 175°F (80°C) for maximum tenderness, but 165°F is the safe minimum and will yield juicy results.
- Resting the Meat for Ultimate Internal Juiciness Transfer the beautiful, golden brown legs to a separate cutting board. Let them sit, uncovered, for 5 minutes. If you slice into them immediately, all those delicious internal juices will rush out onto the plate. We want that moisture inside the meat!
Troubleshooting and Professional Tips for Flawless Drumsticks
Common Mistakes
- Overcrowding the Pan: If you try to cram 15 drumsticks onto one sheet, they will generate too much moisture and steam each other. Flabby skin central! Use two pans if necessary, giving each leg breathing room.
- Skipping the Wire Rack: I once tried to cheat this step, figuring the sheet pan was fine. Nope. The bottoms of the legs sat in the rendered fat and steamed, turning pale and soft. Always use a wire rack for 360 degree convection.
- Relying on Color Alone: You simply cannot tell if cooked chicken legs are safe based only on skin color or whether the juices look clear. How to tell if chicken drumsticks are fully cooked? Only a thermometer can tell you for sure. Invest the $15; it prevents tragedy.
Calibrating Internal Temperatures Safely for Doneness
While the safe minimum for poultry is 165°F (74°C), dark meat like drumsticks often benefits from cooking a little longer to break down the tough connective tissues. Don't be afraid to take them to 170°F or 175°F they won’t dry out like white meat would. (Speaking of white meat, if you need a quick dinner, check out my guide on Baked Boneless Skinless Chicken Breast: The Essential 20 Minute Juicy Method — it's a whole different game!)
Utilizing the Pan Drippings as a Simple Jus
All that beautiful, rendered fat and seasoning juice at the bottom of the pan is liquid gold. Carefully skim off most of the fat, leaving the remaining brown bits and liquid (the fond ). Pour this concentrated jus over your rice or potatoes for an instant depth of flavor.
Serving Suggestions: Sides and Simple Sauces That Complement the Crisp Skin
These drumsticks are perfect paired with rich, starchy sides that soak up any remaining juices.
Quick Dipping Sauces (That Aren't Creamy or Heavy)
A dollop of simple whole grain mustard is fantastic. Alternatively, mix a tablespoon of hot sauce with a little apple cider vinegar for a bright, vinegary pop that cuts through the richness.
If you’re looking for a simple, healthy grain to serve alongside, I highly recommend my method for Cooked Quinoa The Foolproof Method for Fluffy NeverMushy Grains . It balances the richness of the dark meat beautifully.
Preparing and Storing Leftover Cooked Chicken Legs
Best Practices for Refrigerating Leftover Crispy Drumsticks
Once the legs have cooled completely, store them in an airtight container in the fridge. They keep well for 3 4 days. If you need to stack them, separate layers with paper towels to absorb any condensation, but try to avoid stacking if possible to prevent smashing the crispy skin.
Reheating Instructions to Retain Shattering Crispness
NEVER use the microwave; it will turn the skin into a rubbery mess. To maintain that shatteringly crisp texture, reheating must be done in the oven or air fryer.
Preheat your oven to 400°F (200°C). Place the drumsticks back on a wire rack over a baking sheet. Reheat for 10– 15 minutes until piping hot all the way through. The high heat quickly re-crisps the skin without overcooking the interior.
The air fryer works even faster; usually about 5– 8 minutes at 380°F (195°C).
Avoiding the ‘Steaming Effect’ in the Oven
Always ensure your leftovers are stored fully cooled before closing the container; sealing in residual heat causes condensation, which guarantees sogginess upon reheating.
If you happen to have a lot of leftover meat, strip it from the bone it makes the most flavorful filling for pot pies or pasties. I use shredded drumstick meat all the time when making my Leftover Chicken Breast Recipes: Creamy Leek Pasty for Easy Dinner .

Recipe FAQs
Why didn't my chicken skin get shatteringly crispy?
The primary causes are usually insufficient drying (not dry-brined long enough) or overcrowding the baking sheet. Ensure the legs are resting on a wire rack with space between them so air can circulate, preventing steam buildup.
Also, verify your oven temperature is accurate, as high heat is essential for rendering the fat quickly.
What is the ideal internal temperature for cooked chicken legs?
While chicken breast is considered done at 165°F (74°C), dark meat like drumsticks benefits greatly from being cooked to a higher temperature, ideally between 175°F (80°C) and 185°F (85°C).
This higher range allows the connective tissues and fat to break down fully, resulting in a much more tender and juicy texture.
Can I use this dry-brining technique with bone-in, skin-on chicken thighs?
Absolutely, the dry-brining method works exceptionally well for thighs, as they also have a higher fat content and tough skin that benefits from drying out. Thighs might require 5-10 minutes less cooking time than drumsticks, so monitor the internal temperature closely.
Always ensure the skin is patted completely dry before the salting process begins.
How should I store and reheat leftover crispy chicken legs?
Store cooked chicken legs in an airtight container in the refrigerator for up to four days. To best preserve the crispness, reheat the legs on a wire rack in a 350°F (175°C) oven or an air fryer until they are warmed through. Avoid using the microwave, as it will instantly steam the skin and make it flabby.
My skin is crispy, but the meat seems tough or slightly dry. What went wrong?
Toughness usually indicates the chicken was cooked slightly past the ideal maximum internal temperature, or the initial oven temperature was too low. Ensure you are targeting the 175°F to 185°F range and using an accurate meat thermometer.
Allowing the chicken to rest for 10 minutes after roasting is also crucial, as this lets the juices redistribute back into the meat.
Can I marinate the chicken instead of dry-brining it?
While you can certainly marinate chicken for flavor, liquid marinades are detrimental to the goal of crispy skin, as they introduce moisture. If you wish to add flavor, use a dry rub containing powdered spices like smoked paprika or garlic powder applied directly to the dry skin before roasting.
For wet flavor, you can brush on a glaze during the last 10 minutes of cooking.
Is it safe to freeze chicken legs after they have been brined?
It is generally recommended to freeze the chicken raw, before salting, as prolonged exposure to salt in the freezer can negatively alter the meat's texture upon thawing. If freezing cooked legs, wrap them individually in plastic wrap and foil; they will remain high-quality for about two months.
Crispy Cooked Chicken Legs Recipe

Ingredients:
Instructions:
Nutrition Facts:
| Calories | 350 kcal |
|---|---|
| Fat | 21.5 g |
| Fiber | 1 g |
