The Ultimate Zesty Lemoncaper Chicken Piccata a Midweek Masterpiece
- Unlocking the Secret to Truly Bright & Zesty Chicken Piccata
- Why This Classic Italian-American Staple Belongs On Your Weeknight Menu
- Assembling Your Pantry for Authentic Flavor Profiles
- Essential Equipment for Perfect Piccata Execution
- Step-by-Step Guide to Pan-Frying Tender Chicken
- Crafting the Luxurious Pan Sauce: The Heart of the Dish
- Elevating Your Chicken Piccata Experience: Serving Suggestions
- Recipe FAQs
- 📝 Recipe Card
Unlocking the Secret to Truly Bright & Zesty Chicken Piccata
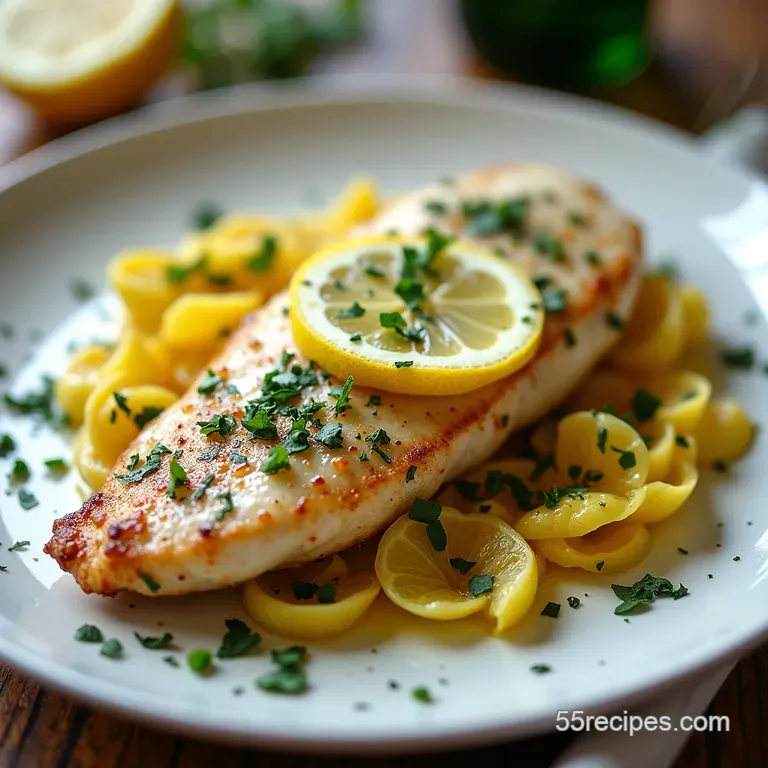
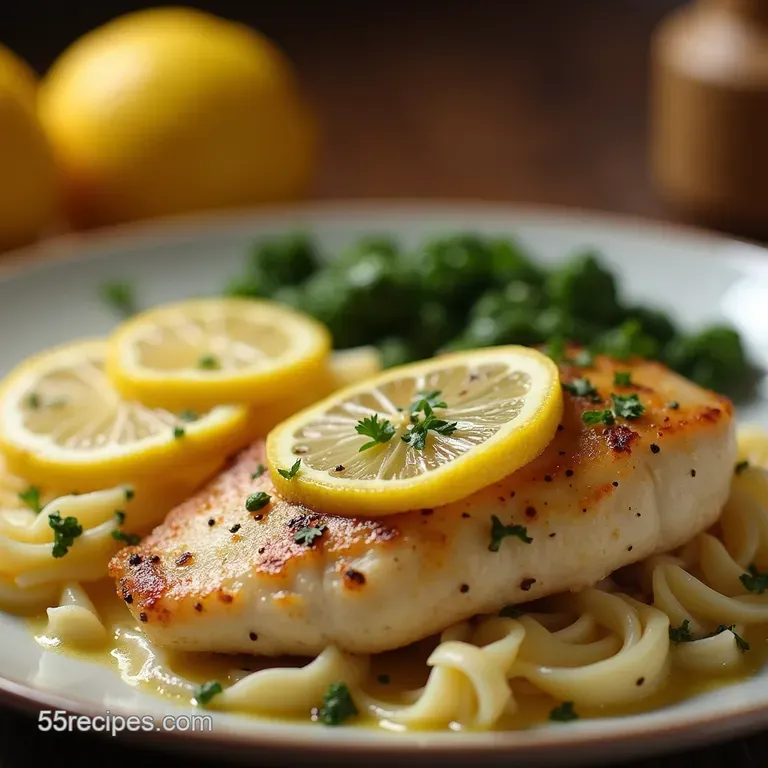
Forget those dreary, bland versions! This Chicken Piccata recipe delivers the vibrant punch of classic Italian American cooking. Tender chicken cutlets, lightly dredged and pan-fried until golden, are bathed in a luxurious, quick pan sauce brimming with zingy lemon juice, salty capers, and finished with a knob of cold butter for shine.
It’s quick, it’s bright, and it tastes like sunshine on a plate. This Easy Chicken Piccata is remarkably simple to pull off, making it a favorite in my kitchen.
Why This Classic Italian American Staple Belongs On Your Weeknight Menu
This preparation elevates simple chicken breasts into something truly sophisticated. The Classic Chicken Piccata method relies on high heat and swift execution, meaning you move from raw ingredients to a finished, stunning meal in about 30 minutes total.
It’s an accessible dish that delivers maximum flavor impact with minimal stress, proving that elegance doesn't require hours in the kitchen.
The Magic Behind the Lemon Caper Balance
The soul of any great Chicken Piccata lies in the interplay between acidity and salinity. The capers provide those necessary salty bursts, cutting through the richness of the butter and chicken fat.
This is perfectly countered by the sharp, fresh tang of the lemon juice, resulting in a Zesty Chicken Piccata that invigorates the palate. It's a delicate dance where neither ingredient overpowers the other.
Impress Guests Without the Fuss: A 30-Minute Wonder
If you need an impressive dish for unexpected guests, look no further. Because the technique involves basic pan-frying and creating a rapid pan sauce (deglazing), the entire process, from prepping the chicken to serving, clocks in at around 30 minutes.
This speed makes it perfect for busy weeknights while still feeling special enough for entertaining.
Defining the Perfect Chicken Cutlet Thickness
For this Homemade Chicken Piccata , uniformity is key. We slice the chicken breasts horizontally to create thinner cutlets, then gently pound them to an even thickness of about ¼ inch.
This ensures the chicken cooks through quickly and evenly, preventing dry edges while you develop the deep, flavorful fond in the pan necessary for the sauce.
Assembling Your Pantry for Authentic Flavor Profiles
To achieve the genuine taste associated with Chicken Piccata , assembling the right supporting cast of ingredients is vital. While the chicken itself is humble, the sauce components must be high quality to truly shine.
You will need 2 large boneless, skinless chicken breasts (about 1.5 lbs total), which you will halve horizontally and pound thin. The flour dredging requires ½ cup of all-purpose flour, seasoned alongside the chicken with Kosher salt and freshly ground black pepper.
For the crucial base of the sauce, have ¼ cup of dry white wine (like Pinot Grigio) handy, ½ cup of low-sodium chicken broth, and the juice of 1 large, fresh lemon (about ¼ cup).
Don't forget the flavor bombs: 2 tablespoons of drained capers (the smaller non-pareil variety works best) and 4 tablespoons of unsalted butter reserved for cooking and finishing.
Related Recipes Worth Trying
- The Best Baked Whole Chicken Recipe for Crispy Skin — Master the ultimate baked whole chicken with this easy recipe Achieve shatteringly crisp skin and juicy meat using a secret ingredient trick
- Fiesta Chicken Taco Salad A Flavor Explosion — Craving a Fiesta Chicken Taco Salad This easy recipe is packed with flavor featuring seasoned chicken fresh veggies a zesty cilantrolime dressing The...
- Crockpot Frozen Chicken Fiesta Easy Weeknight Winner — Forgot to thaw the chicken No worries This crockpot frozen chicken fiesta is a flavour explosion ready in hours Dump cook shred enjoy easyrecipe
Essential Equipment for Perfect Piccata Execution
Having the right tools on hand makes the swift cooking process for this Best Chicken Piccata recipe smooth and efficient.
The Non-Negotiable Components: Chicken, Capers, and Citrus
While the chicken is the star, the capers and fresh citrus are the supporting leads that define the dish. Ensure your capers are rinsed lightly after draining to remove excess saltiness before they hit the pan. Freshly squeezed lemon juice is mandatory; bottled juice simply lacks the necessary brightness.
Flour Dredging: Choosing the Right Binder
The light coating of flour serves two primary purposes: it helps the cutlets achieve a beautiful, crisp golden brown exterior when pan-fried, and crucially, it acts as a thickening agent for the sauce later. Whisk together the flour with salt and pepper in a shallow dish.
Lightly dredge each cutlet, shaking off any heavy excess before it hits the hot fat.
Selecting the Best Broth for Sauce Depth
The quality of your chicken broth significantly impacts the final flavor of the Chicken Piccata sauce . Always opt for low-sodium chicken broth. This allows you to control the final salt level after the capers and seasoning are added.
It provides the necessary liquid body for deglazing and simmering down the sauce.
Required Tools for Swift Preparation
You absolutely need a meat mallet or a heavy rolling pin to tenderize and thin the chicken properly. For cooking, a large skillet preferably stainless steel or cast iron is ideal, as these materials build the most fond (the flavorful browned bits) necessary for deglazing.
Tongs are essential for flipping the delicate cutlets without tearing them.
Step-by-step Guide to Pan-Frying Tender Chicken
The foundation of this dish is perfectly cooked chicken. After slicing and pounding your 2 large chicken breasts into uniform, thin cutlets, season them lightly. Then, dredge them in the seasoned flour mixture, ensuring a very light, even coat.
Heat 2 tablespoons of olive oil and 2 tablespoons of unsalted butter in your large skillet over medium high heat until shimmering. Working in batches is paramount do not overcrowd the pan sear the dredged cutlets for 2– 3 minutes per side until they achieve that appealing golden brown color and are cooked through (reaching 165° F internal temperature).
Once cooked, transfer the cutlets immediately to a warm plate and cover loosely with foil to retain heat while you build the accompanying sauce.
Crafting the Luxurious Pan Sauce: The Heart of the Dish
The pan sauce transforms the fried chicken into the elegant Chicken Piccata we know and love. This entire process should happen swiftly in the same pan used for frying.
Prep Work: Pounding the Chicken to Uniformity
As mentioned, uniformity is crucial. Take the time during the 15-minute prep window to beat the chicken breasts evenly to about ¼ inch. This ensures that during the rapid searing stage, you don't have thick parts that remain raw while the thinner parts dry out.
Achieving Golden Brown Perfection (No Sogginess Allowed)
Using medium high heat guarantees a quick sear. The combination of oil and butter not only provides a high smoke point but also contributes to the rich flavor profile. Remember, the goal here is to build the fond —those caramelized bits stuck to the bottom of the pan are flavor gold that will dissolve into your sauce.
Deglazing the Pan: Capturing Every Flavor Nugget
Once the chicken is removed, reduce the heat slightly. Pour in the ¼ cup of dry white wine (if using) and immediately begin scraping the bottom of the pan vigorously with a wooden spoon. This action, known as deglazing, lifts all those flavour packed brown bits into the liquid.
Allow the wine to reduce by about half, concentrating its flavour. If you skipped the wine, start this step with the broth.
Finishing Touches: Emulsifying the Butter and Lemon
Next, introduce the ½ cup of chicken broth and the ¼ cup of fresh lemon juice. Let this mixture simmer gently until it reduces by about one-third this concentrates the acidity and salinity. Stir in your 2 tablespoons of drained capers.
The final, most crucial step for a glossy, restaurant quality finish is incorporating the remaining 2 tablespoons of cold, cubed unsalted butter. Remove the pan from the direct heat and whisk the butter in, one small cube at a time, letting each melt fully before adding the next ( monter au beurre ).
This creates a luxurious emulsion. Do not boil the sauce after adding the cold butter, or it risks breaking. Finally, return the chicken to the pan just to coat it in the sauce, garnish with 2 tablespoons of fresh chopped parsley, and serve immediately.
Elevating Your Chicken Piccata Experience: Serving Suggestions
A dish this bright and tangy deserves thoughtful accompaniments. The primary goal is providing something neutral or starchy to soak up that magnificent sauce.
Pairing Perfection: What Sides Complement This Zesty Sauce?
For a truly authentic Chicken Piccata pasta recipe feel, serve it over a bed of thin angel hair or linguine, ensuring the pasta is slightly underdone so it absorbs the sauce beautifully as it finishes cooking in the pan juices.
Alternatively, a simple side of fluffy couscous or light risotto stands up well. For vegetable pairings, blanched asparagus spears or lightly sautéed green beans tossed with toasted slivered almonds offer a necessary textural contrast.
Ingredient Substitutions for Dietary Needs
If you need to skip the wine, substitute it with additional chicken broth, boosting the lemon juice slightly to compensate for the lost acidity. For gluten sensitivities, rice flour or a quality gluten-free 1:1 blend works perfectly for the dredging process.
Dairy sensitivities can be accommodated by swapping the butter for a high-quality, neutral flavored vegan butter block during the final emulsification step, though remember to avoid boiling the sauce once the substitute butter is added.
Troubleshooting: Why Is My Sauce Too Thin?
If, after simmering, your Chicken Piccata sauce still seems watery, the culprit is usually insufficient reduction or that the butter wasn't fully incorporated.
To fix it quickly, remove the pan from the heat and whisk in one more tablespoon of cold butter, or for a thicker result, mix half a teaspoon of cornstarch with one teaspoon of cold water to create a slurry, then whisk this slurry into the simmering sauce until it thickens slightly.
Optimal Storage Containers for Leftover Piccata
Leftovers of this dish are a treat, but the sauce quality can degrade if stored improperly. Ensure the chicken is completely cooled before placing it in an airtight container. For best results, store the chicken and any remaining sauce separately, perhaps placing the cutlets in a zip-top bag and the sauce in a small glass jar.
When reheating, warm the sauce gently first, then add the chicken and heat through just until warmed, avoiding overcooking the meat.
Recipe FAQs
Why does my Chicken Piccata sauce look oily or broken instead of glossy?
That’s usually down to temperature control when adding the finishing butter a classic kitchen mishap! You must remove the pan from the heat (or use the lowest setting) before whisking in the cold butter cubes (the monter au beurre step).
If the sauce boils after the butter is added, the emulsion will break, leaving you with an oily mess.
How can I make sure my Chicken Piccata cooks quickly without drying out?
The key is getting the chicken nice and thin aim for about ¼ inch thick by pounding it gently. Because the cutlets are so thin and only lightly floured, they cook very fast, usually just 2 3 minutes per side in hot fat.
If you overcrowd the pan, the temperature drops, and the chicken steams instead of searing, leading to tough results!
I don't have white wine; what can I use instead for the pan sauce?
No worries, you can easily skip the wine without ruining the dish. Use extra low-sodium chicken broth in its place when deglazing the pan. Just make sure to scrape up all those tasty browned bits (the fond) from the bottom, as that’s where most of the deep flavour comes from!
Can I prepare parts of this Chicken Piccata recipe ahead of time, perhaps for a dinner party?
You certainly can! You can pound and dredge the chicken earlier in the day, storing the floured cutlets on a plate covered tightly in the fridge. Better yet, you can make the complete lemon caper sauce, let it cool, and gently reheat it when you are ready to serve; just remember to swirl in the final cold butter right before serving to ensure maximum shine.
What’s the best way to store leftover Chicken Piccata, and can I freeze it?
Leftovers should be stored in an airtight container in the fridge for up to three days. While the chicken freezes okay, the sauce might separate slightly upon thawing, losing some of its lovely glossy texture.
If you do freeze it, reheat gently on the stove and whisk in a tiny fresh knob of cold butter to revive the sauce.
Easy Zesty Chicken Piccata

