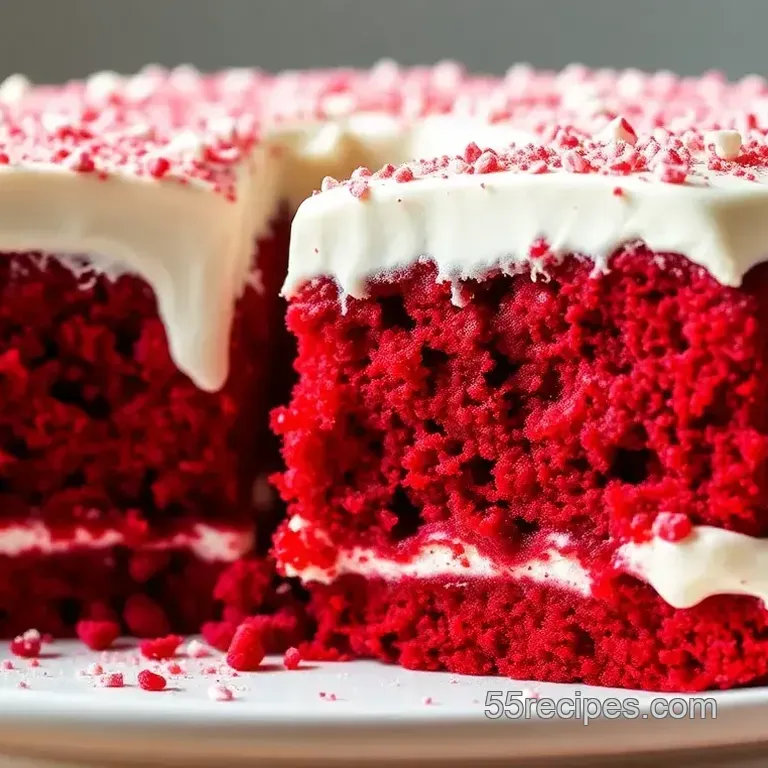
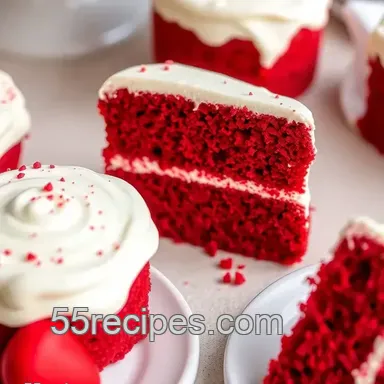
Heart-Shaped Red Velvet Cakes with Cream Cheese Frosting
- Are You Ready to Bake Your Heart Out This Valentine’s Day?
- The Ultimate Guide to Mastering Heart-Shaped Red Velvet Cakes
- What Makes This Recipe Special
- Recipe at a Glance
- Quality Ingredients Breakdown
- Professional Cooking Guide
- Master Chef's Advice
- Perfect Presentation
- Storage and Make-Ahead
- Creative Variations
- Complete Nutrition Guide
- Expert FAQ Solutions
- 📝 Recipe Card
Are You Ready to Bake Your Heart Out This Valentine’s Day?
What if i told you that a simple heart shaped cake could pack all the romance of a candlelit dinner? makes you wonder, doesn’t it? valentine’s day is not just about flowers and chocolates; let’s not forget about the desserts!
and, oh boy, is there anything more indulgent than homemade heart shaped red velvet cakes with cream cheese frosting? not only do they look stunning, but they also taste divine, making them the perfect sweet treat for lovers.
This recipe, which only requires about 55 minutes from start to finish, falls somewhere between easy and medium in terms of difficulty perfect for both novice bakers and those looking to impress without too much fuss!
The Ultimate Guide to Mastering Heart Shaped Red Velvet Cakes
The origins of red velvet cake are a bit murky, swirling around the southern u.s. in the 1920s, when it began to gain popularity.
This cake was often associated with the elegant desserts typically gracing grand dinner parties think of it as the star on the table, shining bright beside those rich sunday roasts.
Today, red velvet has made its way into various celebrations, becoming a staple of special occasion cakes, particularly valentine’s day.
What makes red velvet so enchanting? well, it boasts a rich and slightly tangy flavor thanks to the cocoa powder a bit of a surprise in what looks like a simple vanilla cake.
Coupled with the indulgence of creamy frosting, red velvet cake has captured hearts and taste buds alike. plus, who can resist those vibrant red layers that scream love?
What Makes This Recipe Special
Now, let’s dig deeper into what sets this cake apart from the crowd of valentine cakes . first up, can we talk about that foolproof method ? i mean, i once mixed the baking soda with my dry ingredients, then grabbed the salt thinking it was sugar… it was not pretty!
but the beauty of this recipe is that with just a bit of patience and the right techniques, you’ll have a show stopping cake.
The rich combination of chocolate and a subtle cream cheese frosting gives an unforgettable indulgence, and it’s expert tested , too trust me, i’ve burned a cake or two in my day, but this one is a winner!
Health and Nutrition Highlights
Although this heart shaped delight comes primarily loaded with sweetness, there are ways to balance it out. each serving brings about 400 calories , and while that may not scream “healthy,” remember, it’s about moderation (and love!).
You can also easily substitute ingredients to make it vegan or gluten-free if you need to! but hey, remember, desserts are for treating yourself , right?
Recipe at a Glance
Here’s a quick rundown:
- Preparation Time: 30 minutes
- Cooking Time: 25 minutes
- Total Time: 55 minutes
- Skill Level Required: Medium (but totally doable)
- Serving Size: 6 servings
- Cost Efficiency: Pretty budget friendly, especially when you’re creating homemade treats compared to pricey bakery options.
As you can see, this recipe is packed with flavor and history, wrapped in love. next up, let’s talk ingredients.
We’ll dive into what you need to gather to create these delightful layers for your special someone!
Quality Ingredients Breakdown
When it comes to making heart shaped red velvet cakes, choosing the right ingredients is non-negotiable. Let’s break it down so you can whip up some valentine cakes that even Cupid would approve of!
Premium Core Ingredients
All-purpose flour (1 ½ cups): for the best texture, go for unbleached flour. it’s got that perfect balance, yielding a light and airy cake.
Always sift it before measuring it’s a little extra work but worth the fluffy outcome!
Granulated sugar (1 cup): look for finely milled sugar. it dissolves easier in the batter, allowing for a smooth cake.
You might think sugar is sugar, but trust me, the finer, the better!
Cocoa Powder (½ cup): Unsweetened is key. Check for Dutch processed if you’re after a deeper chocolatey flavor. Keep it sealed in a cool, dry place it can absorb moisture and lose its charm.
Baking soda (1 teaspoon) & salt (½ teaspoon): always fresh! if it’s been sitting in your pantry for a year, it's time to replace it.
Old leavening agents can lead to a dense cake you want light and fluffy, not brick like.
Vegetable oil (1 cup): i often grab canola or sunflower oil. they’re flavorless and keep your cake from drying out.
Keep it stored away from light, and don’t buy in bulk unless you plan to use it soon.
Buttermilk (1 cup): use room temperature! if you find yourself without, mix a cup of milk with a tablespoon of vinegar or lemon juice and let it sit for 5 minutes.
Voila, instant buttermilk!
Eggs (2 large): Always grab the freshest ones. Check the sell-by date, and aim for organic if you can. They help bind everything and add moisture plus they’re protein packed!
Red Food Coloring (2 tablespoons): Gel coloring gives a richer hue without affecting the batter’s consistency. Regular liquid dye can be a bit watery, and nobody wants a pale red velvet cake!
Vanilla extract (1 teaspoon) & white vinegar (1 teaspoon): pure vanilla adds warmth to the flavor, while the vinegar helps activate the baking soda, giving your cake that airy lift.
Store in a cool, dark cupboard.
Signature Seasoning Blend
Now for the fun part the flavor boosters. Your red velvet cake isn’t just made sweet. A good balance makes it extra special.
Cocoa & Vanilla: Cocoa brings a rich, deep flavor, while vanilla gives a warm sweetness. Don't skimp on these, and consider adding a touch of almond extract for a twist.
Aromatic Additions: A sprinkle of cinnamon can surprise your taste buds. Just a pinch makes a difference but doesn’t overwhelm; it’s all about balance here!
Smart Substitutions
So, let’s say you’re out of something or maybe need to whip up a vegan version:
Egg Replacement: Use a flax egg! Mix 1 tablespoon flaxseed meal with 2.5 tablespoons water, let it sit for 5 minutes to thicken, and voilà!
gluten-free Option: Check for a 1:1 gluten-free flour blend. That's pretty reliable in recipes like this one just ensure it contains xanthan gum.
Dairy Alternatives: Almond milk or oat milk can stand in for buttermilk. Just remember to add that vinegar or lemon juice!
Kitchen Equipment Essentials
Having the right tools can make the baking experience smoother. You don’t need fancy gadgets, but a few essentials will help:
Mixing Bowls: Durable and easy to clean. You’ll want a medium for mixing dry, a large for wet, and maybe even a tiny for the frosting.
Electric Mixer: A stand or hand mixer will save you the arm workout! Just don’t go too fast; you want to incorporate, not create a flour storm.
Cake Pans: Heart shaped pans are cute, but really, any shape works just adjust your baking time according to the size.
Spatula: A sturdy rubber spatula is great for scraping down the sides of your bowl and smoothening frosting. It's essential for that pro-look!
Pro Ingredient Tips
As I've learned the hard way, freshness is vital. Always check expiration dates on ingredients before use, especially baking soda and powder.
Storage Secrets: Keep your flour and sugar in airtight containers to avoid bugs and moisture. Cocoa powder should be stored in a cool, dark place, too.
Money saving Tips: Buy essentials like flour and sugar in bulk. Plus, if you have leftover buttermilk, make a batch of pancakes or waffles! Waste not, want not, right?
Now that you’ve prepped your ingredients, it’s time to get into the fun part: baking! follow along as we dive into the cooking instructions to create these delightful heart shaped red velvet cakes, perfect for those romantic evenings filled with love and sweet treats.
Trust me, the kitchen might get a little messy, but oh, the joy of enjoying a slice of delicious, homemade cake together is truly worth it!
Professional Cooking Guide

Cooking doesn’t have to be all about precision and stuffy rules; sometimes, it’s about the love and passion you pour into your dishes.
In this guide, we’ll tackle the art of making heart shaped red velvet cakes with cream cheese frosting perfect for valentine’s day, if i do say so myself! let’s dive into our cooking adventure!
Essential Preparation Steps
Before we roll up our sleeves, we need to get organized. mise en place (a fancy french term for "everything in its place") is crucial.
Gather all your ingredients: flour, sugar, cocoa powder, and those vibrant red food colors that’ll make your cake pop.
Now, about prep techniques sifting the dry ingredients isn’t just for show. it helps combine them better and breaks up any clumps.
I remember my first attempt, and i was left with little cocoa powder lumps in my cake yikes! as for time management , allow about 30 minutes for prep.
You’ll want things to go smoothly, especially when the mixer gets going.
Next, keep your station organized . clear off any clutter; trust me, you’ll thank yourself midway through. place your mixing bowls, measuring cups, and spatula right where you need them.
You want to be in the zone, not searching for a tablespoon like it's hiding forever.
Professional Cooking Method
Once you’re ready, it’s showtime!
Preheat the Oven: Start by preheating your oven to 350°F (175°C) while you prepare your batter. That’s just smart cooking!
Mixing it up: combine your dry ingredients flour, sugar, cocoa, and all that goodness until it’s a lovely fluffy mix. in another bowl, blend your wet ingredients.
I always add the food coloring last; i like to see that vibrant red bloom when i stir it in.
Combine everything: gradually mix your wet and dry ingredients, but be careful! don’t overmix! a few lumps won’t hurt; in fact, they can add character! think of it like putting little surprises in your batter.
Bake: Divide that luscious batter into your greased heart shaped cake pans and smooth it down. Bake for 20-25 minutes. You’re looking for the toothpick test when it comes out clean, happiness ensues.
Cool It: Let the cakes cool in the pans for 10 minutes, then transfer them to a wire rack. If you skip this step, you might end up with a crumbly mess don’t ask how I know…
Expert Techniques
Some critical steps and points of precision make all the difference.
Temperature Control is Key: That oven must be at the right temperature. Too hot? Your cakes could burn. Not hot enough? They’ll flop.
Timing Precision: Set a timer! I once got distracted binge watching a series and ended up with a charcoal cake. Spoiler: it didn't turn out well.
Quality checks: when your cakes are done, look for moistness this is a sign of success. you want them to be springy when you press down gently.
If you give them too much love, they’ll turn dense.
Success Strategies
Even seasoned bakers hit a wall sometimes! Here are some tips to troubleshoot.
If your cakes domed too much and look a bit funny don’t stress! trim off the tops to level them out.
Just make sure to eat the scraps; it’s a perk of the job!
For frosting, ensure your cream cheese and butter are softened to room temperature. Cold ingredients mean a lumpy frosting, which is just tragic for any cake especially valentine cakes.
Need a smoother finish? Try chilling the cake for 30 minutes before frosting; this helps in achieving a beautiful finish.
And if you’re wondering about perfect results, the key is in patience and taste testing along the way. If it doesn't taste right, adjust add a pinch more sugar or a splash of vanilla.
Now that you’re all set with techniques and tips, you’re going to ace your valentine’s day dessert ! but let’s not leave you hanging there.
In the next section, we'll cover some additional information to keep your baking adventures exciting! whether it’s ideas for garnishing cakes or variations on this recipe, you won’t want to miss it!
Master Chef's Advice
When it comes to creating valentine cakes , the little things can make a world of difference. from professional insights to kitchen wisdom, let’s dive into some advice that will help ensure your cake turns out fabulously.
Professional Insights
A veteran baker once told me that patience is your best friend in the kitchen. savor every moment while mixing, baking, and decorating.
Don’t rush the process; let the batter come together slowly, and you’ll be rewarded with a soft, fluffy cake.
Expert Techniques
Have you ever struggled with achieving that perfect frosting consistency? i know i have! it took me a few tries (and a few too many runny batches) to figure out the sweet spot.
Just be sure to soften your cream cheese and butter before mixing. it makes a world of difference!
Kitchen Wisdom
Here’s something i learned the hard way: always use room temperature ingredients. eggs and buttermilk mix together so much better when they’re not cold from the fridge.
Trust me, it helps create a smoother batter, and that’s the key to making sure your heart shaped red velvet cakes are delightfully airy.
Success Guarantees
One surefire way to a successful bake is to prepare for the unexpected. sometimes ovens have their quirks, and your cake may need an extra few minutes don’t fret! just keep an eye on it toward the end of the baking time and test with a toothpick.
Perfect Presentation
Let’s be honest, nobody wants a cake that looks like a hot mess. So here are some tips to help you present your creation like a professional baker.
Plating Techniques
As you layer your cakes, sprinkle a little cocoa or powdered sugar on the serving plate first. It not only adds a charming touch but also prevents that dreaded cake slide!
Garnish Ideas
Fresh berries, edible flowers, or even some chocolate shavings can completely elevate your cake. I’m partial to using raspberries and mint leaves for a cheery pop of color perfect for celebrating love!
Serving Suggestions
Cut your cake into generous slices but don’t forget to keep the extra frosting on hand for those who might want a little more of that cream cheese goodness.
Serve with a side of whipped cream for a classic touch or a scoop of vanilla ice cream, and watch everyone swoon.
Visual Appeal Tips
Remember, “you eat with your eyes first!” that’s what my grandma always said. take care when frosting your cake. a spatula works wonders, but if you have one, a palette knife gives a beautiful finish.
A little warmth from your hands when applying the frosting can make it smooth and creamy, too.
Storage and make-ahead
If you’re planning to whip up these valentine cakes in advance, I’ve got you covered.
Storage Guidelines
Once your cakes are assembled, store them in an airtight container at room temperature for about two days. if storing longer, pop that baby in the fridge.
Just be sure to cover it up to avoid the dreaded dry cake scenario!
Preservation Methods
You can freeze your layers before frosting. Wrap each layer in plastic wrap and then in foil to keep them fresh. Just let them thaw overnight in the fridge before frosting.
Reheating Instructions
If you find that your cake has become a little firm after a day or two, a quick 5-10 second zap in the microwave does wonders! Just don’t turn it into cake soup this is not a cake pudding, folks!
Freshness Tips
When you’re ready to serve, a quick dusting of powdered sugar on top can bring a little life back to the cake, making it look fresh and inviting.
Creative Variations
Who said you have to stick to the classic recipe?
Flavor Adaptations
Try adding spices like cinnamon or nutmeg for a cozy twist. Or, for a touch of decadence, toss in chocolate chips for some extra surprise!
Dietary Modifications
If you have a vegan friend joining the festivities, try using flaxseed meal instead of eggs and coconut milk instead of buttermilk. Trust me, nobody will notice the difference!
Seasonal Twists
In fall, drizzle some caramel on top for a seasonal touch. In summer, add fresh berries into the batter for a delightful berry explosion throughout.
Regional Variations
Feeling adventurous? Swap the red food coloring for a deep purple beet juice for an earthy modification. It’s not just for birthdays; it makes for a gorgeous Valentine’s dessert, too!
Complete Nutrition Guide
Baking can mean indulging, but knowing what’s in your delicious creation is key.
Detailed Breakdown
Each slice of your heart shaped cake packs about 400 calories. So, you can indulge without any guilt just remember, moderation is key!
Health Benefits
With the buttermilk providing some calcium and the moisture from the cake, you are also sneaking in a tiny bit of nutrition. Plus, who can resist a happy tummy?
Dietary Information
A serving contains about 22g of fat, but when it’s this amazing, it’s hard to resist just one slice!
Portion Guidance
I usually aim for six servings, but don’t worry! If you’re too smitten, you can easily can double the recipe for a larger gathering (or to save for yourself).
Expert FAQ Solutions
Got questions? I’ve probably asked them too.
Common Concerns
“What if my cake falls flat?” This used to be my biggest fear. Make sure not to overmix the batter and let your ingredients come to room temperature.
Expert Answers
“I’m not sure if my cake is done.” A toothpick inserted in the center should come out clean or with a few crumbs not wet batter!
Troubleshooting Guide
If your cake is too dense, it’s often due to overmixing. It took me a couple tries to get it just right so don’t get discouraged!
Success Tips
Always measure accurately. Weighing your flour can take your baking to the next level. Plus, if you ever find yourself with extra batter, trial bake some cupcakes instead!
In conclusion, whipping up these heart shaped red velvet cakes with cream cheese frosting is not just about the end product; it’s about the love and thought you put into each step.
So, roll up your sleeves, pour your heart into the batter, and remember to have fun with it. after all, it’s valentine cakes we’re talking about let’s spread the love!
Heart Shaped Red Velvet Cakes With Cream Cheese
Ingredients:
Instructions:
Nutrition Facts:
| Calories | 400 |
|---|---|
| Protein | 5g |
| Fat | 22g |
| Carbs | 48g |
| Fiber | 1g |
| Sugar | 35g |
| Sodium | 300mg |
