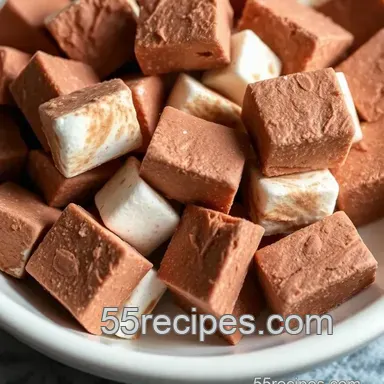
Heavenly Cocoa Marshmallows
A Sweet Journey Into Cocoa Marshmallows
Oh my gosh, have you ever taken a bite of a homemade marshmallow and just felt all your worries melt away? i remember the first time i tried making marshmallows from scratch my kitchen was a war zone of sticky sugar and flour, but let me tell ya, the moment i bit into that fluffy, cloud like treat, it was like a bite of nostalgia!
If you’re looking for a cocoa marshmallow recipe that will not only impress but also kick your regular, store-bought marshmallows to the curb, you’re in for a treat.
You know, marshmallows have been around forever. they date back to ancient egypt, where they made a sweet treat from the sap of the mallow plant.
Can you believe it? over time, candy making techniques have evolved, but the thrill of biting into these fluffy bites of joy hasn’t changed a bit.
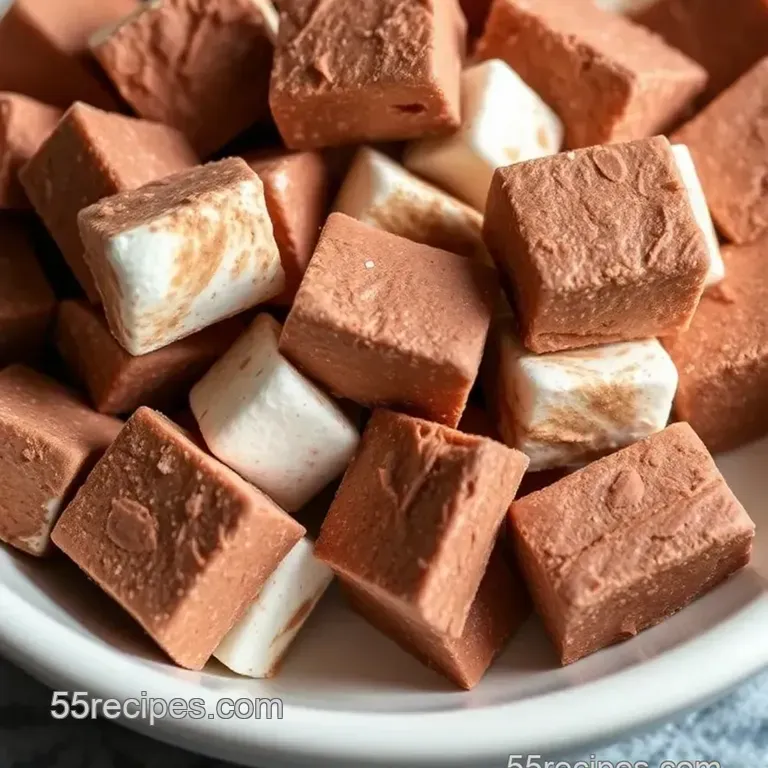
Nowadays, folks are crafting gourmet marshmallows in all kinds of flavors, and guess what? this cocoa marshmallow recipe is no exception! these babies are perfect for cozy nights in with a cup of hot chocolate or just as a little guilty pleasure on their own.
Making Cocoa Marshmallows: The Basics
So, let's chat about what you need to know before diving in. first off, this treat isn’t too difficult, but you'll need a bit of patience and a trusty candy thermometer.
The time required? about an hour total, which includes prep and some chilling time. and speaking of chilling, just imagine how good it’ll feel to know that you whipped up these rich cocoa treats right at home!
You’ll wind up with about two dozen marshmallows, depending on how generous you are when cutting them. And trust me, you might find yourself wanting to triple the batch after you see how easily they disappear I mean, who can resist a chocolate marshmallow dessert ?
Why You’ll Love These Cocoa Marshmallows
Here’s the kicker: these marshmallows aren’t just fluffy; they’re packed with health benefits too! well, if you consider the joys of happiness and nostalgia part of wellness.
They bring a little sweetness into life, making them perfect for festive gatherings. imagine presenting a batch at your next holiday party it’ll make you the mvp of the dessert table!
Besides, they’re incredibly versatile. want to throw them into your favorite hot chocolate topping ideas ? go ahead! or perhaps, you want to use them in a s'mores variation? yes, please! they also make for fab gifts, wrapped in pretty packaging to delight your family and friends.
Honestly, who doesn’t want a bag of sweet treats for kids or adults?
Let’s not overlook the fact that these marshmallows beat any pre-packaged ones with a stick. you’re in control of the ingredients.
Plus, you can easily experiment with variations add peppermint extract, or maybe a sprinkle of cinnamon? the world (and your kitchen) is your oyster!
Now, without further ado, let’s chat about what you need to gather for this divine cocoa marshmallow recipe . Grab your aprons, and let’s dive into the deliciousness of homemade goodness!
Essential Ingredients Guide to a Cocoa Marshmallow Recipe
Hey, fellow food lovers! today, i’m diving into the world of ingredients that make up the heart of our heavenly cocoa marshmallow recipe .
Yep, we’re talking about that glorious fluffy treat you wished you had as a kid. so, let’s get started and break it down into easy-to-digest sections, just like your favorite dessert!
Premium Core Components
First up, let’s chat about those premium core components . You know, that sugar, cocoa, and gelatin magic that brings our homemade marshmallows to light. Here’s what you need to know:
Detailed measurements: We’ll work with simple measurements. For the sugar, it’s 2 cups (400 g) . If you’ve got a kitchen scale, trust me, it’s your best pal.
Quality indicators: Always look for unsweetened cocoa powder that’s rich and dark. A good brand can make those cocoa flavored marshmallows taste out of this world!
Storage guidelines: Keep those marshmallows in an airtight container! They’ll stay fresh for about a week, but honestly, they won’t last that long once your friends try them.
Freshness tips: For the best taste, use your cocoa powder within six months of opening just like you would with spices! Fresh ingredients are key to those delicious rich cocoa treats .
Signature Seasoning Blend
Let’s get into that signature seasoning blend that transforms our basic ingredients into something extraordinary.
Essential spice combinations: A touch of sea salt balances all that sweetness. Seriously, don’t skimp on it!
Herb selections: It might sound quirky, but I love adding a whisper of peppermint to the mix, especially around the holidays. It just screams festive dessert recipes .
Flavor enhancers: Vanilla extract is a no-brainer here. It adds that final, dreamy flavor that just ties it all into a neat little bow.
Regional variations: If you’re feeling adventurous, try swapping out the vanilla for almond extract. It’ll add a unique twist to your fluffy marshmallow recipe .
Smart Substitutions
Next, we’ve got your back with smart substitutions for those moments when life throws you a curveball.
Common alternatives: If you find yourself out of corn syrup, honey or agave syrup works just as well.
Dietary modifications: Feeling vegan? Substitute gelatin with agar agar.
Emergency replacements: No cocoa powder? No problem! Use melted chocolate instead for a chocolatey kick that’s to die for!
Seasonal options: As the seasons change, switch up flavors. For fall, how about some pumpkin spice?
Kitchen Equipment Essentials
Now, onto the kitchen equipment essentials ; these tools are more important than you might think.
Must have tools: A stand mixer with a whisk attachment is a game changer for whipped textures. But if you’ve only got a handheld mixer, yeah, that’ll work too.
Alternative equipment: If you don’t own a candy thermometer, a simple kitchen thermometer will do in a pinch. Just keep it close by!
Preparation tips: Always prepare your dish by lining it with parchment paper. It’ll save you a headache when it’s time to pop out those marshmallows.
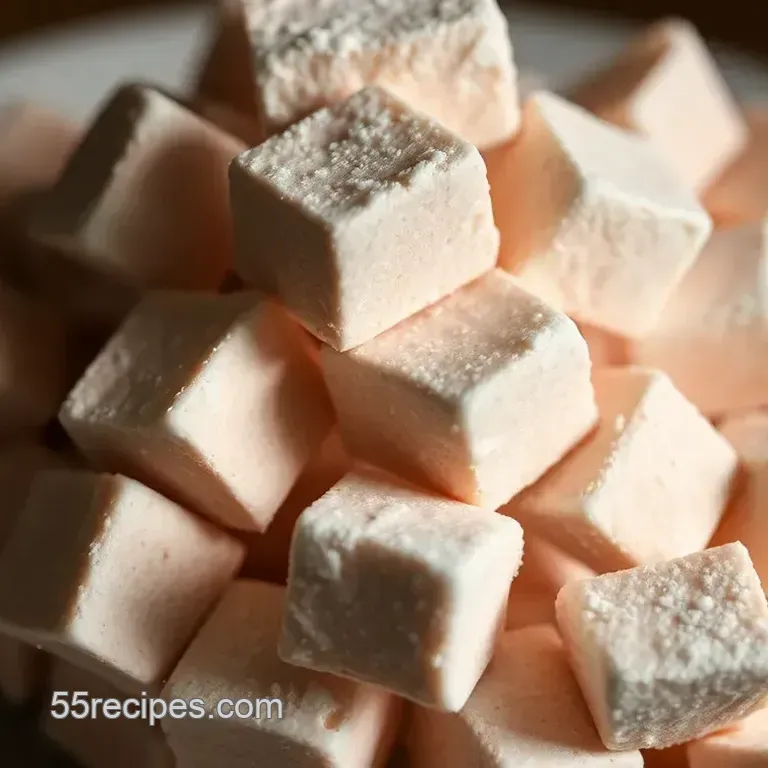
Storage solutions: Remember to dust your marshmallows with powdered sugar before storing. This keeps them from sticking together like best buds!
Now that we’ve unlocked all these ingredient secrets and tips, you’re well on your way to whipping up a batch of delightful cocoa marshmallows ! Get excited because your kitchen is about to become the sweetest spot in your home!
Next up, let’s dive into the instructions on making those dreamy marshmallows that will have you channeling your inner chocolatier! Trust me, you’ll want to keep reading, so let’s get our marshmallow party started!
Professional Cooking Method: Whipping Up Heavenly Cocoa Marshmallows
Ah, marshmallows! whether you’re enjoying a cozy night in or throwing a summer bbq, these fluffy treats never go out of style.
And let’s face it, who can resist a cocoa marshmallow recipe ? especially when we’re talking about homemade marshmallows that you whipped up yourself.
Here’s the lowdown on professional cooking methods to get you started, combined with my own experiences. spoiler: you’ll be rolling out the red carpet for your marshmallow making skills in no time!
Essential Preparation Steps
First up is mise en place, which is just a fancy way of saying, “get your stuff together before you start.
” measure out your ingredients: you'll need 2 cups of granulated sugar, 3/4 cup of water, and 1/4 cup of light corn syrup among others.
Having everything ready means fewer oops moments later on, trust me!
Now let’s talk time management. you’ll want to set aside about 1 hour from start to finish, plus some chilling time.
Just think about how you can multitask while your sugar syrup is cooking, you can hydrate the gelatin. how efficient!
For organization, i swear by sticky notes! label your utensils and ingredients. keep that kitchen organized like you might want guests over unexpectedly! and let’s not forget safety candy temperatures can go high, like around 240° f .
Use a good candy thermometer and be careful not to touch the hot syrup. trust me, you don’t want to learn that the hard way.
Step-by-step Process
Alright, let's dive into the nitty gritty.
Prepare your pan. You want to line a 9x9 inch dish with parchment paper. Let some hang over the sides for easy removal later.
Hydrate the gelatin. Combine it with 1/2 cup of cold water and let it bloom for 5 minutes .
Cook the syrup. in a medium saucepan, combine sugar, corn syrup, and the remaining water. heat it to that perfect soft ball stage at 240° f .
Time this right; you don’t want a sugar volcano.
Whisk in cocoa. Stir in a 1 cup of cocoa powder until smooth after removing from heat. This is where the dessert magic happens!
Whip it good! Slowly pour the hot syrup into the bloomed gelatin while your mixer is on medium speed. It should be fluffy in about 10 minutes .
Flavor it! Once fluffy, add 1 teaspoon of vanilla extract and 1/4 teaspoon of salt. Whip until it's thick and glossy.
Chill out. Pour everything into your pan and smooth the top. Let it sit for at least 4 hours until set.
Dust and cut. Once ready, remove it from the pan, dust with powdered sugar , and cut into squares. Voila your dreamy cocoa marshmallows are ready to shine!
Expert Techniques
Here comes the pro stuff. always keep an eye on temperature control . if your syrup doesn’t reach 240° f , your marshmallows will be a gooey mess.
I learned this the first time i tried this recipe, and it was a bubble bath disaster!
What about quality checkpoints? When all is whipped and piled into the pan, it should resemble soft and smooth marshmallow fluff. That's when you know you're on the right track.
Now for troubleshooting: if your marshmallows aren't setting, they need more time. Patience is essential in chef skills, my friends.
Success Strategies
Okay, let’s chat about the common mistakes folks usually make. not letting your marshmallows chill long enough and skimping on the powdered sugar can lead to sticky situations.
Dust generously, and let the marshmallows set for the whole recommended time.
For quality assurance, always taste a tiny bit of the mixture before it sets. this not only helps you evaluate the flavor but makes you feel like a marshmallow magician! don’t forget about those make-ahead options.
Whip some up for festive dessert recipes to impress your friends during the holidays or get-togethers. they also make for great diy marshmallow treats for kids.
How fun!
And in case you want to switch things up, feel free to explore marshmallow variations : think of adding purees, spices, or flavored extracts for a personalized twist!
Additional Information
So there you have it your ultimate guide to making a cocoa marshmallow recipe that’ll have folks drooling. with the right preparation and a sprinkle of creativity, you’ll create some serious gourmet marshmallows that'll take your hot chocolate and desserts to the next level.
Don’t forget about all the delicious ways you can enjoy them, from s'mores ingredients to vibrant toppings!
Now, if you’re ready for more tips or variations, stick around! There's plenty exciting ahead on making those marshmallows truly your own! Happy cooking!
Extra Delights on Your Cocoa Marshmallow Journey
Alright friends, buckle up because we’re diving into the world of heavenly cocoa marshmallows ! who knew taking a little plunge into homemade marshmallows could yield such a glorious cloud of sweetness? trust me, your tastebuds will thank you.
Now, let’s chat about some really cool ways to enhance your marshmallow making experience!
Pro Tips & Secrets
Let's kick things off with some pro tips straight from my kitchen to yours. first, when you're working with a sugar syrup, timing is everything.
Use a candy thermometer to help you hit that sweet spot around 240° f ( 115° c) . if you take it off too early, your marshmallows might end up a tad gooey.
And if you take it too late? well, let's just say no one likes rock hard treats, right?
Now, if you're in a pinch and want to speed things up, try incorporating flavorful cocoa powder uses earlier in the cooking process.
It not only amps up the chocolatey goodness but also keeps it rich and silky, unlike that chalky stuff you sometimes find in store-bought options.
Oh, and if you're feeling adventurous, adding a splash of vanilla extract while mixing the marshmallow fluff really gives it that gourmet touch. Voila! Fluffy heaven right there.
Perfect Presentation
Okay, so you’ve got your luscious marshmallows ready to go. how are you serving them? let's make it gorgeous! think about plating techniques set those beautiful squares on a decorative plate and sprinkle some colorful bits around them.
You could use crushed nuts or colorful sprinkles. it’s all about that visual appeal !
And don’t forget the garnish ! a little drizzle of melted chocolate or a few chocolatey sweet snacks on top can turn your simple treat into a five star dessert.
And who doesn't love a little flair, right? just picture it: friends come over, and you blow them away with these gorgeous cocoa marshmallow creations.
Suddenly, you’re the dessert superstar !
Storage & make-ahead
Made a big batch of these rich cocoa treats ? not a problem! just let your marshmallows cool completely, dust them with powdered sugar, and pop those babies into an airtight container .
They stay fresh for about a week. just a little tip: if they start to get sticky, toss a bit more powdered sugar on them to keep things fluffy.
If you're thinking ahead for a holiday dessert recipe , you can whip these up a few days in advance.
Just put them in the fridge for a couple of hours before serving for a chewy, cool delight!
Creative Variations
Get ready to switch it up! once you’ve mastered the basic fluffy marshmallow recipe , the sky's the limit . want to jazz things up? how about a peppermint twist for the holidays? just add a splash of peppermint extract to the mix.
Or, if you’re feeling spicy, throw in a hint of cayenne pepper for a unique kick. who said marshmallows couldn’t be adventurous?!
Are you dealing with dietary needs? There's a delightful vegan marshmallow recipe just waiting for you, swapping gelatin for agar agar. Trust me; it’s a game changer!
Complete Nutrition Guide
Now, let’s talk about the nutrition facts of these dreamy squares. each delightful serving packs about 90 calories . so, not too shabby for a sweet treat for kids ! plus, they have no fat it’s pure sugary goodness.
Do keep in mind if you're watching your sugar intake; these treats aren’t exactly guilt free. but hey, we all deserve a little indulgence now and then!
In conclusion, your journey with this delightful cocoa marshmallow recipe can be filled with so much joy! whether you are crafting homemade candy recipes , inspiring your friends, or getting nostalgic over some hot chocolate with marshmallows on top, there’s so much to love.
Look into in, explore those marshmallow variations , and make your creations uniquely yours. happy cooking, folks! 🍫💖
Frequently Asked Questions
What is the best way to store my cocoa marshmallows?
The best way to store cocoa marshmallows is in an airtight container at room temperature. This keeps them soft and prevents them from getting too sticky. If you live in a particularly humid area, consider using parchment paper between layers to avoid clumping.
Can I make variations of the cocoa marshmallow recipe?
Absolutely! You can add extracts like peppermint for a festive touch or even a hint of cayenne pepper for a spicy marshmallow experience. Feel free to experiment with flavours to find your perfect combination!
Why do I need a candy thermometer for the cocoa marshmallow recipe?
A candy thermometer is crucial because it ensures you heat the sugar syrup to the right temperature (around 240°F/115°C). Getting this temperature right is key to achieving the desired texture of those soft, pillowy marshmallows!
How do I prevent my marshmallows from sticking together?
To prevent sticking, be sure to dust your cocoa marshmallows generously with powdered sugar after cutting them into squares. You can also separate layers with parchment paper in your storage container to keep them from clumping together.
How long will my homemade cocoa marshmallows last?
Homemade cocoa marshmallows can last around 1-2 weeks when stored properly in an airtight container. However, for the best taste and texture, enjoying them fresh within the first week is recommended. They might get firmer over time, but they'll still be delightful!
Are cocoa marshmallows suitable for vegan diets?
Yes, you can make a vegan version of cocoa marshmallows by substituting gelatin with agar agar. Just follow the instructions on the agar package for blooming and activating to achieve that fluffy consistency!
Heavenly Cocoa Marshmallows