Quick and Delicious Strawberry Jam in Just 50 Minutes!
- Sweet Strawberry Jam: A Flavorful Journey
- A Taste of Jam History
- Benefits that Go Beyond Taste
- Freshened Up Traditions
- Essential Ingredients Guide
- Mastering the Art of Professional Cooking: Begin with Strawberry Jam
- Pro Tips & Secrets for Stunning Strawberry Jam
- Perfect Presentation for Your Jam
- Storage & Make-Ahead
- Creative Variations to Tickle Your Taste Buds
- Complete Nutrition Guide
- In Conclusion
- Frequently Asked Questions
- 📝 Recipe Card
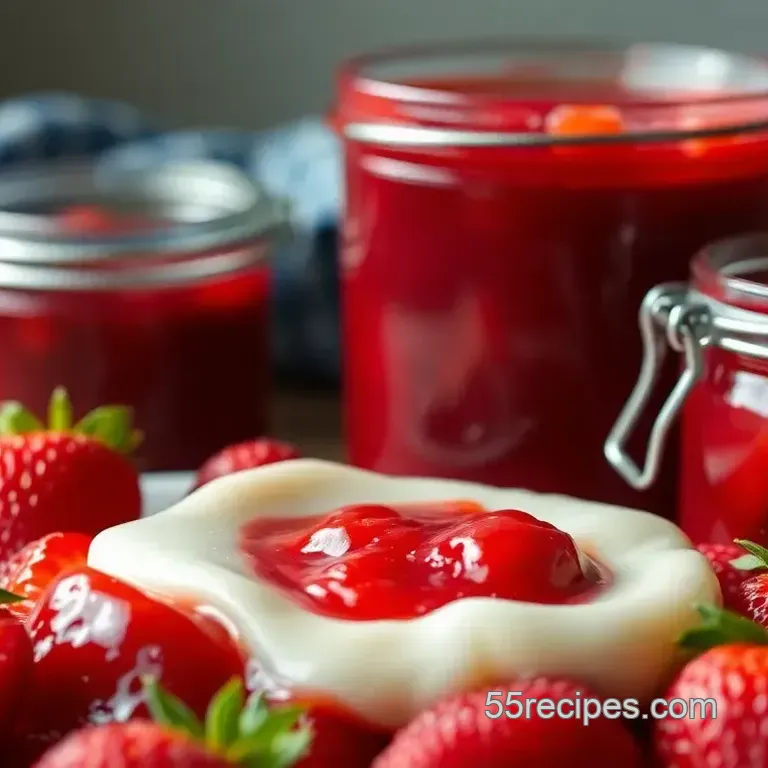
Sweet Strawberry Jam: A Flavorful Journey
Oh my gosh, have you ever tasted sweet strawberry jam fresh from the stove? i remember the first time i tried making jam.
It was a sunny saturday, and my mom had just come back from the farmers' market with the sweetest fresh strawberries .
I couldn’t resist diving in and making homemade strawberry jam . thinking about that juicy goodness still makes my taste buds dance!
Now, let me ask you, have you ever thought about how you could make sweet strawberry jam in 50 minutes ? trust me, it’s easier than you think and so worth it.
This recipe is perfection, packed with nostalgia and flavor, and captures the essence of summer in a jar. plus, it’s an easy jam recipe that will leave you feeling like a culinary rock star!
A Taste of Jam History
Strawberry jam is not just a treat; it has a rich history behind it. preserving strawberries dates back hundreds of years remember those famous jam recipes from your great grandma's kitchen? those jams brought families together, way before the advent of store-bought spreads.
Nowadays, classic strawberry jam is a staple in many homes, adored for its versatility and sweet taste. in fact, jam-making is making a comeback.
People are craving those simple pleasures made from seasonal fruits .
You can whip up this jam in about 50 minutes total , and it’s easy enough for anyone to tackle.
We've got about 10 minutes of prep and 40 minutes of cooking easy peasy! it yields around three cups , enough to keep your toast spreadin' for days or to share as delightful homemade gift ideas.
Benefits that Go Beyond Taste
Let’s talk about why strawberry jam is such a winner. for starters, it’s downright delicious, sure, but it’s also full of nutritional perks! strawberries are packed with vitamins and antioxidants.
They're heart friendly, low in calories, and oh-so-good for your skin. plus, this easy jam recipe can be customized! want a low-sugar strawberry jam ? you can adjust the sugar to your liking or swap it out for natural sweeteners like honey or maple syrup .
This jam is perfect for any occasion. want to impress during a brunch? slather it onto pancakes or toast. it makes for a great cheese platter pairing too! whether it’s a cozy day in or a sunny picnic, nothing beats a dollop of sweet fruit spread on warm bread.
Freshened Up Traditions
The transformation of this traditional treat into something modern doesn’t just stop at flavor. there are tons of strawberry jam variations you can try! toss in some lemon juice , a splash of balsamic vinegar for a savory kick, or mix in other berries for a fruity jam party!
you can even dry herbs like basil and mint to create a unique jam.
How cool is that?
Here’s a kitchen tip for you: when you’re canning homemade jam, always make sure your jars are properly sterilized. you’ll want to prevent spoilage, especially if you’re vying for an amazing homemade gift .
So, are you ready to dive into this process? i promise once you try it, you’ll be hooked! now let’s move on to the fun part gathering our ingredients! with the right prep and love for strawberries, we’ll embark on an adventure packed with flavor and nostalgia.
You won’t just be making jam; you’ll create memories in your kitchen! ready, set, let’s jam!
Essential Ingredients Guide
When it comes to making jam, knowing your core ingredients is key. whether you're diving into a classic homemade strawberry jam or trying your hand at a creative berry jam recipe , understanding what goes into your spread can transform your culinary game.
Let’s break it down.
Premium Core Components
First off, you need fresh ingredients. for our strawberry jam, grab about 4 cups of fresh strawberries , hulled and sliced.
If you’re measuring in metric, that’s around 1.5 pounds or 680 grams . looking for quality? ripe strawberries are your best bet the ones that smell heavenly and are a bright red.
Storage is just as critical. keep strawberries in the fridge, unwashed, until you’re ready to use them. they last about 3-7 days when fresh.
If you need more time, go for frozen strawberries they work fantastic too! just make sure they're well thawed and drained of excess moisture.
Signature Seasoning Blend
Now, let’s talk sweetness. you’re gonna need 1½ cups of granulated sugar . if you're aiming for a low-sugar strawberry jam , you can substitute with natural sweeteners like honey or agave.
Just know that you might have to adjust the cooking times a bit.
Next up, you’ll want a splash of acidity. 1 tablespoon of fresh lemon juice does the trick beautifully. not only does it help balance the sweetness, but it also extends shelf life.
And trust me, nothing brings out the flavor in strawberries quite like lemon!
Smart Substitutions
Let’s be real sometimes you just don’t have all the ingredients on hand. no problem! if you’ve got a lemon lime soda lying around, that can add the required acidity, or if you're feeling adventurous, a splash of balsamic vinegar creates a tangy twist that’s to die for.
For the sugar, if you’re trying to avoid it for dietary reasons, maple syrup or agave can step in. just bear in mind, sugar plays a crucial role in the jam-making process, so tread carefully if you’re really trying to skip it.
Kitchen Equipment Essentials
You don’t need fancy gadgets here just the basics. a large pot , a potato masher , and sterilized jars are your mvps.
If you’re planning to go full canning mode , a canning funnel may become your new best friend. remember to sterilize those jars! just boil them in water for about 10 minutes .
This keeps spoilage at bay nothing worse than making a batch of jam and having to toss it because it went bad.
Tasty Tidbits on Making Sweet Strawberry Jam
With our ingredients and tools lined up, you’re a hop, skip, and jump away from making that sweet treat. Did you know that the cooking time for our strawberry jam is just around 40 minutes ? Seriously! In under an hour, you can Make Sweet Strawberry Jam in 50 Minutes !
And don't worry about making it perfect the first time. jam-making is an art, but it's also a forgiving process.
Plus, experimenting is half the fun. maybe you decide to toss in some fresh herbs for a unique flavor. or even mix in a different fruit for fun variations how about some raspberry spiced strawberry jam ?
Making homemade jam is not just about spreading sweetness on your breakfast toast. it’s a chance to bond with the season, create memories, and maybe even whip up some cute homemade gift ideas for your pals.
So, gather your berries, grab your pots, and get ready to take your culinary adventure with strawberries to delightful new heights.
Up next, i’ll walk you through the step-by-step instructions to turn all these amazing ingredients into a luscious, flavorful strawberry jam that’ll make you wonder why you ever bought store-bought!
Mastering the Art of Professional Cooking: Begin with Strawberry Jam
Oh my gosh, are you ready to dive into the delicious world of homemade strawberry jam ? making jam can be so satisfying! you just can’t beat that sweet, tart bite of fresh strawberries spread on warm toast, right?
today, i’m here to guide you through professional cooking methods that can transform your kitchen skills.
Let’s set the stage with some essential preparation steps, and before you know it, you’ll be whipping up a satisfying batch of quick and delicious strawberry jam in just 50 minutes !
Essential Preparation Steps
Before you jump into cooking, let’s talk mise en place . for you non-chefs, that’s just a fancy way of saying, “have your stuff ready.
” you want to hulk that countertop with your ingredients: 4 cups of fresh strawberries , 1.5 cups of sugar , and that sprinkle of lemon juice .
It keeps things flowing smoothly, trust me!
Time management tips? keep an eye on the clock. you’ve got 10 minutes to prep and 40 minutes to cook, so divide your time wisely.
Knowing how long each step takes can make you feel like a pro.
Now, organization is key. put everything within arm's reach. no scrambling around for that potato masher, ok? and safety, my friends, is super important.
Keep a towel handy for those hot pots, and remember: hot jam can burn! always be cautious around boiling sugar; it’s not a fun time if you get splashed.
The step-by-step Process
Now, let’s get into the nitty gritty of making this easy jam recipe . Here’s how you’ll go about it:
Prepare Strawberries: Hull and slice them. The smaller, the better!
Combine Ingredients: In that big pot, mix your strawberries with sugar and lemon juice .
Mash Strawberries: Use your fork or masher to smash them up but leave a few chunks for texture nobody likes a totally smooth jam, right?
Cook mixture: turn the heat up to medium high . stir until the sugar disappears and bring it to a boil. then let that bad boy simmer for 30- 40 minutes .
Make sure you’re stirring often.
Add Pectin (optional): If you want it thicker, toss in some pectin here and keep on boiling for another minute or two.
Test for Doneness: Take a spoonful and drop it on a cold plate. Wait a minute. If it sets, woohoo! You’re golden!
Jar the Jam: Pour it into your sterilized jars, leaving a little space at the top. Cap it with a lid.
Cool and Store: Let it chill at room temperature before tossing it in the fridge.
Expert Techniques
You're not just making jam; you're mastering strawberry preserving methods here.
When heating your mixture, remembering those temperature control points is vital. Stay at a rolling boil for effective thickening. Pay attention; when it starts to bubble aggressively, that’s your cue to stir like a maniac!
And let’s chat about troubleshooting. if you find your jam hasn’t thickened enough after cooling, don’t panic! just toss it back in a pot, reheat, and add a smidge of pectin to help it out.
It’s all about adjusting as you go along.
Success Strategies
You wanna succeed, right? let’s avoid those common mistakes like overcooking, which turns your lovely jam into a sticky, gunky mess.
Keep an eye on your timing and always check for those key indicators the plate test is your best friend here!
Quality assurance is essential, ladies and gentlemen! use ripe strawberries; they’re sweeter and make your jam sing. and if you’re prepping to gift your homemade strawberry jam , make sure to sterilize those jars properly for canning safety .
Okay, side note : if you are short on fresh strawberries, feel free to use frozen. Just remember to drain the excess moisture before going ham with the recipe.
Wrapping It Up
In the end, this whole experience isn’t just about jam; it’s about building skills in your kitchen! with these basics, you can experiment and create variations, from low-sugar strawberry jam to an exotic blend featuring spices.
Trust me, no one’s going to complain about a homemade gift from your kitchen. those delicious summer recipes will floor your friends during brunch!
So go ahead and put your apron on. you’re now on your way to making delightful strawberry jam, perfect for breakfast spreads or just evening snacks.
Stay tuned for more additional information and hopefully delicious adventures ahead!
Pro Tips & Secrets for Stunning Strawberry Jam
Making jam is like a little kitchen magic. seriously, once you get the hang of it, you’ll be whipping up homemade strawberry jam and feeling like a pro! here are a few pro tips to get you there.
First off, choose ripe strawberries. they’re sweeter and bursting with flavor. you wanna use the kind that makes your heart sing, right? if you can, get them from a local farm! it's so much better than those sad store-bought ones that taste like cardboard.
Also, don’t rush the cooking time. the strawberry jam cooking time isn’t just about boiling strawberries and sugar together. it’s about letting those flavors meld like a good friendship over time.
Make sure you stir frequently to avoid sticking. i’ve learned this the hard way!
Oh, and if you're in a hurry, time saving techniques can help. try chopping those strawberries ahead of time or even making the jam in batches.
You can also use a potato masher or fork to save some energy while mixing.
When it comes to flavor enhancements, a squeeze of lemon juice not only brightens everything up but also helps preserve that gorgeous color.
Plus, you can toss in some vanilla or a tiny pinch of salt to amplify those sweet notes.
Perfect Presentation for Your Jam
Now, let’s talk about making it look as good as it tastes because presentation matters ! when you're ready to jar up that beautiful jam, think about your plating techniques.
Use sterilized jars that look cute and are ready for instagram, okay?
For a fun touch, consider dressing up your jars with cute labels and some twine or fabric on top. it’s such a simple method to turn your homemade gifts from the kitchen into something that’ll wow anyone receiving it.
A little flair goes a long way!
And let’s not forget garnishing. if you’re serving your jam on toast, why not add a sprig of mint on top? it’s all about those color combinations that make people go, “whoa!” at your beautiful creations.
Storage & make-ahead
You’re gonna want to know how to store your strawberry jam so it remains tasty. to keep it fresh, make sure to let your jam cool completely before sealing it with lids.
The heat creates a vacuum, keeping everything nice and delicious.
In the fridge, your homemade strawberry jam should last about 2-3 weeks . for longer storage, think about canning! proper canning safety for homemade jams means sterilizing your jars and making sure they’re sealed tightly.
Trust me, you’ll thank me later when you open that jar in the middle of winter and it tastes like summer.
If you decide to make-ahead, you can easily whip this jam up on the weekend and have it ready for your weekday breakfasts. Talk about a quick jam making solution!
Creative Variations to Tickle Your Taste Buds
Feeling adventurous? There are so many strawberry jam variations you can try. Mix things up by adding other fruits like blueberries or raspberries for a fabulous berry medley.
Want to give it a twist? try adding a splash of balsamic vinegar or even some herbs like basil. sounds fancy, right? you can also experiment with sugar substitutes like honey or maple syrup for a low-sugar strawberry jam experience.
And if fresh strawberries aren’t calling your name, you can use frozen ones! Just thaw and drain them first. Easy peasy!
Complete Nutrition Guide
Let’s keep it real for a sec. it’s always good to know what you’re putting in your body. your homemade strawberry jam coming in at about 60 calories per serving is a great addition to your toast or yogurt.
Plus, it has some fiber, so you don’t have to feel guilty!
You can tweak the sweetness level to suit your taste. this is perfect if you're watching your sugar intake! check the portion guidance two tablespoons is typical, but let’s be real: we all love to slather it on extra thick sometimes.
In Conclusion
So there you have it a delightful journey to make sweet strawberry jam in 50 minutes ! with these tips and tricks, you will impress your friends and yourself! the joy of sharing homemade goodies is unparalleled.
Whether it’s for special occasions or just because, this jam shines. now, get your strawberries and start creating something special.
Happy jamming!
Frequently Asked Questions
How long does it take to make sweet strawberry jam in 50 minutes?
This recipe is designed to be completed in just 50 minutes, which includes approximately 10 minutes of prep time and around 40 minutes of cooking time. You'll be able to enjoy freshly made strawberry jam in no time!
What should I do if my strawberry jam is too thin?
If your jam is too thin, you can return it to the heat and simmer it a bit longer to allow excess moisture to evaporate. Alternatively, you can add a bit more fruit pectin to help thicken it up. Just be sure to stir continuously to avoid burning!
Can I use frozen strawberries to make sweet strawberry jam in 50 minutes?
Yes, you can use frozen strawberries! Just thaw them first and drain any excess moisture before using them in the recipe. Frozen strawberries can be a convenient option when fresh ones are not available.
How should I store my homemade strawberry jam?
Once your jam is cooled, store it in sterilized jars and keep it in the refrigerator. Homemade jam typically lasts for 2-3 weeks. You can also freeze it for longer storage just ensure the jars are freezer safe and leave some headspace for expansion!
Can I substitute sugar in the strawberry jam recipe?
Absolutely! You can use natural sweeteners like honey or maple syrup as substitutes for granulated sugar. Just keep in mind that this may change the flavor slightly, and you might need to adjust the quantity to achieve your desired sweetness level.
What are some additional flavors I can add to my strawberry jam?
Consider adding a splash of balsamic vinegar for a unique twist, or mix in other berries like blueberries or raspberries for a berry blend. You can also infuse your jam with fresh herbs such as basil or mint for a refreshing flavor profile!
Make Sweet Strawberry Jam In 50 Minutes
Ingredients:
Instructions:
Nutrition Facts:
| Calories | 60 |
|---|---|
| Fat | 0g |
| Fiber | 0.5g |
