Guilt-Free Mini Pumpkin Pies
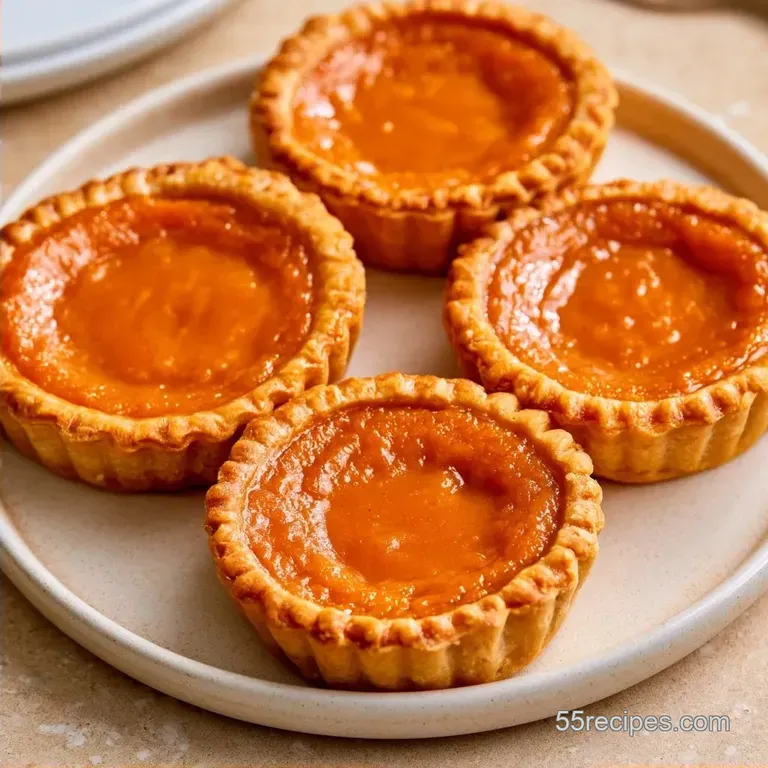
- Time: 15 min active + 25 min bake
- Flavor/Texture Hook: Spiced custard in a flaky, buttery shell
- Perfect for: Holiday parties, dessert platters, or cozy autumn weekends
Have you ever noticed how mini desserts often feel more concentrated in flavor than full-sized versions? It comes down to the proportions. By scaling down the pie, you maximize the crust-to-filling ratio in every mouthful, and the quicker baking time prevents the filling from developing those tough, overbaked edges.
I once spent an entire afternoon perfecting a massive pumpkin pie for a family gathering, only for the center to collapse the moment I sliced into it. It was a total disaster of orange mush. That experience taught me that opting for Mini Pumpkin Pies is the far more reliable approach for holiday hosting. Not only are they adorable individual servings, but they also maintain their structure perfectly.
These bites are a study in complementary flavors. Each mouthful begins with a savory, buttery pastry crunch, followed by the rich sweetness of the custard, and finishes with a fragrant blend of clove and cinnamon. It's the ultimate comfort dessert that looks far more sophisticated than the actual effort required.
Easy Mini Pumpkin Pies for Everyone
Condensed Milk: This ingredient provides a thick, creamy base that sets quickly, preventing the center from sinking.
Small Volume: Heat reaches the middle of a mini pie much faster than a full one, so the eggs cook through without drying out the edges.
If you're feeling brave and want to make your own dough from scratch, my all-butter pie crust is the way to go. It gives you a bit more control over the salt and flake.
| Method | Time | Texture | Best For |
|---|---|---|---|
| Full Sized Pie | 60+ mins | Softer center | Traditional dinner |
| Mini Pies | 40 mins | Higher crust ratio | Parties/Snacking |
The trick is in the aeration. When we beat the filling for that final minute, we're adding tiny bubbles that keep the custard from feeling too heavy on the tongue.
Gear for the Job
While you can get by with basic gear, these tools make the process much smoother. First, get a standard 12-cup muffin tin, which is the ideal size for this recipe. To stamp out the dough circles, I use a 2-inch round cutter or a sturdy drinking glass.
A silicone pastry brush is perfect for coating every corner of the tin with melted butter. When preparing the filling, a large mixing bowl paired with a handheld electric mixer is the most effective combination. You can certainly use a whisk, but an electric mixer clears out pumpkin puree lumps far more quickly.
Lastly, have a wire cooling rack on hand. To avoid steaming the bottoms and losing that crunch, don't leave the pies in the hot tin for too long. Moving them to a rack allows air to flow, ensuring the base stays firm.
The Flavor Building Blocks
Pumpkin puree serves as the foundation of this recipe. I recommend using canned puree rather than pumpkin pie filling to maintain total control over the sugar and spice levels. To offset the sweetness of the condensed milk, evaporated milk provides a subtle, toasted dairy note.
The eggs are essential for the structure; without them, the filling would be more like a pudding. That iconic, nostalgic aroma comes from the pumpkin pie spice, typically a blend of cloves, nutmeg, ginger, and cinnamon. A pinch of salt is mandatory here to balance the sugar and amplify the spices.
The Main Components:
- 1 package (400g) refrigerated pie crustsWhy this? Quick and ensures a reliable flake
- 1 tbsp (14g) melted butterWhy this? Stops sticking and adds richness
- 15 oz (425g) pumpkin pureeWhy this? Allows for precise spice adjustments
- 1/2 cup (120ml) evaporated milkWhy this? Provides creamy texture without excessive fat
- 1/2 cup (100g) sweetened condensed milkWhy this? Ensures a dense, stable custard
- 2 large eggs (100g)Why this? Acts as a binder to set the filling
- 1 tsp (5g) vanilla extractWhy this? Softens the intensity of the spices
- 1 tbsp (8g) pumpkin pie spiceWhy this? Delivers that iconic fall taste
- 1/4 tsp (1.5g) saltWhy this? Brings out the depth of every ingredient
| Original Ingredient | Substitute | Why It Works |
|---|---|---|
| Refrigerated Crust | Puff Pastry | Higher rise and flakier. Note: Stronger butter flavor |
| Evaporated Milk | Whole Milk | Comparable liquid volume. Note: Slightly less creamy |
| Condensed Milk | Heavy Cream + Sugar | Replicates the consistency. Note: May need more sugar |
Ensure your eggs reach room temperature before you begin. Using cold eggs can cause the milk fats to seize, which may result in a slightly grainy filling.
Timing and Temperature
Precision is everything with custard. If the oven is too hot, the top will crack before the middle is set. If it's too low, the crust will get soggy before the filling cooks.
- Oven Temp: 350°F (175°C)
- Prep Time: 15 minutes
- Bake Time: 25 minutes
- Total Time: 40 minutes
- For a firmer set
- chill 30 minutes after baking.
- For a softer center
- pull them out 2 minutes early.
- For a crispier base
- blind bake shells for 5 minutes.
Step by step Baking
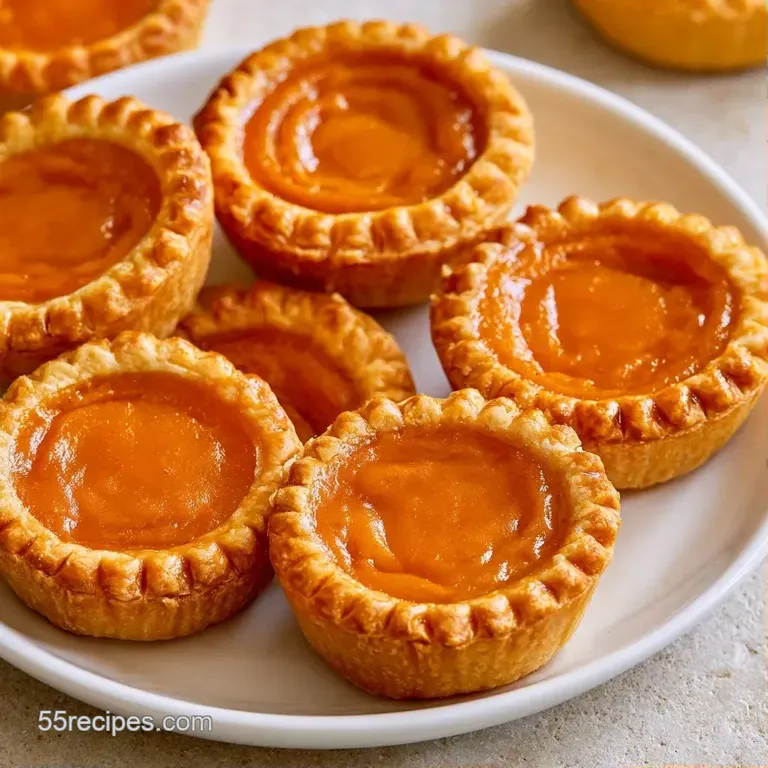
Phase 1: Preparing the Shells
- Brush melted butter into the bottom and sides of each muffin cup. Note: This ensures the pastry slides out without tearing
- Roll out the pie crust on a floured surface. Use a 2 inch glass to stamp out circles slightly larger than the cups.
- Press each circle into the muffin cup. Push the dough up the sides and use your thumb to flatten the bottom. Note: This removes air pockets that could cause the crust to bubble up
Phase 2: Creating the Filling
- Beat the pumpkin puree, sweetened condensed milk, and evaporated milk in a large bowl. Mix until the texture is smooth and glossy.
- Whisk in the eggs one at a time. Stir in the vanilla, pumpkin pie spice, and salt.
- Beat the mixture on medium speed for 1 minute. Note: This incorporates air for a lighter, less dense result
Phase 3: The Bake and Set
- Fill each pastry shell with the pumpkin custard. Leave a tiny bit of space at the top to prevent overflow.
- Bake at 350°F (175°C) for 25 minutes until the edges are set and the centers jiggle only slightly.
- Let them cool in the tin for 5 minutes before moving them to a wire rack.
Fixing Common Pie Issues
The most common struggles with Mini Pumpkin Pies are raw bottoms or cracked tops. These issues usually stem from the oven temperature or how the pastry was handled.
If the custard remains too runny after baking, it was likely underbaked, as these fillings need to reach a specific internal temperature to set. Conversely, deep surface cracks are a sign of overbaking, which causes the eggs to over-coagulate and expel moisture.
Preventing Soggy Bottoms
Sogginess occurs when the filling seeps into the crust before the dough can seal. Pre-baking the shells for a few minutes creates a protective barrier.
Preventing Surface Cracks
High heat is typically the culprit for cracks. Keep your oven at 350°F and avoid the convection setting if possible, as the forced air can dry out the surface too quickly.
Fixing Filling Separation
A layer of liquid on top usually means the eggs weren't fully incorporated or the mixture was over-beaten. To prevent this, whisk your eggs in one at a time.
| Problem | Root Cause | Solution |
|---|---|---|
| Soggy Crust | Filling moisture | Blind bake shells 5 mins |
| Cracked Top | Over baking | Reduce bake time by 2-3 mins |
| Grainy Texture | Cold eggs | Use room temperature eggs |
| Shrunken Filling | Too much air | Beat for exactly 1 minute |
If you have extra pumpkin puree, you could make an olive oil pumpkin cake for tomorrow. It's a perfect way to finish the rest of the can.
Storage and Waste Tips
While these pies are durable, they are tastiest when eaten within a few days. Store them in a single layer inside a container with a lid. If you need to stack them, place parchment paper between layers to keep them from sticking. They will stay fresh in the refrigerator for 3 to 4 days.
These also freeze wonderfully for later. Start by flash freezing them on a tray for one hour, then move them into a freezer bag to prevent them from smashing together. They'll last about 2 months in the freezer. When you're ready, let them thaw in the fridge overnight.
To keep the crust crisp, avoid reheating in the microwave. Instead, use an oven set to 300°F (150°C) for about 5 to 8 minutes.
Avoid throwing away your leftover pie crust scraps. Gather the pieces, roll them together, and bake them with a sprinkle of sugar on top as "cinnamon chips."
Creative Flavor Twists
Once you've got the base down, you can really play with the flavors. I love adding a small dollop of cream cheese to the bottom of the crust before adding the pumpkin filling. It creates a cheesecake style layer that adds a nice tang.
For a different crunch, try using a graham cracker crust. Pulse graham crackers with melted butter and sugar, then press that into the muffin tin instead of the pastry. It gives a more "cheesecake" vibe and pairs well with the creamy filling.
If you want something more sophisticated, try a puff pastry base. The layers are much taller and airier than standard pie crust. Just be careful with the filling amount, as puff pastry rises quite a bit.
You can also tweak the spice profile. Adding a pinch of ground cloves or a bit of fresh grated ginger can make the Mini Pumpkin Pies taste more "grown up" and less like a store-bought mix. For an intense maple profile, swap the vanilla extract for maple syrup.
| Variation | Base Change | Flavor Shift |
|---|---|---|
| Graham Cracker | Crushed Cookies | Sweeter, sandy texture |
| Puff Pastry | French Pastry | Airy, buttery, tall |
| Maple Twist | Maple Syrup | Woody, rich sweetness |
The most important thing is to keep the liquid ratios the same. If you add more "extras" to the filling, you might need to add an extra egg yolk to make sure it still sets.
Best Pairing Suggestions
These pies are rich, so they need something to cut through that weight. A dollop of unsweetened whipped cream is the classic choice. I like to add a tiny pinch of cinnamon to the cream to tie everything together.
If you're serving these at a brunch, they go great with a sharp, bitter coffee or a hot Earl Grey tea. The tannins in the tea balance the sugar in the condensed milk perfectly.
For a full dessert spread, pair them with some sliced crisp apples or a handful of toasted pecans. The fresh fruit adds a brightness that keeps the plate from feeling too heavy.
Chef's Note: Try adding a tiny pinch of flaky sea salt on top of the whipped cream. It sounds weird, but it makes the pumpkin flavor taste more vivid.
The result is a treat that feels like a hug in a muffin tin. These Mini Pumpkin Pies are the kind of thing that makes a house smell like autumn the second they hit the oven. Just make sure you don't eat too many before they hit the table.
Recipe FAQs
How long do mini pumpkin pies need to bake?
Bake them for 25 minutes at 350°F (175°C). They are ready once the centers are set.
How to make your own mini pie?
Stamp circles from refrigerated pie crust and press them into buttered muffin cups. Fill the shells with pumpkin custard and bake until firm.
Is it true that I should pre-bake the crusts for 10 minutes?
No, this is a common misconception. These shells bake perfectly alongside the filling in one step.
Can I freeze these for later?
Flash freeze the pies on a tray for one hour before moving them to a freezer bag. This keeps them from smashing and they will last about 2 months.
What prevents the crust from sticking?
Brushing the bottom and sides of the muffin cups with melted butter ensures a clean release. This creates a non-stick barrier between the dough and the pan.
Why are the centers still liquid after baking?
Ensure your oven is exactly 350°F. Bake them for a few additional minutes until the middle no longer jiggles.
Could I use a different milk for the filling?
You can substitute the milk with a creamy alternative. If you enjoyed the texture of our homemade almond milk, it works well here.
Mini Pumpkin Pies with Condensed Milk