Quick Pressure Cooker Fried Chicken Delight
- Discovering the Magic of Quick Pressure Cooker Fried Chicken Delight
- Essential Ingredients Guide
- Mastering the Art of Professional Cooking: Quick Pressure Cooker Fried Chicken Delight
- Pro Tips & Secrets for Quick Pressure Cooker Fried Chicken Delight
- Perfect Presentation
- Storage & Make-Ahead
- Creative Variations
- Complete Nutrition Guide
- Expert FAQ Solutions
- 📝 Recipe Card
Discovering the Magic of Quick Pressure Cooker Fried Chicken Delight
Have you ever had one of those days when the thought of slaving over a hot stove feels more exhausting than running a marathon? yeah, me too! last week, i found myself in that same boat.
I was hungry for some good ol' fried chicken , but i just didn’t have the energy to deal with the whole frying mess.
That’s when i remembered my trusty pressure cooker. oh my gosh! i turned a classic southern comfort food into a simple, speedy meal with my quick pressure cooker fried chicken delight recipe! trust me; it's a game changer.
Fried chicken has been around for centuries. historically, cooks would deep fry chicken until it shone golden and crisp. but let’s be real, deep frying can be overwhelming.
Now, with modern techniques like pressure cooking , you can get that same beloved flavor without all the fuss! this recipe strikes that perfect balance: crispy on the outside, tender and juicy on the inside.
Who doesn't love a dish that makes everyone gather around the dinner table? in just about an hour yes, i said an hour you'll have dinner ready without breaking a sweat.
A Quick Snapshot of The Recipe
Wondering about the time commitment? prep time is around 15 minutes (30 if you fancy marinating overnight for extra flavor).
Then, you pop it in the pressure cooker for just 20 minutes . so total? roughly 65 minutes ! easy peasy.
And what about costs? with around four servings , this recipe is budget friendly. plus, you can utilize your leftovers for meal prep ideas throughout the week.
Why This Recipe Rocks
You might be thinking, “why should i ditch my traditional fried chicken recipe ?” great question! here’s why this version stands out.
First off, the health benefits are huge. by using a pressure cooker, you can cook with less oil. that means fewer calories while still enjoying that classic taste.
It's a win-win!
Also, this dish is super versatile. love a kick? toss in some cayenne pepper. looking for a gluten-free option? swap the flour with your fave gluten-free brand.
Perfect for any occasion! be it a quick weeknight dinner or impressing guests at a gathering, this dish is a family friendly meal that fits right in the comfort food category.
The Cooking Experience
Let’s not forget the joy of food, right? when i was experimenting with this recipe, i learned a few cool pressure cooking techniques along the way.
Like, did you know that marinating your chicken can really amp up the flavors? if you can, try to let it sit overnight.
You’ll be surprised at how tender and juicy it turns out. and those spices garlic and onion powder sing every time.
Plus, there’s nothing like the smell of seasoned chicken cooking away in your kitchen!
I also tried a little broiling action at the end to give it that crispy finish that is oh-so-important for fried chicken.
Seriously, giving it a few moments under the broiler makes such a difference. just keep an eye on it to avoid a charred disaster!
With all this said, are you ready to get those flavors dancing in your mouth? next up, i’ll guide you through the ingredients you'll need to whip up this delicious quick pressure cooker fried chicken delight.
Trust me, once you try it, you’ll be sharing this recipe with your friends and family like the rockstar chef you are.
Essential Ingredients Guide
When it comes to whipping up some incredible pressure cooker recipes, especially that quick pressure cooker fried chicken delight , knowing your ingredients is key.
This guide covers everything from what makes a quality ingredient to smart substitutions that keep your cooking game strong. let’s dive into the essentials!
Premium Core Components
First off, let’s talk about the premium core components for your fried chicken. Start with detailed measurements —it's important to get it right. Here's a quick rundown for the marinade and breading:
Chicken Marinade:
- 2 pounds (900g) bone-in, skin-on chicken pieces
- 1 cup (240ml) buttermilk
- Seasonings: garlic powder, onion powder, paprika, salt, and pepper.
Breading:
- 1 cup (120g) all-purpose flour
- Baking powder, salt, and a bit of spice depending on your taste.
Quality indicators for these ingredients? Look for fresh, vibrant spices and buttermilk that smells good (not sour!). If your chicken is bright pink and the skin is firm, you're good to go.
As for storage guidelines , your dried spices can last a long time in a cool, dark place. chicken? use it within 2 days if it's raw, or pop it in the freezer for later use.
Freshness tips ? always check expiration dates and trust your nose if it smells off, toss it!
Signature Seasoning Blend
Now onto the signature seasoning blend . it's all about the spice combinations . i swear by a mix of garlic and onion powder to amp up the flavor.
If you’re feeling fancy, you can add some cayenne for kick.
When it comes to herb selections , consider pairing thyme and rosemary for a country style magic. you can also experiment with regional variations try cajun spices for a spicy twist, or italian herbs for a fresh feel.
Smart Substitutions
Now let’s get handy with smart substitutions . missing buttermilk? just mix regular milk with a splash of vinegar, and voila! need to go gluten-free? swap in some gluten-free flour for the breading.
For those keeping an eye on their diets, you can always opt for skinless chicken. there are tons of dietary modifications that keep your meal light without sacrificing flavor.
I often use quick marinating tips like using a vacuum sealed bag; it cuts marinating time dramatically!
In case you run out of flour, use crushed cornflakes or panko crumbs for your emergency replacements for that nice crispy texture perfect for an easy chicken recipe while keeping it fun.
Kitchen Equipment Essentials
Let’s not forget the tools of the trade! here are your kitchen equipment essentials for preparing that delicious fried chicken.
You definitely need a pressure cooker ; if you don’t have an instant pot, a stovetop version will work, too.
You’ll also want mixing bowls, a whisk, and some trusty tongs. If you own a kitchen thermometer, it can help check that the chicken reaches a safe cooking temperature 165° F ( 75° C) internal goes without saying!
For storage solutions , keep your spices in airtight containers and organize them to make grabbing them super efficient.
With this essential ingredients guide, you’re all set to create your masterpiece Quick Pressure Cooker Fried Chicken Delight ! Now that you've got the basics down, let’s roll into the step-by-step instructions, shall we? Keep the flavors flowing and let's get cooking!
Mastering the Art of Professional Cooking: Quick Pressure Cooker Fried Chicken Delight
Let’s talk about cooking. i mean really cooking. not just slapping something in the microwave and calling it dinner. we're diving into the world of professional cooking methods , and trust me, once you get the hang of them, you can whip up dishes that leave your friends and family saying, “wow, are you a chef or what?” we're focusing on the quick pressure cooker fried chicken delight .
Yup, that means crispy, tender fried chicken in no time. and i'm here to guide you through it step-by-step.
Essential Preparation Steps
Starting off, there’s something every kitchen wizard must know: mise en place . it’s a french term that sounds fancy, but it simply means “everything in its place.
” have your ingredients measured and ready to go. for our fried chicken, that means having your chicken, buttermilk, spices, and flour all prepped ahead.
Now, let’s chat about time management . cooking is like a dance. you’ve got to move gracefully without stepping on your own toes.
Start with marinating your chicken. i suggest at least 30 minutes , but honestly, give it a good overnight soak for the best flavor.
The next step is breading and sautéing, which should all take no more than 15- 20 minutes . keep an eye on the clock; timing is everything!
Then there’s organization . have your work area clear of clutter. it really is a game changer. and remember, safety first! be careful with that hot oil.
If you're sautéing in your pressure cooker, splashes can happen.
step-by-step Process
Alright, let’s get to the juicy part. Here’s how to pull off this dish like a pro:
Marinate the chicken: in a big bowl, mix 1 cup of buttermilk , 1 tablespoon of hot sauce , and all those spices like 1 teaspoon garlic powder and onion powder .
Toss in the chicken and let it hang out for 30 minutes or even overnight.
Bread the Chicken: Now, in another bowl, mix your flour , baking powder , and seasonings. Dredge each piece for a perfect coating.
Sauté the chicken: heat up your pressure cooker on “sauté” mode, then add 2 tablespoons of vegetable oil . cook the chicken pieces for about 4- 5 minutes per side until they're golden brown.
Pressure cook: add ½ cup of water or chicken broth , then pop the chicken back in and seal that lid.
Cook on high pressure for 10 minutes . after that, let it rest for 5 minutes before releasing any remaining pressure.
Crisp it Up: If you want that extra crunch, throw the cooked chicken under a broiler for 3- 5 minutes . Trust me, it’s worth it.
Expert Techniques
Here’s where we get into those expert techniques . the key steps here? make sure your chicken hits 165° f ( 75° c) internally.
And don’t skip that marinating step; it works wonders for tenderness.
If that breading starts to come off when you cook, your marinade was probably too wet. next time, let it drain a bit before dredging.
And if you’re worried about not having crispy skin? try cooking in smaller batches. this way, you won’t overcrowd the pot and you’ll maintain that crispiness.
Success Strategies
We’ve all been there burnt edges or soggy crusts. to avoid common mistakes, keep your cooking temperatures steady. that deep fried crunch is all about the oil being hot enough.
Also, if your chicken starts to look tired and oily, it might need some more time in the broiler.
And for the ultimate quality assurance ? Check your chicken’s internal temperature. It’s all about cooking chicken thighs in a pressure cooker correctly for tender juicy chicken every time.
Feeling up for some meal prep? You can prep your chicken ahead of time, and throw it in the pressure cooker on a busy weeknight. Easy peasy!
Wrapping It Up
So there you go a step into the pro-cooking world with an easy, delicious recipe. the quick pressure cooker fried chicken delight will quickly become a family favorite.
Pair it with some classic sides like mashed potatoes or coleslaw, and you’ve got yourself a meal that could rival any southern kitchen.
Now that you’re prepped and ready for action, let’s move on to the next part. do you need more tips and tricks? how about side dish ideas or the best dipping sauces? stay tuned for more.
Pro Tips & Secrets for Quick Pressure Cooker Fried Chicken Delight
Alright, folks let’s dive into the world of flavors and textures that make quick pressure cooker fried chicken delight the star of your dinner table! you might be asking, "what’s the secret sauce to this crispy goodness?" well, grab a seat and let's chat about my best kept tips.
Chef's Personal Insights
Whenever i whip up this recipe, i can't stress enough how important the chicken marinade is. seriously, marinating your chicken in buttermilk not only adds flavor but also tenderizes it! i usually let it soak overnight to really pack in that goodness.
Trust me, the difference is wild. if you're in a rush, even 30 minutes of marinating will help a ton, especially with a touch of garlic and onion powder to amp up that savory flair.
Time Saving Techniques
Life's busy, right? one of my favorite time savers is the sauté function on my pressure cooker. instead of deep frying (which makes a mess), you can get that golden brown crust while using much less oil.
Plus, it cuts down the cook time for fried chicken. we’re talking crispy outside and tender juicy chicken inside in about 20 minutes.
No one has time to wait around!
Flavor Enhancement Tips
Want to kick it up a notch? toss a little paprika or cayenne in your breading mix for a mild kick.
Oh, and salt don’t skimp on that, y’all. a well seasoned chicken is a happy chicken. mix it all up, and you'll have the crispiest fried chicken recipe ever to grace your table!
Presentation Advice
Now, let’s talk about visuals. trust me, plating techniques can elevate your dish tremendously. use a large white platter for contrast to really make that crispy fried chicken pop! and, sprinkle some fresh parsley or chives over it to add color.
You’ve poured your heart into this dish, so let it shine when you serve it.
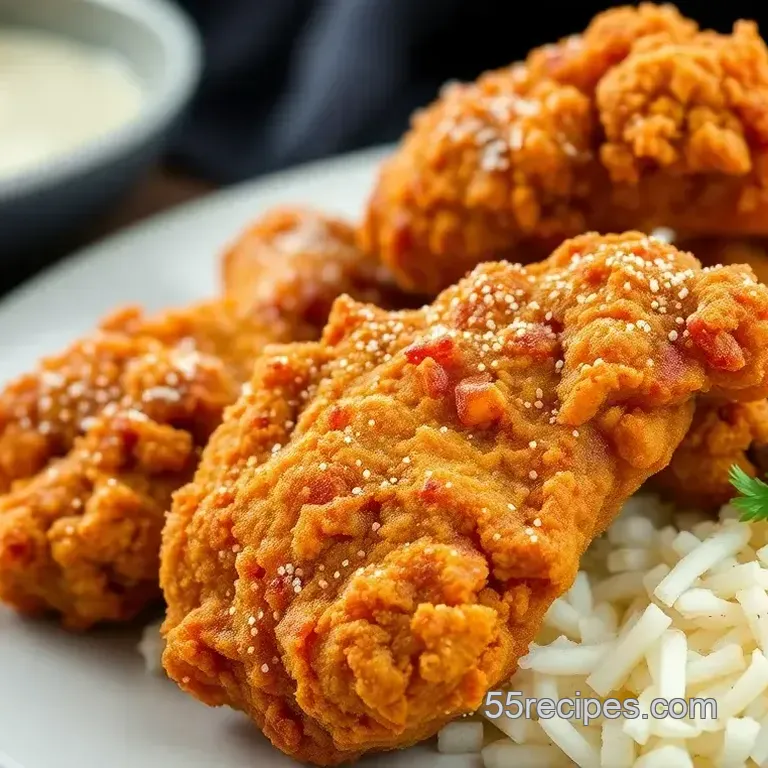
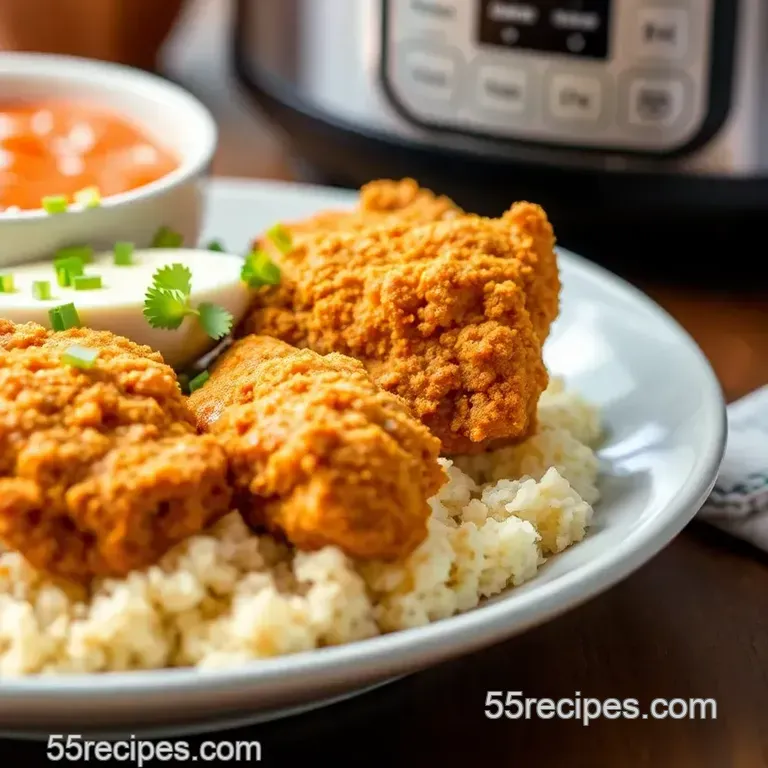
Perfect Presentation
When it comes to presenting your Quick Pressure Cooker Fried Chicken Delight, it’s all about the visual appeal .
Plating Techniques
Start with a bed of creamy mashed potatoes or a vibrant coleslaw. then, stack those golden brown chicken pieces lovingly on top.
It’s all about that height, y’know? feeling extra fancy? try a drizzle of homemade gravy or some delicious dipping sauces beside it.
Garnish Ideas
I’m all about the garnishes, baby! fresh lemon wedges not only look pretty but also add a zing when squeezed over the chicken.
You could also use a sprinkle of smoked paprika on top for color and a hint of smokiness.
Color Combinations
Don’t forget to play with color! pair your chicken with bright sides a fresh green salad or some roasted veggies. it makes the meal more inviting and comforting, just like southern comfort food should be.
Storage & make-ahead
Dinner party prep? You bet! Here’s how you can make this dish ahead and still have it sing on serving.
Storage Guidelines
Cooked chicken is best stored in an airtight container in the fridge. It’ll last up to 3-4 days, though the crispy texture may soften over time.
Preservation Methods
If you want to keep your chicken longer, consider freezing it. Wrap it tight and pop it in the freezer. Just make sure to reheat it properly to avoid any sogginess.
Reheating Instructions
When you’re ready to eat, it’s best to reheat in the oven. This way you’ll get that lovely crispy texture back rather than turning it into a rubbery mess in the microwave.
Freshness Duration
Honestly, the chicken tastes best fresh, but if you get creative with sides, it's still gonna be a crowd pleaser days later!
Creative Variations
Let’s spice it up a bit!
Flavor Adaptations
Mix things around based on what you love. Feeling adventurous? Try a spicy fried chicken version by adding hot sauce to your marinade.
Dietary Modifications
Got dietary restrictions? No problem! You can go for skinless chicken or even gluten-free breading options like almond flour or crushed cornflakes to cater to your friends and family.
Seasonal Twists
Incorporate those seasonal veggies when they’re fresh sweet corn in summer or butternut squash in autumn. It’s all about making it your own.
Complete Nutrition Guide
Finally, it’s essential to know what you’re munching on!
Detailed Breakdown
Each serving gives you around 420 calories and a hearty amount of protein. Perfect for fueling your busy day with a bit of comfort.
Health Benefits
The beauty of using a pressure cooker is that it minimizes the amount of oil needed compared to traditional frying, making this a healthier option without sacrificing flavor.
Dietary Considerations
Just keep an eye on sodium levels adjust if you can.
Portion Guidance
Honestly, 4 servings might be too little for those hungry crowds, especially if you're serving with those classic fried chicken sides!
Expert FAQ Solutions
Got questions? I’ve got answers!
Common Questions
“Why use a pressure cooker?” It’s quick. You get amazing flavors without waiting hours.
Success Tips
Make sure you properly coat that chicken! A good breading leads to the crunch you dreamed of.
Variations Explained
Feeling creative? Play around! You can even plop in some flavored marinades like teriyaki or BBQ for a different vibe entirely.
So there you have it! with these tips, tricks, and all the love you'll pour into your quick pressure cooker fried chicken delight , your family will be eating out of the palm of your hand.
Give it a go, and trust me, no one will complain about dinner tonight! enjoy cooking, and happy feasting!
Quick Pressure Cooker Fried Chicken Delight

