Simply Sugar Free Syrup
- Introduction: Sweetness Without the Guilt!
- Recipe Overview: A Sweet Legacy
- Key Benefits: Syrup with a Healthy Twist
- Essential Ingredients Guide
- Culinary Foundations: Mastering the Essentials
- Pro Tips & Secrets for Your Simply Sugar Free Syrup
- Perfect Presentation for Your Syrup
- Storage & Make-Ahead Tips
- Creative Variations
- Complete Nutrition Guide
- Expert FAQ Solutions
- 📝 Recipe Card
Introduction: Sweetness Without the Guilt!
Okay, picture this: it’s sunday morning. you're lounging around in your pajamas, and the aroma of freshly made pancakes is wafting through the air.
Yum, right? but here’s the kicker what if you could pour on a syrup that not only tastes divine but is actually good for you ? enter the world of simply sugar free syrup .
Just the thought sets my heart racing! seriously, how can you resist glorious pancake topping ideas that don’t spike your blood sugar?
I remember the first time i tried making this syrup at home. after years of searching for sugar-free alternatives, i stumbled upon a knockout recipe.
It was game changing! i could relish my beloved breakfast treat and ditch the sugar. whether you're looking to keep it low-calorie or want a diabetic friendly syrup option, this homemade syrup recipe will redefine your mornings.
Recipe Overview: A Sweet Legacy
Let’s take a quick trip down sweet lane, shall we? syrup has been a staple in many cultures for centuries, primarily as a pancake topping or a dessert enhancer.
Initially, the star of the show was good ol’ maple syrup. but as we became more health conscious, we craved a way to enjoy those flavors without the downside.
Today, sugar substitutes like erythritol have become popular for their weight loss benefits . making our own syrup has not only gained traction among clean eaters but has also caught the attention of anyone wanting a breakfast treat that won’t sabotage their diet.
And let’s be real, this easy syrup recipe takes only 25 minutes from start to finish. plus, you’ll whip up about 1 cup of syrup enough to get you through a hearty brunch with friends or a week of delicious breakfasts.
With just a few ingredients you likely have at home, we're talking easy peasy! the costs are minimal, especially when compared to the fancy, bottled counterparts filled with funky preservatives.
Trust me; once you go homemade , there's no turning back!
Key Benefits: Syrup with a Healthy Twist
So, let’s get into the juicy bit. Why bother with simply sugar free syrup ? Let me share a few highlights:
Health benefits: this syrup is a guilt free indulgence! with no sugar and low calories, it’s the perfect choice for those watching their intake.
Erythritol has even been linked to various health benefits, like improved dental health, which is a win-win if you ask me!
Unique Flavor: Infused with vanilla or a dash of cinnamon, it brings a depth to your breakfast that’s hard to beat. Those gourmet syrup variations add personality to plain pancakes or waffles.
Versatile occasions: from brunch with the fam to cozy saturday mornings, this syrup fits right in. it’s also a fantastic topping for healthy sweeteners like greek yogurt or oatmeal , giving you that indulgent feel without all the sugar.
Comparison advantage: compared to regular syrups, which can clock in at a whopping 60 grams of sugar per serving, our homemade syrup recipe keeps things clean.
You won’t find any sticky surprises or non-caloric sweeteners in here!
I can’t think of anything better than drizzling a plate of pancakes with this syrup, feeling like you might just conquer the world today.
Ready to get started on making your very own simply sugar free syrup ? Let's dive into the ingredient list so you can whip this up and join the thousands who’ve made the switch to guilt free toppings!
Essential Ingredients Guide
When you’re stepping into the kitchen, having the right essential ingredients can make all the difference. Let’s break down what you need and why it matters.
Premium Core Components
First off, let's talk about measurements . for most of us, sticking with familiar measurements like 1 cup or 1 teaspoon makes it easier.
But for my european friends, don’t worry! i got you covered: 240 ml for a cup and 5 ml for a teaspoon.
Quality is key! always look for ingredients that are fresh. for spices, check the color; a vibrant hue usually means they’re potent and flavorful.
Storage guidelines are important too spices last about 2-3 years. store them in a cool, dark place to keep them fresh.
When you're picking your ingredients, go for the freshest options. In terms of fruits and veggies, the more colorful, the better. Not just looks; those hues mean more nutrients!
Signature Seasoning Blend
Now, let’s get to the fun part signature seasoning blends ! essential spice combinations like cinnamon and nutmeg can turn a simple dish into a flavor explosion.
Toss dried herbs like oregano or thyme into your meals, and boom instant gourmet vibes!
And if you want to kick it up a notch try adding a pinch of salt to enhance those flavors. don’t forget about regional variations every culture has its own spin on spices.
Think about adding cumin for mexican dishes or curry powder for indian delights.
Smart Substitutions
Ever run out of an ingredient? no sweat! that’s where smart substitutions come in. if a recipe calls for sugar, a sugar substitute like erythritol can step in.
It’s low-calorie and diabetic friendly! you could even try using fruit infused syrups if you want natural sweetening options.
Dietary restrictions? no problem! just ask your family or friends what they need, and you can whip up something perfect for them.
Emergency replacements, like using honey for maple syrup or applesauce for sugar, can really save your dish. seasonal options like fresh strawberries or blueberries can perk up your breakfast treats, and trust me, they also taste fantastic over pancakes!
Kitchen Equipment Essentials
Now let’s talk kitchen equipment . you don’t need much. a good set of measuring cups, a whisk, and a medium saucepan are the basics.
But here’s a handy tip: if you don’t have a whisk, a fork works too!
As for storage? An airtight container is a must to keep everything fresh. Alternatively, those glass jars from store-bought sauces or jams? They work like a charm!
When it comes to prep, it’s all about efficiency. Keep a trash bowl handy to toss scraps, and clean as you go. It makes everything feel less chaotic and more enjoyable!
So there you go! we’ve gone through some core components, signature seasonings, smart substitutions, and must have tools. now, you’re all set to dive into the world of flavors and experiment in your kitchen.
And speaking of flavors, if you're looking for a way to sweeten your breakfast without the sugar overload, let's jump right into making that simply sugar free syrup ! this recipe is perfect as a guilt free topping for your pancakes or waffles.
Trust me, once you give it a try, you’ll be drizzling that delicious goodness all over your healthy breakfast .
Culinary Foundations: Mastering the Essentials
When it comes to professional cooking, nailing down your methods can totally change the game. So let’s dig into the nitty gritty of professional cooking techniques that can help you elevate those home cooked meals!
Essential Preparation Steps
Alright, before we get our hands dirty, let’s talk about mise en place that fancy french term for "everything in its place.
" this isn’t just a buzzword; it’s your best friend in the kitchen. chop your veggies, measure out your ingredients, and have everything handy.
Seriously, you’d be amazed how much smoother things go when you’re not running around like a headless chicken looking for the salt.
Now onto time management . you’ve got a lot to juggle, so piecing together an outline for your cooking session helps.
Maybe you’re baking that homemade syrup that’s a mission all on its own. cook it while prepping your pancakes or waffles.
Kill two birds with one stone, right?
Organization is key. take it from me; i've forgotten to add salt a few too many times to count! layout your ingredients in the order you’ll use them, and keep like items together.
It’s super helpful and saves you from that awkward moment of scrambling to find the cinnamon when you're halfway through boiling your syrup.
Don’t forget safety! Watch those knife skills, and keep a fire extinguisher handy. Just in case, because trust me, a kitchen fire is not the ideal way to spice up a meal!
Step-by-step Process
Let’s get into our cooking rhythm with some clear, numbered instructions:
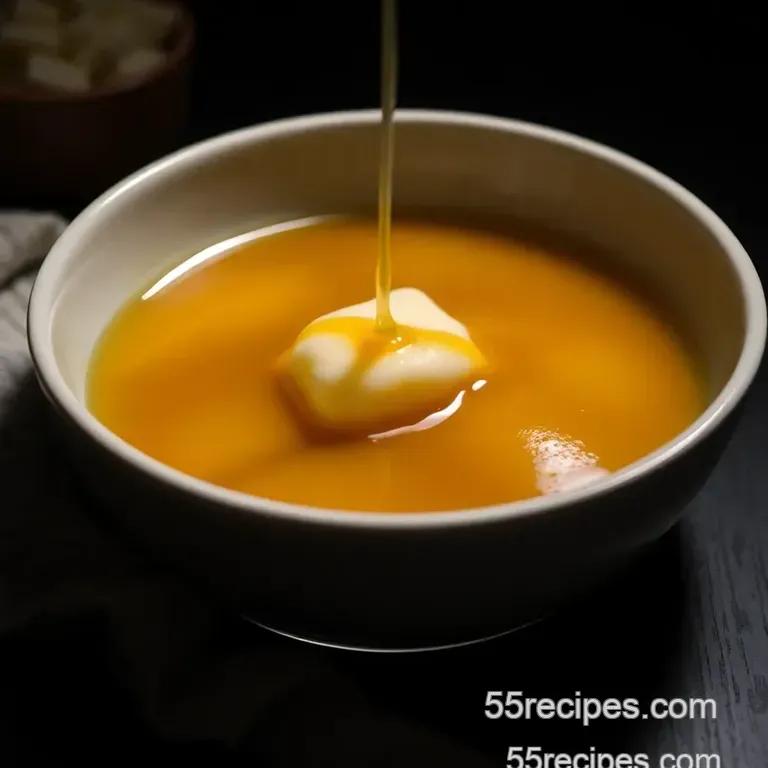
- Gather Your Ingredients: You’re gonna need 1 cup (240 ml) of water and 1 cup (200 g) of erythritol.
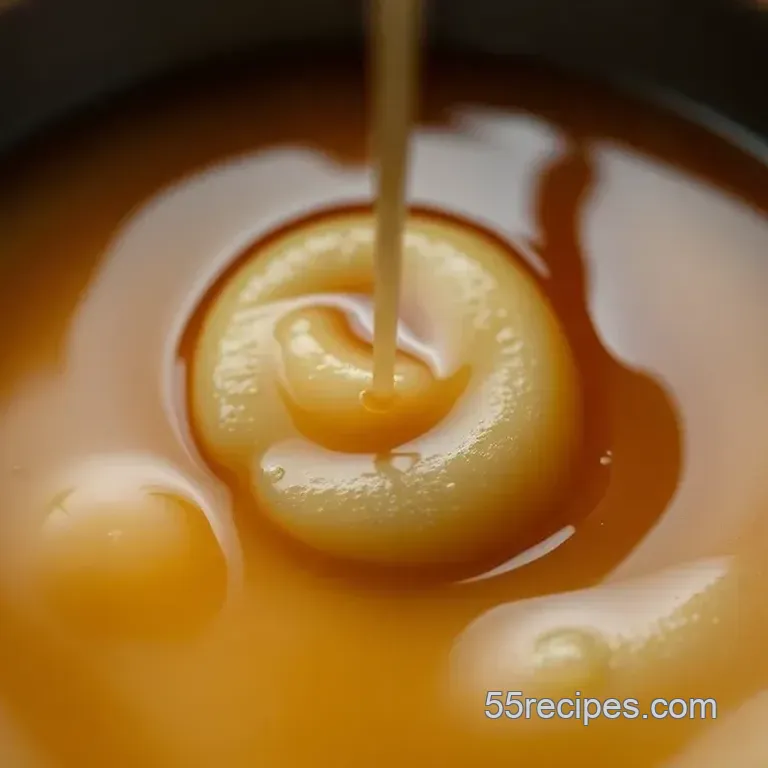
- Heat It Up: Pour the water and erythritol into a medium saucepan and place it on the stove over medium heat . Whisk until it’s all dissolved this usually takes about 5 minutes.
- Flavor Town: Add in 1 teaspoon vanilla extract , 1/4 teaspoon salt , and if you’re adventurous, a pinch of cinnamon.
- Bring to a Simmer: Watch it carefully! Bring it to just below a boil, and let it simmer for 10 minutes , stirring occasionally.
- Cool Off: Remove it from the heat, let it chill, then transfer to an airtight container. It can be stored in the fridge for about a month.
Expert Techniques
You might be wondering about some professional methods, huh? one of the biggest tips: temperature control is your best buddy.
The syrup’s gotta simmer, not boil over like a crazy ex! keep it steady at that perfect simmer for a rich flavor.
As for timing, precision is what sets a pro apart. if your syrup simmers for too long, you could end up with something thicker, almost like a gooey mess! monitor those 10 minutes like your cooking life depends on it.
Check for doneness: the syrup should be a thin, pourable consistency. If it starts looking like maple syrup, then you nailed it! If not, a tiny bit more time won’t hurt it.
Success Strategies
We all make blunders, even the pros. Avoid adding too much sweetener right off the bat; it’s easier to add more later than to fix an overly sweet mess.
For the best results, always taste as you go. we’re aiming for flavor perfection here! and don’t be shy to experiment with those sugar-free alternatives or even toothpaste recipes to strike the right balance.
And let’s talk make-ahead options . Seriously, this syrup can be made days, even weeks in advance. Just keep it stored tightly, and you’ve got yourself a perfect breakfast partner!
As you whip up this simple syrup, think about how many delicious breakfast options you can create! drizzle it over pancakes, waffles, or make it a guilty pleasure topping for your morning yogurt.
You’re satisfying those sweet cravings without a sugar crash, thanks to your simply sugar-free syrup .
Wrapping It Up
Crafting the perfect syrup doesn’t have to be a daunting task. with easy steps and a bit of patience, you’ll nail that clean eating syrup recipe .
And the best part? you’re embracing a style suited for guilt free indulgence that still elevates your breakfast game.
In the next section, we’ll dive deeper into additional ways you can spice up your cooking. So stay tuned for more flavor enhancing tips and syrup variations that keep your breakfast treat ideas fresh and exciting!
Pro Tips & Secrets for Your Simply sugar free Syrup
Oh my gosh, you did it! you made the decision to whip up our simply sugar free syrup . seriously, you’re gonna love this syrup; it’s a total game changer for your breakfast spread! here are some insider tips and tricks that i’ve picked up along the way to take your syrup skills to the next level.
Chef's Personal Insights
First off, don’t be afraid to play around with it! if you want a little more sweetness, just add more erythritol .
You can also swap in other sugar substitutes that you like. stevia or monk fruit could work great too! just keep in mind that they tend to be sweeter than erythritol, so adjust accordingly.
Flavor Enhancement Tips
Want that syrup to stand out? try adding a pinch of cinnamon or even a splash of bourbon for a grown-up twist! seriously, just let it simmer a bit longer to infuse those flavors.
They always take it up a notch.
Time Saving Techniques
If you’re short on time, you can simmer the syrup and work on other parts of your breakfast at the same time.
Multi tasking is key, right? keep an eye on it though don’t burn your beautiful syrup!
Presentation Advice
Nothing screams “i’m fancy” more than a well presented dish. use a sleek glass jar for serving. you can even tie a rustic twine around the neck with a little tag.
It makes a perfect gift or a pretty display on your brunch table!
Perfect Presentation for Your Syrup
Now that you’ve got the syrup down, let’s talk about how to make it look as good as it tastes. Who doesn’t want that Instagram worthy breakfast, right?
Plating Techniques
When drizzling your syrup, start from the middle of your pancakes or waffles and work outwards. This creates a nice, inviting coverage. Bonus points if you layer it with fresh fruit!
Garnish Ideas
Add a few fresh berries on top. They not only look great but give it that fresh burst of flavor. A mint leaf or two can also brighten up your dish visually.
Color Combinations
Pair your syrup with colorful toppings. Use bright strawberries, blueberries, or banana slices. It’s a feast for the eyes!
Visual Appeal Tips
Lighting is key! When you're plating, natural light works best. Snap your pictures by a window for that dreamy vibe.
Storage & make-ahead Tips
If you’re planning a big breakfast or brunch, then making this syrup ahead of time is super smart. Here’s how to keep it fresh:
Storage Guidelines
Once cooled, pour your syrup into a clean airtight container . It should stay fresh in the fridge for about two weeks.
Preservation Methods
If you want to store it for longer, consider freezing it in ice cube trays. Then, transfer those frozen cubes to a freezer bag.
Reheating Instructions
When you’re ready to use your syrup, just pop it in the microwave for a few seconds, or let it sit at room temperature until it’s pourable again.
Creative Variations
Don’t settle for just one flavor! Our Simply sugar free Syrup is a fantastic base for experimentation.
Flavor Adaptations
Try adding a splash of lemon juice for a zingy twist, or infuse it with herbs like basil or thyme for something unexpected.
Dietary Modifications
For a vegan option, use coconut sugar instead of erythritol, and make sure your vanilla extract is alcohol free.
Seasonal Twists
During the fall, how about making a cinnamon syrup ? Just add extra cinnamon while simmering for that warm, cozy flavor!
Regional Variations
Want to take it global? Try a fruit infused syrup by adding pureed fruit after simmering. Living in the South? Go for a peach syrup sweet and just right for those summer breakfasts!
Complete Nutrition Guide
Why not enjoy your syrup guilt free? Here’s a lowdown on the nutrition:
Dietary Considerations
This syrup is perfect for sugar-free breakfast ideas and awesome for those on weight loss journeys or needing diabetic friendly options.
Portion Guidance
A serving size is about 2 tablespoons , and guess what? It’s only 15 calories! So drizzle away without fear of that sugar crash later.
Expert FAQ Solutions
Got questions? I’ve been there. Here’s a quick FAQ to help you out!
- Is this really sugar-free? Yes! With erythritol, you can indulge without the sugar rush.
- Can I use this syrup in baking? Absolutely! It’s versatile!
- What if it’s too thick? Just thin it out with a little water when heating.
So there you have it! craft this simply sugar free syrup and feel good about your breakfast. whether you’re watching your diet or just want a delicious treat, this syrup is a perfect choice.
It’s time to enjoy that sweet life without the sugar guilt!
Simply sugar free Syrup

