Toasted Coconut Marshmallows: a Sweet Island Escape
A Sweet Escape with Toasted Coconut Marshmallows
Let’s talk marshmallows. i’m not talking about those store-bought, fluffy cubes you toss into hot cocoa i mean homemade marshmallows that make you feel like you’ve been transported to a sunny beach, sipping piña coladas and basking in the glow of tropical bliss.
How do i know? because the first time i whipped up a batch of toasted coconut marshmallows , i felt like i was on vacation, and boy, was it a game changer! seriously, have you ever put in that little elbow grease, only to have your taste buds explode in delight?
if you're craving something sweet and a little fancy, keep reading, my friend!
A Little Marshmallow History
Now, let’s take a step back. marshmallows have been around since ancient egypt, where they were made from the sap of the marshmallow plant (hence the name!).
Fast forward to today, and these delightful puffs have transformed significantly. our friends in the culinary world have taken them to a whole new level! these days, toasted coconut marshmallows are pretty popular, especially for diy party treats or when you want to impress at the next potluck.
The best part? you can turn these beauties into s'mores ingredients , hot cocoa whims, or even edible gifts that make everyone swoon.
Now, don’t stress it may sound tricky, but trust me: with patience and practice , you'll whip up a batch in no time.
Get Ready for a Flavor Adventure
This fluffy marshmallow recipe is equal parts fun and tasty! you’ll need roughly an hour, including some downtime while they chill.
The process is rated as medium difficulty . so, don’t freak out if you’re not a master chef just yet these delightful coconut desserts won’t make you sweat! let’s break down the key stuff worth knowing:
- Time Commitment : You're looking at 15 minutes of active prep time, followed by about 30 minutes of chilling. That’s less than a sitcom episode!
- Cost Considerations : The ingredients won’t break the bank. A couple of cups of sugar, some unsweetened shredded coconut, and a few pantry staples? Easy and cheap.
Why You’ll Love Them
Okay, so let’s get to the juicy part why make these toasted coconut marshmallows ? first up, they’re ridiculously fluffy and light , perfect for satisfying that sweet tooth.
Each bite combines the sweetness of marshmallow and the nutty flavor of coconut. plus, if you've ever thought about candy making techniques , this is a fun way to dive in without losing your mind.
These marshmallows are perfect for special occasions, like parties and celebrations, but honestly, who needs a reason to indulge? they're great as an addition to a summer bbq or even just a night in while binge watching your latest netflix obsession.
If you're into s'mores variations , these fluffy delights can take your classic campfire snacks to the next level, with that added tropical twist.
Wrap It Up with a Touch of Adventure
So, are you as excited as i am? don't fret if things get messy that's just part of the fun when making these light and airy desserts! with a few tips and the right mindset, you can easily tackle making toasted coconut marshmallows at home.
Plus, there's something magical about the process of watching your whipped marshmallow mixture transform into sweet pillowy bites.
Are you ready to gather those ingredients? let’s make some magic happen in the kitchen! you’ll never look at marshmallows the same way again.
Now, let’s dive into what you'll need for this tropical escapade!
Essential Ingredients Guide to Crafting Irresistible Sweets

When you think about making toasted coconut marshmallows , it’s not just about throwing ingredients together. oh no, my friend! it’s about having the right premium core components .
Now let’s dive into what you really need to make your marshmallow dreams a reality.
Premium Core Components
First up, you need to know the detailed measurements . for your fluffiest marshmallows, we’re talking 2 cups (400g) of granulated sugar.
A whole half a cup (120ml) of light corn syrup adds that sweetness we crave. and don’t forget the gelatin you’ll need two envelopes (14g each) of unflavored goodness! for those who prefer the metric system, enjoy the sugar and syrup measurements.
When it comes to quality indicators , ensure your sugar is fine and free of lumps. look for fresh gelatin ; the packets shouldn’t be expired.
Oh, and check your shredded coconut! it should be unsweetened and have that beautiful white color.
Storing your ingredients is crucial, too. keep your sugar in a cool, dry place, and store your coconut in an airtight container.
Once opened, your shredded coconut should last about unsweetened weeks in the fridge. and remember: freshness tips go a long way.
Always give your coconut a sniff before using it to ensure it’s not stale.
Signature Seasoning Blend
Now let’s get spicy! the right signature seasoning blend can kick your marshmallows into another stratosphere. think about adding a touch of vanilla extract it's an essential flavor enhancer.
When you whip up that whipped marshmallow mixture , this subtle sweetness will change your life.
You can play around with different herb selections, but honestly, for these treats, vanilla is the star. and if you're feeling adventurous, try adding some toasted nuts for a flavor kick.
They’ll pair beautifully with toasted coconut recipes !
Smart Substitutions
What if you’re out of an ingredient? don’t worry, i’ve got your back with smart substitutions! if you don’t have light corn syrup, agave syrup can save the day.
Just keep in mind that the texture might change a bit kind of like those awkward school photos, but we’ll roll with it!
For a touch of smoothness, you might swap out regular sugar for coconut sugar . and for folks who follow a vegan lifestyle, consider using gelatin alternatives like agar agar.
This method requires a slight adjustment, but it's a pretty fab option! just follow the instructions for substitution closely.
Kitchen Equipment Essentials
To nail this fluffy marshmallow recipe, you’ve got to arm yourself with must have tools . a large saucepan is a must.
Trust me, you don’t want sugar syrup all over the counter! a candy thermometer is also essential for measuring that sweet spot at 240° f ( 115° c), which is the threshold for perfect sugar syrup.
Even if you don’t own a stand mixer, a handheld mixer will do the trick. just prepare yourself for a bit of a workout! and let’s not forget about a 9x13-inch baking pan .
Lining it with parchment paper makes life so much easier. you’ll have those marshmallows out in no time!
Wrapping things up
Making toasted coconut marshmallows is not just a cooking project; it’s a fun baking adventure! by knowing your essential ingredients and having the right kitchen equipment, you’ll be whippin’ up light and airy desserts in no time.
So, grab your gear, and let’s move on to the step-by-step instructions! you’ll be whether you're making them for yourself or whipping up some edible gifts for friends at the next party!
Elevate Your Sweet Game with Professional Cooking Techniques
When it comes to making toasted coconut marshmallows , there’s something magical about blending the comfort of home cooking with professional techniques.
Let me tell you, it’s a game changer! with a splash of patience and a dash of organization, you can whip up these fluffy, tropical treats that will have everyone raving.
So, let’s dive right into some essential preparation steps!
Essential Preparation Steps: Your Culinary Foundation
The first secret of the pros? mise en place ! this french term just means "everything in its place." grab all your ingredients and equipment before you start cooking.
Trust me, it’s a total lifesaver! no one wants to be scrambling for the gelatin when your sugar syrup is bubbling away.
Time management is key, too. think about it like planning a party you wouldn’t invite a bunch of friends and then forget the snacks, right? set a timer for each step, especially for your sugar syrup .
You want that bad boy to hit 240° f ( 115° c) , so keep your eye on the clock!
And while we’re at it, let’s talk safety considerations . candy can reach hot temperatures, so keep a pair of long handled gloves nearby.
Your fingertips will thank you later! plus, if you're using equipment like a candy thermometer, be sure to have it secured at all times to keep your workspace safe.
step-by-step Process: The Paving Stones of Success
Now onto the fun part! Here’s a nifty little step-by-step for your toasted coconut marshmallows:
Prepare Your Baking Pan by lining it with parchment paper. You’re gonna want that overhang for the easy removal later, trust me!
Toast the Coconut until it’s golden brown. You’ll want to set that toaster oven to 350° F ( 175° C) and keep an eye on it. Stir halfway through to prevent burning.
Bloom the Gelatin by mixing one cup of water with the gelatin and letting it sit for 5- 10 minutes. This is where the magic begins!
Cook the Sugar Syrup : Combine sugar, corn syrup, and your remaining water in a saucepan. Boil it while stirring until everything dissolves. Remember, we need that candy thermometer!
Whip the Marshmallow Mixture until it triples in volume, which takes about 10- 15 minutes . You’ll see it becomes fluffy and light. Add your vanilla extract once it’s almost there.
Fold in Toasted Coconut because we’re creating a tropical fiesta in our marshmallow base!
Transfer to the Pan and let it rest. Don't rush this step patience is a virtue here!
Cut and Dust : Slice 'em up and dust each piece to keep them from sticking. You don’t want your marshmallows getting cozy with each other!
Store or Serve your delectable treats! They’ll stay fresh in an airtight container for about two weeks.
Expert Techniques: Fine Tuning Your Craft
Every cooking adventure has its pitfalls. one of the common mistakes to avoid is letting your sugar syrup exceed that crucial 240° f ( 115° c) mark burnt caramel is not what we’re after! check it consistently, and remember to be patient.
For quality assurance , always do a visual cue check. When your marshmallow mixture looks shiny and holds its shape, you know you're on the right path to those fluffy marshmallow dreams!
If things go awry, don’t panic! troubleshooting is part of the process. if your marshmallows don't set, it might be that the syrup wasn't hot enough.
A little fix? just warm 'em up gently and whip again.
Success Strategies: Game Plan for Win-Win!
Want perfect toasted coconut marshmallows every time? Here are a few quality assurance tips :
- Make sure your kitchen gear is clean. Any oily residue can mess with the texture.
- Don’t skip on dusting with powdered sugar and cornstarch after cutting. It totally helps with that sticky situation.
Need make-ahead options ? these marshmallows are legit perfect for prepping in advance. they’re great for parties, and they make cute diy edible gifts .
Who wouldn’t love a bag of these sweet treats after a beach day?
Ready for More Sweet Treats?
Now that you’ve got the rundown on how to create these dreamy toasted coconut marshmallows , why not dive into more dessert ideas? there are so many incredible coconut desserts out there waiting for you.
That's just the tip of the sweet tooth iceberg!
Next up, let’s explore some ways to elevate your marshmallow game even further. We’ll dig into chocolate dipped variations and how to customize your marshmallow candy to take your desserts to the next level! Stay tuned for all the surprises ahead!
look into into Toasted Coconut Magic: Your Ultimate Guide
Oh my gosh! if you haven’t made toasted coconut marshmallows yet, are you even living? these fluffy wonders are a leap into tropical paradise, making you feel like you’re lounging on sun-soaked beaches with a cocktail in hand.
Let's sprinkle some pro tips, presentation magic, storage secrets, and fun variations to make your candy game even stronger!
Pro Tips & Secrets
Here’s the deal: candy making can be a bit intimidating. But don’t sweat it! With a few candy making techniques , you’ll be a pro in no time.
Tip 1: Keep a close eye on your sugar syrup. If it goes above 240° F, you might as well start making hard candy! Use a reliable candy thermometer .
Tip 2: patience is key. after whipping the marshmallow mixture which should get a lovely fluffy texture in about 10- 15 minutes don’t rush the chilling time.
Letting those marshmallows set properly is crucial. they need to be light, airy, and perfect for s’mores ingredients .
Tip 3: Toast that coconut fresh for the ultimate coconut flavor profile. Trust me, you’ll notice the difference. Plus, you could save some toasted coconut for dusting to elevate your presentation.
Perfect Presentation
Now let's talk about making these marshmallows look fab! Presentation is everything in the dessert world, right?
Plating Techniques: Once you’ve cut those marshmallows, arrange them on a fun plate or tiered stand. Add a few colorful fruits around them for that tropical flair. Pineapples or mango slices, anyone?
Garnish Ideas: Dust with cocoa powder or even marshmallow frosting blended with a hint of vanilla for that "wow" factor.
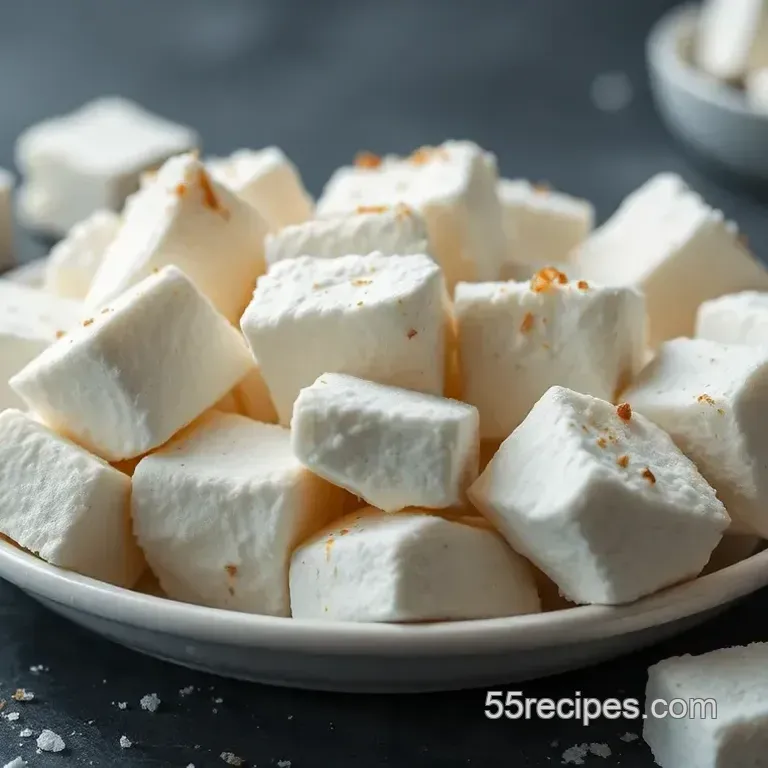
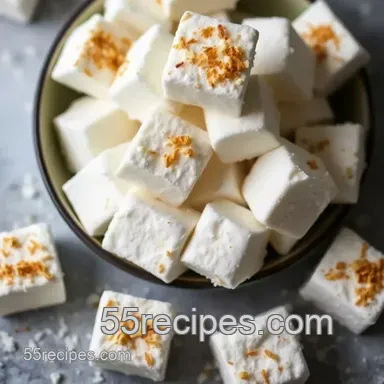
Color combinations: the combination of the white marshmallows against golden toasted coconut can’t be beaten. add some colorful sprinkles if you want a party vibe.
You know those childhood memories of birthday cakes? bring that energy back!
Storage & make-ahead
Who doesn’t love a good make-ahead treat? Here are easy guidelines to store your toasted coconut marshmallows:
Storage Guidelines: Keep them in an airtight container to ensure they stay fluffy. They can last up to two weeks if stored correctly!
Preservation Methods: If you're making these as edible gifts , consider wrapping them in cute cellophane. Who wouldn’t love opening that present?
Reheating Instructions: If you need to soften them, you can pop them in the microwave for a few seconds, but be careful! They’ll get gooey quickly.
Creative Variations
Let’s get creative! There are so many ways to switch up your fluffy marshmallow recipe .
Flavor adaptations: how about adding a dash of coconut extract to take that coconut flavor even further? or you could mix in chocolate chips for a decadent twist.
I mean, chocolate dipped marshmallows sound amazing, don’t you think?
Dietary Modifications: For those of you looking for a vegan marshmallow alternative , try using agar agar instead of gelatin. You can still enjoy that light and fluffy goodness!
Seasonal Twists: Go wild with seasonal ingredients. In summer, pair these with fresh berries for a refreshing dessert. Or in the fall, throw in some pumpkin spice. Yum!
Complete Nutrition Guide
Okay, let's dish on the nutrition facts a bit. Each toasted coconut marshmallow packs around 90 calories . They are mainly comprised of carbs from sugar, but hey, everything in moderation, right?
These treats can be a great addition to a post workout snack when paired with some protein. Just keep an eye on portion sizes!
Wrapping Up
Making toasted coconut marshmallows is a delightful journey into the world of coconut desserts . whether you enjoy them as a treat for yourself, a fun activity with the kids, or show stopping diy party treats , they are guaranteed to elevate your dessert game.
So, grab those ingredients and dive in! You’re not just making marshmallows; you’re creating memories wrapped in sweetness. Happy cooking, and may your marshmallows be ever fluffy!
Frequently Asked Questions
How do I store toasted coconut marshmallows?
To store your toasted coconut marshmallows, place them in an airtight container lined with parchment paper. They can be kept at room temperature for up to 2 weeks, but be sure to dust them with powdered sugar and cornstarch to prevent sticking!
Can I use unsweetened shredded coconut for my toasted coconut marshmallows?
Yes, in fact, using unsweetened shredded coconut is recommended for toasted coconut marshmallows. It allows for the natural coconut flavor to shine through without excess sugar, making the marshmallows delightfully sweet but not overpowering.
What’s the best way to enjoy toasted coconut marshmallows?
Toasted coconut marshmallows are incredibly versatile! You can enjoy them on their own, toss them into hot cocoa for a tropical twist, or create scrumptious s'mores. They also pair beautifully with fresh fruit for a light dessert!
Are toasted coconut marshmallows suitable for vegans?
Not unless you make some substitutions, as traditional marshmallows require gelatin, which is animal based. However, you can make a vegan version by using agar agar as a substitute for gelatin, though the texture might change slightly.
What kitchen equipment do I need to make toasted coconut marshmallows?
You’ll need a few essential pieces of equipment: a large saucepan for boiling the sugar, a candy thermometer to ensure proper temperature settings, and a stand or handheld mixer for whipping the marshmallow mixture. A baking pan lined with parchment paper is also crucial for easy removal!
Can I add flavors to my toasted coconut marshmallows?
Absolutely! You can mix in extracts like vanilla or coconut for an extra flavor boost. For a fun variation, try adding cocoa powder for chocolate coconut marshmallows or even fruity flavors for a vibrant twist. The world of marshmallow flavors is your oyster!
Toasted Coconut Marshmallows A Sweet Island Esca
Ingredients:
Instructions:
Nutrition Facts:
| Calories | 90 |
|---|---|
| Protein | 1g |
| Fat | 0.5g |
| Carbs | 23g |
| Fiber | 0g |
| Sugar | 16g |
| Sodium | 5mg |
