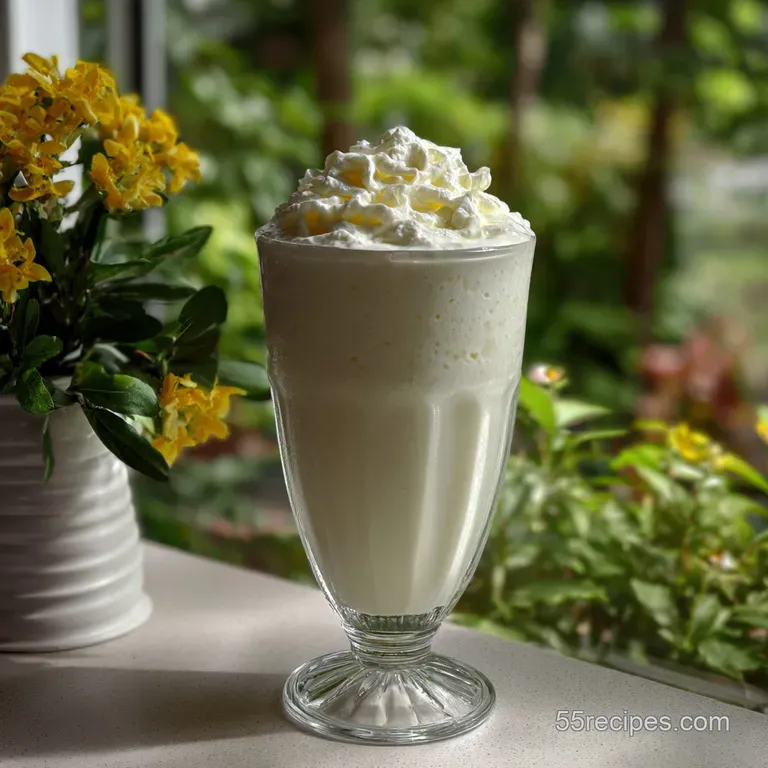
Vanilla Milkshake: Silky Smooth & Aromatic
- Time: Active 5 minutes, Passive 0 minutes, Total 5 minutes
- Flavor/Texture Hook: Frosty, velvety, and intensely aromatic
- Perfect for: Late night cravings or a classic weekend treat
- The Science of Creamy Emulsification
- Essential Specs for This Recipe
- Analyzing Our Key Pantry Staples
- Tools for a Silky Blend
- Step-by-Step Blend and Serve
- Solving Texture and Flavor Issues
- Simple Ways to Adapt Ingredients
- Storing Leftovers Without Losing Quality
- Visual Hacks for Better Shakes
- Vanilla Milkshake FAQs
- 📝 Recipe Card
You know that specific sound a blender makes when it hits a pocket of air because the ice cream is just too thick? That’s actually a good sign. It means you’re about to enjoy a shake that doesn't just turn into vanilla soup the second it hits the glass.
I’ve spent years trying to figure out why my home versions felt like thin milk while the ones at the local malt shop felt like a decadent event.
The secret isn't some fancy industrial machine; it’s actually about how we handle the temperature and the fat content of our ingredients. Most of us make the mistake of adding too much milk because we’re impatient with the blender, but that’s the fastest way to ruin the experience.
We want something that holds its shape, carries the floral notes of the bean, and feels substantial on the tongue.
Trust me on this one, we’ve all been there with a glass of melted ice cream, wondering where we went wrong. This approach is my tried and tested method for getting that thick, luxurious result every single time without needing a degree in dairy science.
We’re going to look at the physics of the blend and why a tiny pinch of salt changes everything.
The Science of Creamy Emulsification
When we make a vanilla milkshake, we aren't just mixing ingredients; we are managing an emulsion of air, water, and fat. The ice cream contains tiny air bubbles and ice crystals trapped in a concentrated sugar solution.
When we blend it with milk, we are trying to keep those ice crystals small enough to feel smooth but large enough to keep the drink cold and thick.
- Thermal Mass
- Using a chilled blender jar prevents the motor's heat from prematurely melting the delicate ice crystal lattice.
- Fat Stabilization
- The addition of heavy whipping cream introduces larger fat globules that coat the tongue, slowing down the perception of cold and allowing the vanilla flavors to linger longer.
- Solubility
- A pinch of salt doesn't make the shake salty; instead, it reduces the freezing point slightly and suppresses bitterness, making the sweetness of the sugar feel more "rounded" and less cloying.
| Method | Time | Texture | Best For |
|---|---|---|---|
| High Speed Blender | 45 seconds | Ultra smooth, aerated | Modern, fluffy shakes |
| Hand Whisked | 4 minutes | Thick, chunky, artisanal | Those who like "bits" of ice cream |
| Food Processor | 1 minute | Dense, very thick | Achieving a "concrete" style consistency |
Blending too fast for too long creates friction heat. This heat is the enemy of a thick shake. If you see the mixture swirling too easily, you’ve likely over processed it. We want the blender to struggle just a little bit at the start.
It’s that resistance that ensures the final product remains spoonable rather than just drinkable.
Essential Specs for This Recipe
Getting the numbers right is the difference between a beverage and a dessert. I used to eyeball the milk, but honestly, even an extra tablespoon can turn a "stand up" shake into a "slumped" one.
We’re aiming for a specific ratio here that prioritizes the solids over the liquids to maintain that classic structural integrity.
When you learn how to make a vanilla milkshake, you realize that weight and volume are your best friends. I’ve found that using 3 large scoops (approx. 1.5 cups) of high-quality vanilla bean ice cream is the sweet spot for a single serving.
It provides enough bulk to create a vortex in the blender without needing a gallon of milk to get things moving.
I’ve also noticed that the type of ice cream matters immensely. Cheap, "light" versions often have too much air whipped into them (called overrun). When you blend them, they deflate, leaving you with a half empty glass of sweet foam.
Stick to the heavy stuff the kind that feels dense when you press the scoop into the container.
| Metric | Measurement | Checkpoint |
|---|---|---|
| Ice Cream Weight | ~280g | Yields 1.5 cups of packed scoops |
| Milk Temperature | 34°F - 38°F | Should be as cold as possible without freezing |
| Blending Duration | 30-45 seconds | Stop once the large chunks disappear |
Analyzing Our Key Pantry Staples
Choosing the right components is where the budget smart strategy comes into play. You don't need the most expensive organic milk, but you do need the right type of milk. Whole milk is non negotiable here because the protein and fat structures are what hold the air bubbles in place.
If you use skim, the shake will separate and look watery within minutes.
| Ingredient | Science Role | Pro Secret |
|---|---|---|
| Vanilla Bean Ice Cream | Base structure & flavor | Use a brand with visible bean specks for a floral depth. |
| Whole Milk | Liquid lubricant | Keep it in the back of the fridge where it stays the coldest. |
| Pure Vanilla Extract | Flavor reinforcement | Adding extra extract boosts the aroma that ice cream loses when frozen. |
| Heavy Whipping Cream | Mouthfeel enhancer | This mimics the "butterfat" feel of high end creamery shakes. |
For the liquid base, we are using 1/2 cup (120ml) cold whole milk. If you’re looking for a variation, this is similar to the technique used in our Cookies and Cream recipe. The heavy cream (1/4 cup) is the "insurance policy" for texture. It adds a velvety coating that makes even a budget ice cream taste like a premium brand.
- 3 large scoops (approx. 1.5 cups) vanilla bean ice cream: The backbone of the recipe. Why this? High fat content provides better structural stability during blending.
- 1/2 cup (120ml) cold whole milk: The thinning agent. Why this? Provides enough liquid to move the blades without diluting the flavor.
- 1/2 tsp pure vanilla extract or vanilla bean paste: The aromatic punch.
- 1 pinch fine sea salt: The flavor balancer.
- 1/4 cup heavy whipping cream: The texture secret.
- 1 maraschino cherry: For the classic finish.
If you don't have vanilla bean paste, a standard extract works fine, but avoid the "imitation" stuff if you can. It has a chemical aftertaste that becomes very obvious when it's the star of the show.
If you're out of whole milk, you can use a bit of evaporated milk for an even richer, slightly caramelized flavor profile.
Tools for a Silky Blend
You don't need a thousand dollar blender to make a vanilla milkshake, but you do need to know how to use what you have. A standard kitchen blender works perfectly, but if you have a high speed one like a Vitamix or Ninja, you’ll get a much smoother result.
The key is the blade's ability to pull the heavy ice cream down into a vortex.
If you don't have a blender at all, a large stainless steel bowl and a sturdy balloon whisk can work, though it’ll be a workout for your forearms. Some people swear by using a food processor, which actually works great for thick shakes because the wide base and flat blades handle the dense ice cream with less liquid than a traditional blender jar.
Chef's Note: Put your blender jar and your serving glass in the freezer for 10 minutes before you start. This prevents the "flash melt" that happens when cold dairy hits room temperature plastic or glass.
I’ve also found that using a long handled spoon or a dedicated milkshake straw makes a huge difference in the "user experience." Thicker shakes need a wider straw think the kind used for boba tea otherwise, you’ll give yourself a headache trying to get a sip!
step-by-step Blend and Serve

Ready to mix? The order in which you add things to the jar is actually the most important part of the process. If you put the ice cream in first, the blades might just spin in place. If you put the liquid in first, you get a much better "pull" and a more even distribution of the vanilla and salt.
- Chill the equipment. Place your glass and blender jar in the freezer. Note: This buys you an extra 3-4 minutes of "thick" time.
- Pour the milk. Add 1/2 cup cold whole milk to the bottom of the blender.
- Add flavorings. Drop in 1/2 tsp vanilla extract and the pinch of sea salt.
- Layer the cream. Pour in the 1/4 cup heavy whipping cream.
- Scoop the ice cream. Add 3 large scoops of vanilla bean ice cream on top of the liquid.
- Pulse first. Don't just turn it on high. Pulse 5-6 times until the ice cream starts to break down.
- Blend on low. Switch to a low speed for about 15-20 seconds until the mixture looks silky but still holds a peak.
- Check consistency. If it's too thick to move, add 1 tablespoon of milk and pulse again.
- Pour and garnish. Transfer to your frosted glass, top with the cherry, and serve immediately.
When you make a vanilla milkshake, you’ll notice a moment where the "vortex" in the center of the blender finally opens up. That is your cue to stop. If you keep going after that point, you’re just incorporating air and melting the ice.
We want a dense, velvety pour that requires a little bit of encouragement to come out of the jar.
Solving Texture and Flavor Issues
Even the simplest recipes can go sideways. I remember one time I was so excited to use a new "premium" organic milk, but it turned out to be ultra pasteurized, which changed the way it bubbled. The shake ended up looking like soap suds!
It’s all a learning process, but here are the quick fixes for the most common roadblocks.
Why does the shake taste "flat" or boring?
Usually, this happens because the cold numbs your taste buds. Cold food needs more seasoning than hot food. If your shake tastes a bit "blah," it's likely missing that pinch of salt or a boost of acidity. While we don't add lemon to a milkshake, the salt helps the vanilla notes "pop" against the heavy fat of the cream.
What if the blender just won't move?
This is the "air pocket" dilemma. Don't just keep adding milk! Instead, stop the blender and use a long spatula to manually stir the ice cream, pushing it down toward the blades. Often, there's just a bubble of air trapped under a big scoop. Give it a stir, then pulse again.
| Problem | Root Cause | Solution |
|---|---|---|
| Too Thin | Over blending or too much milk | Add another half scoop of ice cream and pulse once. |
| Grainy Texture | Ice cream has freezer burn | Let ice cream sit for 2 mins, then blend; the salt will help smooth it. |
| Too Sweet | Low quality ice cream/syrup | Add an extra pinch of salt or a splash of unsweetened milk. |
Common Mistakes Checklist: - ✓ Forgetting to chill the glass (causes immediate melting at the edges) - ✓ Using "light" or "low-fat" ice cream (lacks the solids needed for thickness) - ✓ Blending on high speed for too long (friction heat is a shake killer) - ✓ Adding the ice
cream before the liquid (creates air pockets around the blades) - ✓ Using room temperature milk (raises the overall temperature too fast)
Simple Ways to Adapt Ingredients
If you're on a budget or have dietary restrictions, you don't have to miss out on a vanilla milkshake. I've had great luck using different bases, though the results vary slightly. For instance, if you're looking for a non dairy option, check out the logic in our Homemade Silk Vanilla recipe. While it’s a milk recipe, the way we balance the vanilla is very similar.
For a budget friendly swap, you can replace the heavy cream with half and half. You’ll lose a bit of that "luxurious" coating on the tongue, but it’ll still be significantly better than using just milk. If you want to get creative, try swapping the whole milk for cold coffee for a "Vanilla Latte" vibe.
| Original Ingredient | Substitute | Why It Works |
|---|---|---|
| Heavy Cream | Half and Half | Reduces fat slightly but keeps a creamy body. Note: Result is slightly less thick. |
| Vanilla Bean Paste | Pure Extract | High aromatic impact. Note: You lose the visual "specks" of the bean. |
| Whole Milk | Evaporated Milk | Very high protein content. Note: Adds a slightly cooked, malty flavor. |
If you need to scale this up for a party, don't try to fit 4 servings in a standard blender. The motor will overheat and melt the bottom layer before the top layer is even mixed. Work in batches of two. If you need a dairy-free version, use a high fat coconut milk (the canned kind) to replace both the milk and the cream. It’s similar to how we treat fats in our How to Make recipe.
- To make it thicker: Reduce milk by 2 tablespoons and add an extra scoop of ice cream.
- To make it lighter: Swap the heavy cream for whole milk and pulse for a shorter time.
- To make it "Malted": Add 2 tablespoons of malted milk powder before blending.
Storing Leftovers Without Losing Quality
Can you store a vanilla milkshake? Technically, yes, but it won’t be the same when it thaws. If you have leftovers, the best way to handle them is to pour the mixture into a silicone muffin tin or an ice cube tray and freeze them solid.
When you’re ready for another treat, just pop those "shake cubes" back into the blender with a tiny splash of fresh milk and pulse. This bypasses the "icy/solid" block issue you get if you just put a glass in the freezer. The cubes break down much more evenly and recreate that fresh blended texture.
As for zero waste tips, if you have a tiny bit of shake left that isn't enough for a refill, use it as a "creamer" for your morning coffee. The vanilla and sugar are already perfectly balanced.
Or, if you have vanilla beans left over from making paste, stick them in a jar of sugar to make homemade vanilla sugar for your next baking project!
Visual Hacks for Better Shakes
We eat with our eyes first, and there’s something about the way to make a vanilla milkshake look "official" that makes it taste better. The classic diner look is all about the height and the contrast.
A perfectly placed maraschino cherry on a cloud of whipped cream isn't just for show it’s the signal that the meal is over and the party has started.
Myth: You should always use the "Milkshake" setting on your blender. Truth: Most "Milkshake" settings are too long and too fast. They are designed for convenience, not quality. Manual pulsing gives you much better control over the size of the ice crystals, which is the key to a thick consistency.
Myth: Adding ice makes it colder and thicker. Truth: Adding ice just dilutes the flavor and creates a "gritty" texture. If your shake isn't cold enough, your ingredients weren't cold enough. Use more ice cream, not ice cubes.
For the best presentation, use a "V shaped" soda glass. Pour the shake so it slightly domes over the top this is only possible if you’ve hit that perfect thickness! If you want to get fancy, drizzle a little honey or maple syrup down the inside of the glass before pouring.
It creates beautiful golden streaks that emphasize the "vanilla" theme without overpowering it.
Now, go grab that blender and get started. There's nothing quite like that first, cold, thick sip of a vanilla milkshake that you made yourself. It’s a small win, but on a hot afternoon, it feels like a total victory. Enjoy!

Vanilla Milkshake FAQs
How to make a vanilla milkshake?
Combine cold ingredients and blend. Start by adding 1/2 cup cold whole milk to your blender, followed by 1/2 tsp vanilla extract, a pinch of salt, and 1/4 cup heavy whipping cream. Then, add 3 large scoops of vanilla bean ice cream.
Pulse the mixture 5-6 times to break down the ice cream, then blend on low for 15-20 seconds until silky smooth but still holding a peak.
How to make a vanilla milkshake step-by-step?
Chill equipment, then layer and blend. First, chill your serving glass and blender jar. Pour 1/2 cup cold whole milk into the blender, add 1/2 tsp vanilla extract and a pinch of salt, then 1/4 cup heavy whipping cream. Top with 3 large scoops of vanilla bean ice cream.
Pulse the mixture 5-6 times, then blend on low for 15-20 seconds until it reaches a thick, silky consistency.
Is a vanilla milkshake just ice cream and milk?
No, a great vanilla milkshake often includes more. While ice cream and milk are the base, adding heavy whipping cream significantly improves texture and mouthfeel, mimicking the luxurious feel of premium shakes. A pinch of salt also balances sweetness and enhances vanilla flavor, as explored in our guide on Easy Homemade Simply Almond Milk: My Creamy dairy-free Secret.
What is the secret of a good milkshake?
Control temperature and fat content. The key is using very cold ingredients and not over blending, which creates heat. Heavy whipping cream adds richness and a velvety coating, while a pinch of salt enhances the vanilla flavor. For a deeper understanding of ingredient roles, check out the thermal balance principles in How to Make Ice Cream: Classic Vanilla Bean, From Scratch!.
Why is my milkshake too thin?
Likely over blending or too much milk. If your shake is too thin, you've either blended it for too long, creating heat that melts the ice cream, or used too much milk. To fix it, add another half scoop of ice cream and pulse once to incorporate.
Avoid adding ice, as it dilutes flavor and creates a grainy texture.
Can I use skim milk in a vanilla milkshake?
No, whole milk is essential for texture. Skim milk lacks the fat and protein structure needed to hold air bubbles and create a stable emulsion, leading to a watery, separated shake. Whole milk provides the necessary richness and body for a truly creamy milkshake experience.
How do I prevent my milkshake from melting too fast?
Start with extremely cold ingredients and equipment. Chill your blender jar and serving glass in the freezer for at least 10 minutes beforehand. Use cold whole milk and heavy cream, and ensure your ice cream is of good quality with a high fat content.
Blending just until smooth, not excessively, also prevents friction heat from accelerating melting.
Vanilla Milkshake
Ingredients:
Instructions:
Nutrition Facts:
| Calories | 788 kcal |
|---|---|
| Protein | 14 g |
| Fat | 53 g |
| Carbs | 64 g |
| Fiber | 0 g |
| Sugar | 55 g |
| Sodium | 445 mg |
