Delightful Cone 6 Glazes: a Guide to Perfecting Your Pottery Finish!
- Essential Ingredients Guide: Crafting Irresistible Pottery Glazes
- Perfecting Your Pottery with Professional Glazing Techniques
- Pro Tips & Secrets for Cone 6 Glaze Recipes
- Perfect Presentation: Making Your Glaze Shine
- Storage & Make-Ahead Tips for Glazes
- Creative Variations for Your Glaze
- Complete Nutrition Guide? More Like Safety Guide!
- Frequently Asked Questions
- 📝 Recipe Card
Okay, let me tell you a little story. a few years ago, i dove headfirst into the world of pottery.
It was one of those “let's try something creative and relaxing” moments. you know what i mean? i thought, “how hard could it possibly be?” fast forward, and i was knee deep in mud, wondering what i just got myself into! the struggle was real! but the best part?
Discovering cone 6 glaze recipes that transformed my pieces from blah to wow .
Seriously, these glazes gave me vibrant finishes that just made my pots pop.
If you ever felt hesitant to start a new project or learned a new skill, you know how good it feels when it pays off.
That’s exactly what these cone 6 glazes can do for you. let me tell you why they’re such a big deal in the pottery community!
Recipe Overview
Pottery glazes have quite the backstory. originating from ancient civilizations, glaze was used to protect and decorate clay pieces. fast forward to today, and cone 6 glazes are all the rage! why?
They fire at a moderately high temperature, usually around 2232° f , allowing for stunning colors and textures without too much fuss.
They're perfect for beginners and pros alike.
Now, you might be wondering how much time you need. here’s the scoop: mixing glazes takes about 10 minutes , but after that, it’s all about patience.
You’ll want to let your pieces dry before firing, and the whole thing can take 1-2 weeks from start to finish.
But hey, good things come to those who wait, right?
When it comes to cost, you’re looking at a modest investment. the basic ingredients can usually be found for around $25 , and a little goes a long way! think of it this way: a batch of glaze can probably cover multiple pottery pieces , which makes it super cost effective.
Key Benefits
Now let’s talk benefits. there are plenty! first off, the health aspect : many cone 6 glazes don’t use harmful materials.
You’ll find that a lot of potters are switching to eco-friendly glaze alternatives , keeping both their art and our planet in mind.
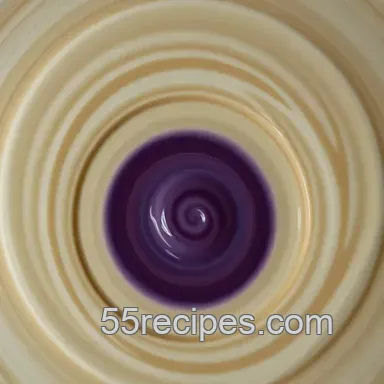
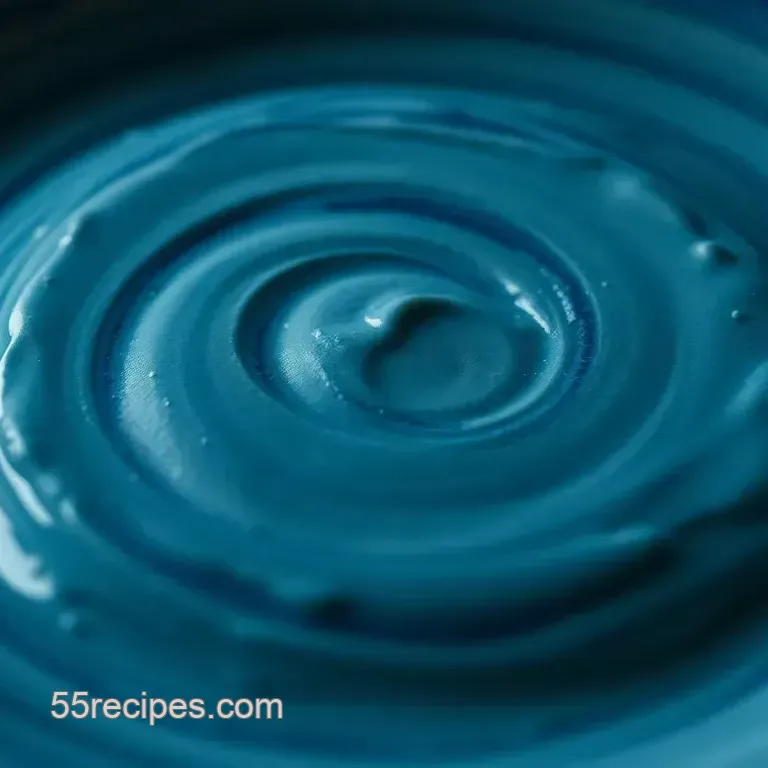
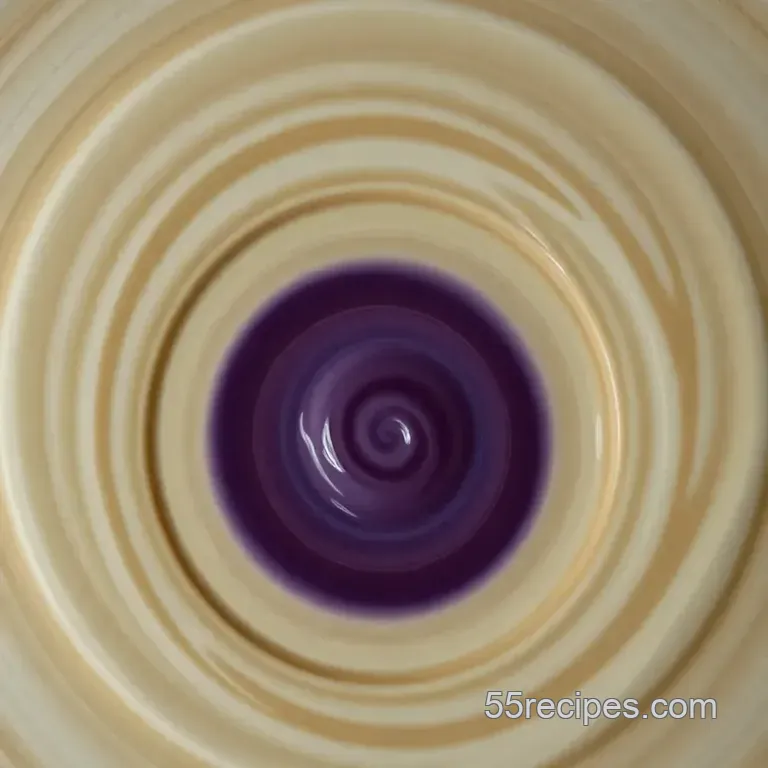
Plus, if you're into vibrant colors, these glazes can give you stunning hues thanks to natural colorants in pottery and beautiful color combinations for glazes .
Another huge bonus? cone 6 glazes are so versatile! use them for everything from mugs to decorative pots. want to impress at your next dinner party? serving food in your handcrafted pottery will definitely take things up a notch.
When it comes to special occasions , these glazes shine. from holiday gifts to custom pottery finishes for weddings, they add a personal touch that store-bought just can't compete with.
Plus, you're learning pottery glazing essentials while you create, which just makes it more rewarding!
Transition to Ingredients
Alright, i hope you’re as excited as i am! next up, we’re diving into the nitty gritty of ingredients. whether you're new to pottery glaze recipes or you’ve been around the block, you'll want a solid foundation.
Get ready to gather everything from feldspar to colouring oxides , because the magic happens when you mix and apply these ingredients.
Trust me! your creations will thank you later!
Essential Ingredients Guide: Crafting Irresistible Pottery Glazes
Alright, folks! get ready for a ride through the colorful and vibrant world of cone 6 glaze recipes . whether you’re a seasoned potter or just dipping your toes into the ceramic pond, knowing your essentials is key to rocking those pottery finishes.
So grab a cup of coffee, and let’s dive in!
Premium Core Components
When it comes to glazes, sourcing and measuring your ingredients is like setting the foundation for a good house. You want to get it right!
- Detailed Measurements (US & Metric): Having accurate measurements is crucial. For example, in the recipe I shared, you'll need 60g (½ cup) of feldspar. Don't sweat it if you're more metric; just remember that sometimes a dash of this and a pinch of that can get you into trouble!
- Quality Indicators: Spotting quality ingredients isn't always easy. Look for fine powders and vibrant colors in your oxides; these indicators often lead to better results.
- Storage Guidelines: Keep your glazes in airtight containers. Trust me; no one wants to open a dusty bag of kaolin after a year! Most dry materials can last up to 2 years if stored well.
- Freshness Tips: When you’re about to use something old, give it a good mix. Sometimes the ingredients can settle, and you want everything nicely distributed for that smooth glaze action.
Signature Seasoning Blend
Now, let’s sprinkle in some magic! Your glaze doesn't have to be just plain. A little seasoning goes a long way.
- Essential Spice Combinations: Think of your base glaze as a blank canvas. Combine it with a smidgen of iron oxide for warm, rustic hues or cobalt for that striking blue vibe.
- Herb Selections: Rosemary in cooking? Think of using herbs like chamomile or mint in glaze applications ; these can add delightful effects!
- Flavor Enhancers: A splash of grog or crushed clay adds texture. It’s like adding salt to a dish; a little can make a big difference!
- Regional Variations: Got a Mexican fiesta in mind? Mix in some copper for those turquoise hues! It’s all about experimenting.
Smart Substitutions
Sometimes things don’t go as planned, and that's okay! Here’s where your creativity can shine.
- Common Alternatives: Running low on feldspar? Sparry stone can step in like a trusty sidekick!
- Dietary Modifications: For those seeking natural options, you can try eco-friendly glaze alternatives that use plant based components.
- Emergency Replacements: Caught in a pickle? Stuck without kaolin? Some arrowroot can save the day! Seriously, it’s a cinch.
- Seasonal Options: Whether it’s summer or winter, adapt your colors based on the vibes. Think light and pastel for spring, deep and rich for fall!
Kitchen Equipment Essentials
Think about your kitchen tools, but for your pottery adventure. You want the right gear to pair perfectly with your skills!
- Must Have Tools: Get your hands on a scale, mixing bowl, and whisk. Trust me; a simple spatula can save you a lot of elbow grease.
- Alternative Equipment: No kiln? It’s a bummer, but there’s always room for creativity with oven use for lower temp projects.
- Preparation Tips: Always wear a mask when working with powdered materials definitely don’t want to be eating dust.
- Storage Solutions: Keep your glaze leftovers in those airtight containers you’ve got lying around. It's just smart, y’know?
So, in your quest for mastering pottery glazes, remember that mixology isn’t just for cocktails anymore. it’s about achieving perfect glaze results through thoughtful preparation and experimentation.
Next, we’ll be jumping into the nitty gritty step-by-step instructions for those delightful cone 6 glazes! are you ready to get your hands dirty and create colorful ceramics that pop? let’s roll!
Perfecting Your Pottery with Professional Glazing Techniques
Ah, the art of glazing pottery! it’s like painting a canvas, but the canvas can be your unique handmade bowl or mug.
You know, when you get that perfect glossy finish, it feels like you’ve just nailed your childhood dream of being a ceramic picasso.
So, let’s dive into the essential preparation steps and processes that can turn your pottery from basic to breathtaking!
Essential Preparation Steps
First off, let’s talk mise en place . you’ve probably heard the chefs say it literally means "everything in its place." before you even touch your cone 6 glaze recipes , gather and prepare all your ingredients.
That way, you won’t be running around like a headless chicken looking for your whiting powder when your mixture is halfway done.
Now, onto time management . pottery and glazing aren’t the quickest hobbies. so, chunk out your time and maybe even set a timer! like, don’t forget to take breaks.
You don’t want your glaze drying out while you’re dawdling around figuring out how to mix oxides, right?
Organization strategies are key! keep your work area clean and clutter free. arrange your materials neatly so you can easily grab what you need.
And remember, safety considerations are paramount! always wear a mask when handling powdered materials, gloves to protect your skin, and ensure you’re working in a well ventilated area.
Step-by-step Process
Ready for the good stuff? Here’s a clear, step-by-step process to get you started.
Measure the Ingredients : Weigh those powders precisely. Trust me, consistency is everything when you’re aiming for vibrant cone 6 glaze finishes.
Mix Dry Ingredients : Combine them in a bowl. Think of it as your pottery’s little dance party feldspar, silica, kaolin, and whiting grooving together!
Add Colouring Oxides : Gradually mix in those oxides. Wanna go cobalt blue? Just think about the pottery pieces you want to showcase.
Add Water : Drizzle in water, mixing until you reach a smooth consistency. It shouldn’t be thick like mud aim for that sweet, pourable texture.
Strain the Mixture : Pass it through a sieve. This step is like filtering coffee; you want the good stuff without the lumps!
Test Application : Apply your glaze to a test piece. Let it dry! This is your “uh-oh” moment, so take notes in case something goes wrong.
Fire in Kiln : Finally, schedule that cone 6 firing. This is where the magic happens! Remember, your kiln should reach temperature settings about 2232° F so keep an eye on it!
Expert Techniques
Moving into expert techniques , let's talk critical steps. as you’re mixing your glazes, be aware of those pesky viscosity adjustments .
Too thick? add a touch more water. too runny? toss in a smidgen more clay.
Here’s a pro tip: troubleshooting is half the fun! if your glaze doesn’t come out exactly how you envisioned, don’t worry! keep a journal.
Document what you did mix ratios, firing schedules so when you find your pottery glaze nirvana, you can replicate it!
Success Strategies for Stellar Pottery
Now, let’s wrap it up with some success strategies . you’d be surprised how easily things can go wrong. i mean, once, i mixed a beautiful turquoise only to have it turn into a murky green.
Painful, right? avoid common mistakes by testing smaller batches first.
Always keep it simple with your quality assurance tips . take note of what looks great after firing. maybe you’ll see those natural colorants in pottery work wonders but didn't quite mix well enough.
And hey, don’t be afraid of make-ahead options ! pre-mix glazes and allow them to settle for a day or two.
This can enhance their beauty when applied.
So, you’re ready to explore cone 6 glaze recipes that will seriously elevate your pottery game! just remember, the key is to enjoy the process.
Every mishap is just another layer of experience on your path to mastering pottery.
Additional Information
With just a little patience and creativity, you can create beautiful custom pottery finishes that will amaze everyone, including yourself! get ready to embrace those textured pottery finishes and carve your niche in the world of ceramics.
Happy glazing, friends!
Pro Tips & Secrets for Cone 6 Glaze Recipes
When it comes to cone 6 glaze recipes , getting the hang of it can be both fun and a bit tricky.
Like any good adventure, you'll want some pro tips to make the journey smoother! first off, let me tell you testing is your best friend .
Try mixing small batches and firing them on test tiles before you go all in on that beautiful piece you’ve worked so hard on.
That way, you can see how the glazes react. i’ve had my share of surprises, where a color turned out way different than i imagined, but hey, that’s all part of the creative experience, right?
Time saving techniques ? sure! when you mix your glazes, do it in larger batches if you find a combination you love.
Just remember to store it properly keep your glazes in airtight containers to avoid drying out. and about enhancing those flavors? i mean textures? for added dimension, toss in some natural colorants in pottery like crushed up shells or sand.
They not only amp up the visual appeal but also give your pottery a unique touch.
Perfect Presentation: Making Your Glaze Shine
Once you have those vibrant cone 6 glaze finishes ready to go, it’s time to think about how to showcase them! a little plating can go a long way.
Instead of just slapping those pots on a shelf, consider positioning them against simple backdrops maybe a white tablecloth or rustic wood? this can really make those colors pop.
And let’s talk garnish ideas . you can use textured pottery finishes to create visual interest. for instance, pairing matte glazes with glossy ones creates a stunning contrast.
Don't shy away from experimenting with color combinations for glazes ; blending greens and blues can evoke a serene, oceanic feel, while fiery reds and oranges might scream modern art!
Storage & make-ahead Tips for Glazes
Now, about storing your glazes think of it like preserving your favorite food. proper storage techniques can make a world of difference.
Make sure to keep your excess glaze in a cool, dry place. an old mason jar works wonders, just ensure the lid seals tight.
Also, note that freshness duration varies by ingredients you don't want to fire a glaze that's been sitting for months. trust me, i learned that the hard way.
If you’re planning for a big project, mix up your glaze a week in advance. let it rest overnight for better consistency and to allow ingredients to hydrate fully.
This little step can save you from a last minute rush!
Creative Variations for Your Glaze
The fun really begins when you step outside the box with creative variations ! if you’re feeling bold, try using different oxides for flavor adaptations copper can create stunning turquoise and chrome gives a vibrant green.
For seasonal twists, incorporate local earth pigments or ash from your backyard (just make sure they’re compatible with your base recipe).
I’ve also found that regional variations can bring a touch of home into your work. If you’re inspired by the Southwest, think about using an ochre based glaze for a warm earthen feel.
Complete Nutrition Guide? More Like Safety Guide!
Now, a nutrition guide for glazes? not quite what you might expect. always focus on safety: wear gloves and masks while mixing! handling raw materials, especially oxides for ceramic glazes, can be risky if inhaled or touched.
Make sure to read up on firing schedule for cone 6 ceramics, as achieving perfect glaze results is all about finding the right temperature.
Honestly, this journey mastering pottery glazes can feel overwhelming. But each piece you create is a step towards perfecting your craft. So, embrace the process, let your creativity run wild, and hey, don’t forget to have fun with it!
In conclusion, the world of cone 6 glazing techniques is vibrant and posh, ready for you to explore. with a bit of practice, some clever tips, and a sprinkle of creativity, you’ll be well on your way to creating stunning works of art.
So, grab those brushes and get glazing your masterpiece is waiting! happy creating! 🌟
Frequently Asked Questions
What are cone 6 glaze recipes exactly?
Cone 6 glaze recipes refer to combinations of materials specifically formulated to be fired at a temperature of approximately 2232°F (1222°C) in a kiln. These glazes are renowned for their versatility, creating beautiful finishes on pottery and stoneware that range from glossy to matte.
They’re a popular choice among potters because they yield vibrant colors and textures under mid-range firing conditions.
Can I modify cone 6 glaze recipes to make my own colours?
Absolutely! One of the joys of working with cone 6 glaze recipes is the ability to customize them to create unique shades. By varying the coloring oxides like adding cobalt for blue or iron for earthy tones you can experiment until you find the perfect hue for your ceramic masterpiece.
Just be sure to record your adjustments for future reference!
How do I store leftover cone 6 glaze?
Leftover cone 6 glaze should be stored in airtight containers to prevent moisture loss and contamination. Keep it in a cool, dry place and make sure to label your storage with the date and composition for future use. This way, you can enjoy your glazing endeavours without having to mix a fresh batch each time!
What safety precautions should I take when working with cone 6 glaze materials?
When working with powdered ingredients for cone 6 glaze recipes, it's crucial to wear a mask and gloves to protect yourself from inhalation and skin contact. Always work in a well ventilated space to minimize dust exposure.
Familiarize yourself with the safety data sheets for the materials you use to ensure you're fully aware of any risks involved.
Do I need to do anything special when firing cone 6 glaze?
Yes, firing cone 6 glaze requires a specific firing schedule to achieve the best results. Make sure to follow recommended ramp-up times and hold points to allow the glaze to mature properly. It might take a bit of practice, but mastering firing techniques will greatly enhance the quality of your finished pottery!
Are there any beginner friendly cone 6 glaze recipes I can start with?
Definitely! Starting with a simple base glaze recipe like the one provided in this guide is a great way to get your feet wet. From there, try adding just one coloring oxide at a time to see how it changes the glaze. Don't shy away from experimenting! Pottery is all about the fun of discovery.
Delightful Cone 6 Glazes A Guide To Perfecting Y