Cooked Quinoa How to Get Fluffy Separate Grains Every Single Time
- Why Your Quinoa Isn't Fluffy (Yet)
- Healthy Eating Made Effortless with Perfect Cooked Quinoa
- Essential Kitchenware for Perfect Quinoa Results
- The Simple Ingredients List (And Why Quality Matters)
- Mastering the Classic Stovetop Method for Fluffy Cooked Quinoa
- Set It and Forget It: Using a Rice Cooker for Hands and Off Preparation
- Delicious Ways to Use Your Batch of Perfectly Cooked Quinoa
- Why Quinoa Is a Powerhouse: Understanding Its Nutritional Profile
- Popular Recipes Under 30 Minutes That Utilize Quinoa
- Recipe FAQs
- 📝 Recipe Card
Why Your Quinoa Isn't Fluffy (Yet)
Listen, I love cooked quinoa. But for the longest time, my batches came out like a gritty, bitter sludge. Seriously. I would rinse it a little, throw it in a pot with too much water (because that’s what the bag said!), and end up with a sticky, mashed mess that tasted vaguely soapy. Sound familiar?
The goal here isn't just cooked quinoa; the goal is perfectly fluffy, distinct little grains that look like they belong on the cover of a fancy magazine. We want grains so separate you can practically count them.
The secret is simple, but often overlooked: precision in the rinse, aggressive draining, and a non and negotiable steam rest. If you nail those three things, the days of mushy quinoa are officially over. I promise.
Healthy Eating Made Effortless with Perfect Cooked Quinoa
Let’s be real: when we talk about staples, most of us default to rice or pasta. But quinoa (keen and wah, remember?) is actually a full and on nutritional powerhouse, offering complete protein and amazing fiber. But is quinoa actually healthier than rice?
Generally, yes, especially because of the protein content and the fact that it’s a complete protein, meaning it has all nine essential amino acids. That’s huge!
If your healthy meal prep relies on a good, filling grain base, learning how to cook quinoa properly makes all the difference. It takes about 30 minutes, it keeps brilliantly in the fridge (we'll cover that later), and it’s a million times more exciting than plain boiled rice, texture and wise.
It’s what makes those quick weeknight grain bowls possible.
Decoding the Saponin Problem (And How to Wash It Away)
Saponin. It sounds like something a chemist invented, but it’s actually a naturally occurring, protective coating on the quinoa seed. It keeps bugs away while the plant is growing. Unfortunately, it tastes terrible bitter, slightly metallic, and yeah, soapy.
Even if the bag says "pre and rinsed," you still need to rinse it. Trust me on this. The manufacturers do a quick tumble, but we need the deep clean.
CRITICAL WARNING: You must use a very fine and mesh sieve. If you use a regular colander, those tiny grains will fall right through. I learned this the hard way trying to salvage 1 cup of quinoa from my sink drain. Not fun.
Rinse under cold water, rubbing the grains with your hand until the water runs completely clear. This usually takes a full minute.
The Ideal Liquid Ratio: Precision for Distinct Grains
This is where most recipes go wrong. They tell you 1 part quinoa to 2 parts liquid. That’s too much! That ratio is what gives you sad, sticky porridge. We are aiming for light, separate grains that absorb just enough liquid to fully hydrate and 'pop' their little white tails (more on that tail later).
I have found, through painful trial and error (and many wasted cups of expensive quinoa), that 1 cup of dry quinoa needs exactly 1 ¾ cups of liquid. This slightly drier ratio works perfectly for both the stovetop and the rice cooker.
Achieving That Perfect, Separated Texture
The key to that gorgeous, separated texture isn't just about the cooking time; it's about the resting time. Think of it like a steak. You don’t pull it off the grill and slice it immediately, right? It needs time to redistribute the juices. Quinoa is the same way, but with steam.
The cooking phase gets the job mostly done, but the 10 minute covered rest allows the residual steam to finish hydrating the grains evenly, causing them to puff up beautifully without absorbing any more water.
Essential Kitchenware for Perfect Quinoa Results
You don't need fancy tools, but you do need the right strainer and a good pot (or, ideally, a machine).
| Item | Why It Matters |
|---|---|
| Fine and Mesh Sieve | Absolutely essential for rinsing off saponin without losing the precious grains down the drain. |
| Heavy Pot/Rice Cooker | Needs a tight and fitting lid to trap the crucial steam during the rest phase. |
| Fork | We use a fork, not a spoon, for fluffing. It keeps the grains separated and prevents mushing. |
The Simple Ingredients List (And Why Quality Matters)
We’re keeping this simple. Quinoa, liquid, and salt. That’s all you need for a fantastic base. But the quality of your liquid makes a huge difference in the final taste. If you’re using this for a side dish, skip the water and grab the broth.
Choosing Your Strainer: Fine Mesh is Non and Negotiable
Seriously, if you are buying quinoa regularly, investing ten bucks in a proper fine and mesh strainer is the best kitchen investment you will make this year. I had one disastrous incident years ago trying to use a standard pasta strainer, and I watched about half a cup of quinoa rain straight into the sink.
It was heartbreaking. Learn from my stupidity! The holes must be tiny, smaller than the grain itself.
The Debate: Stovetop Pot vs. Dedicated Rice Cooker
I am biased. I love my rice cooker. I find it much more forgiving than the stovetop, especially if you get distracted by Twitter or, you know, life. It controls the heat perfectly and switches to 'Warm' when it's done, which makes the resting phase automatic.
The stovetop method is perfectly fine, but you have to be much more attentive to the heat control (too high and you burn the bottom; too low and it never fully cooks). If you cook grains often, the rice cooker is the way to go. It makes hands and off cooking a reality.
Stock Up: The Pantry Collection for Maximum Flavor
A pinch of sea salt is necessary to highlight the quinoa’s natural nutty flavor. If you want to make it taste truly brilliant, throw in a bay leaf or a spoonful of good quality olive oil before cooking. This helps keep the grains separate and adds a nice mouthfeel.
Rinsing Techniques for White, Red, or Black Quinoa
The rinsing technique is the same regardless of color. However, be aware that red and black quinoa tend to be a bit firmer and require slightly more cooking time, maybe an extra five minutes, and potentially an extra splash of liquid. They also maintain their distinctive color, which is great for salads.
Best Liquid Bases: Water, Broth, or Stock?
If you are going to use the cooked quinoa in baking (like veggie burgers), plain water is fine. But if this is a savory side dish or the base for a bowl, please use low and sodium vegetable or chicken broth/stock. It infuses flavor right into the center of the grain.
It makes a neutral ingredient taste instantly savory and complex.
Related Recipes Worth Trying
- Energy Boosting Quinoa Bowl: Easy Follicular Phase Recipes — Looking for tasty follicular phase recipes? Try my Energy Boosting Quinoa Bowl with roasted veggies and herby tahini dressing for a nutritious uplift!
- Easy & Flavorful Garlic Confit Recipe: My Go-To Slow Cooked Method — Discover my favorite garlic confit recipe! This herb infused garlic oil is easy to make and perfect for elevating your meals. Dive in for delicious tips!
- How to Make the Best Gluten dairy-free Breakfast Quinoa Bowl — Wondering what's for breakfast? This energizing quinoa bowl is a delightful mix of fresh fruits and nuts. Perfect for gluten dairy-free diets, it’s so easy...
Mastering the Classic Stovetop Method for Fluffy Cooked Quinoa

Okay, stovetop purists, this is for you. We’ve rinsed and drained the quinoa completely (stage one, check!).
- Combine the 1 cup of rinsed quinoa, 1 ¾ cups of liquid, and salt in a heavy and bottomed saucepan.
- Bring the mixture to a rolling boil over medium and high heat.
- As soon as it boils, immediately reduce the heat to the absolute lowest setting. We want a gentle simmer, barely bubbling.
- Cover the pot tightly . If your lid is a bit loose, wrap a tea towel around it before placing it on the pot to trap that steam.
- Simmer, undisturbed, for 15 minutes. No peeking!
- Remove the pot from the heat, but keep the lid on. Now, follow the crucial rest phase below.
Set It and Forget It: Using a Rice Cooker for Hands and Off Preparation
This is the easiest way to ensure success. Dump the rinsed quinoa, 1 ¾ cups of liquid, salt, and optional oil into the cooker bowl. Close the lid. Press 'Cook' (usually the 'White Rice' setting). Done. Walk away.
The Crucial Simmer and Covered Rest Phase
The rice cooker will handle the simmer, boil, and timing. Once it switches to 'Warm' (or 'Off'), that is not the moment to eat it. I know, it's torture. But if you skip this next step, the grains will collapse and you’ll lose that amazing texture.
Immediately after cooking, let the quinoa rest, still covered, for 10 minutes. Set a timer if you must!
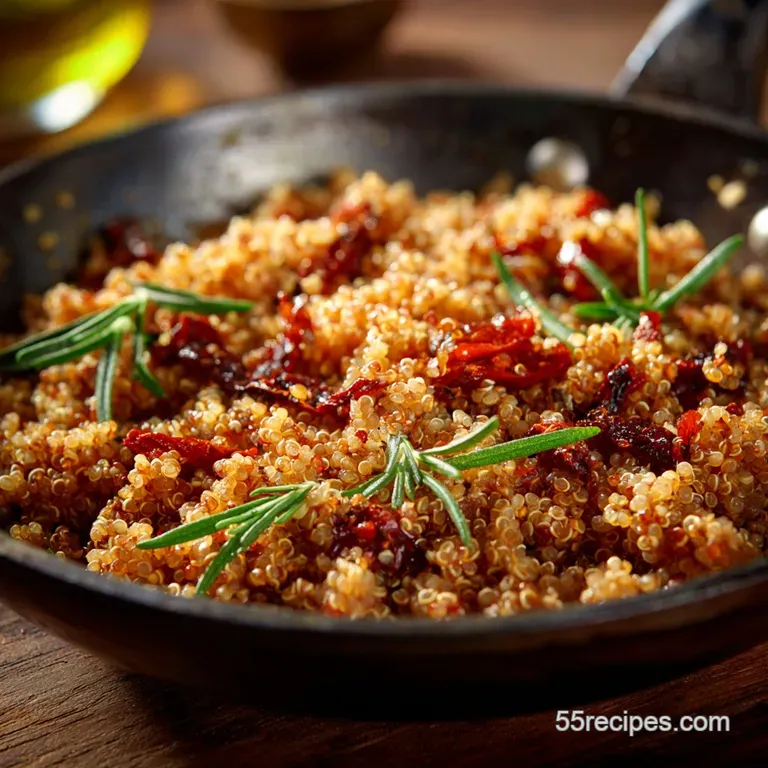
Checking for the Signature 'Tail' (A Visual Sign of Doneness)
When the quinoa is properly cooked, the tiny white germ (the little baby plant) unfurls and spirals around the seed, looking like a little white ring or a tiny tail. It makes the grain look translucent and puffy. If you don't see those tiny tails, it might need another few minutes of steaming.
Precise Water Calibration for Automated Appliances
Because rice cookers are so good at controlling temperature, you really can rely on the 1:1.75 ratio. Don’t use the marked lines inside the cooker bowl those are calibrated for rice, which needs more liquid than quinoa. Measure your liquid precisely for the best result.
Fluffing Techniques to Prevent Sticky Clumping
This is the final, satisfying step! After the 10 minute rest:
- Use a Fork: Gently rake the fork through the quinoa, starting from the edges and working toward the middle.
- Don't Overwork It: We are fluffing, not mashing. Keep the movement light and quick.
- Aerate: Lift the quinoa slightly as you fluff it. This releases trapped steam and helps prevent clumping.
Delicious Ways to Use Your Batch of Perfectly Cooked Quinoa
You’ve got a massive bowl of amazing, fluffy cooked quinoa. What now? The possibilities are endless! It is the perfect neutral base for flavor additions. Need a quick dinner? Toss some roasted veggies and vinaigrette in there.
Why Quinoa Is a Powerhouse: Understanding Its Nutritional Profile
Yes, the flavor and texture are great, but the cooked quinoa nutrition facts are why we bother. It’s significantly higher in protein and fiber than most conventional grains. That fiber content helps keep you full, which is a major win for healthy eating goals. Plus, the protein quality is superior.
Popular Recipes Under 30 Minutes That Utilize Quinoa
Once you have this perfectly cooked quinoa ready to go, the rest of dinner is a breeze. These are my go and to, lightning and fast meals.
Transforming Leftovers: Quick Quinoa Bowl Inspiration
For a quick lunch, just combine your pre and cooked quinoa with these things:
- Protein: Black beans, diced rotisserie chicken, or a hard and boiled egg.
- Greens: Spinach or arugula.
- Crunch: Pepitas, chopped cucumber, or red bell pepper.
- Dressing: A simple homemade lemon and tahini dressing.
That’s a complete meal ready in the time it takes to chop a cucumber.
Meal Prep: Storage Solutions for Maximum Freshness
Cooked quinoa shelf life is about 5 to 7 days in the fridge. Let it cool completely before sealing it in an airtight container. If you store it while it’s still warm, you trap steam and create moisture, which makes it go soggy faster.
Freezing Cooked Quinoa: Tips for Quick Thawing
Yes, you can absolutely freeze it! It’s a meal prep miracle. Lay the cooled quinoa out on a sheet pan in a thin layer and flash freeze for an hour. Then, transfer the frozen, separated grains into a freezer bag. This prevents a giant frozen block.
When you want to use it, microwave it from frozen or add it directly to simmering soup.
Protein Content and Complete Amino Acid Breakdown
Remember how I said it was a complete protein? That’s because it contains all nine essential amino acids those building blocks our bodies can’t produce on their own.
Each cup of cooked quinoa protein delivers around 8 grams, making it a fantastic source for vegetarians, vegans, or anyone trying to cut back on meat.
Fiber Benefits: Supporting Digestive Health and Fullness
The high fiber content is fantastic for your digestive system. It’s also incredibly satisfying, helping you feel fuller for longer. It’s the difference between eating a bowl of white rice (quick energy spike and crash) and a bowl of quinoa (slow and releasing energy and stable satiety).
Toasting Quinoa: Adding Depth and Nutty Flavor
If you want to get really fancy, try toasting the dry, rinsed quinoa in the saucepan with a teaspoon of oil before adding the liquid. Just stir it constantly over medium heat for about 2 minutes until it smells toasty and nutty.
This small step caramelizes the edges slightly and deepens the final flavor profile considerably. Right then, let's crack on with cooking!

Recipe FAQs
My quinoa always tastes a bit soapy or bitter am I doing something wrong?
Not at all! That slightly unpleasant taste comes from saponin, a natural protective coating. You must rinse the quinoa thoroughly in a fine mesh sieve under cold water until the runoff is perfectly clear it's absolutely non-negotiable for a cracking result.
How long can I keep leftover Cooked Quinoa in the fridge?
Properly stored cooked quinoa is safe in an airtight container in the fridge for 3 to 5 days, making it an excellent, reliable base for meal prepping your lunches for the whole working week.
I always end up with mushy quinoa. What's the secret to getting those lovely, distinct fluffy grains?
The secret is the rest and steam: once the liquid is absorbed (or the rice cooker switches off), switch off the heat and leave the lid on for 10 minutes; this crucial step allows the residual steam to fully hydrate the grains without turning them into a sticky mess.
Can I use red or black quinoa instead of white for this standard recipe?
You certainly can, but mind the cooking time red and black varieties are firmer, so they often require an extra splash of liquid and about five minutes more simmering time to achieve that perfect tender chewy texture.
Is quinoa actually a complete protein, and should I choose it over brown rice?
Yes, quinoa is one of the few plant based foods containing all nine essential amino acids, offering a superior protein profile and generally more fiber per serving than most common rice varieties.
Foolproof Fluffy Cooked Quinoa

Ingredients:
Instructions:
Nutrition Facts:
| Calories | 82 kcal |
|---|---|
| Protein | 2.4 g |
| Fat | 2.4 g |
| Carbs | 12.6 g |
