Homemade Hawaiian Bread Recipe for the Bread Maker

- A Sweet Escape to Tropical Bliss
- What’s the Deal with Hawaiian Bread?
- Why You’ll Love It
- Bringing It All Home
- Essential Ingredients Guide
- Transitioning Into Homemade Bread
- Look into into Professional Cooking with Hawaiian Bread
- Pro Tips & Secrets to Hawaiian Bread Bliss
- Perfect Presentation Like a Pro
- Storage & Make-Ahead Magic
- Creative Variations That Wow
- Complete Nutrition Guide for Health-Conscious Bakers
- In Conclusion - Let’s Get Baking!
- Frequently Asked Questions
- 📝 Recipe Card
A Sweet Escape to Tropical Bliss
So, picture this: it’s a lazy sunday morning, and the sun is peeking through the blinds. you can almost hear the waves crashing and a gentle breeze wafting through the air if only!
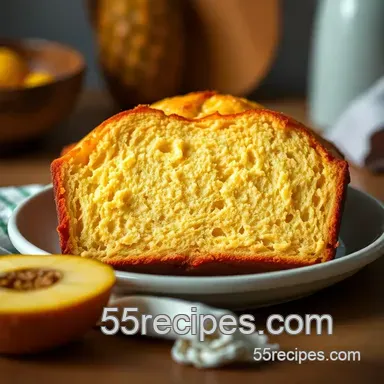
Well, maybe you can’t transport yourself to hawaii, but you can bring its flavors to your kitchen with a hawaiian bread recipe using a bread maker .
Trust me, this sweet bread is like a tropical hug in edible form.
I remember the first time i tried making this bread. the sweet scent of pineapple mixed with coconut drifted into the air, and boom! i was hooked.
I want to share that experience with you full of good vibes and a sprinkle of sunshine.
What’s the Deal with Hawaiian Bread?
Now, let’s dive into a bit of history. hawaiian bread has roots tracing back to the introduction of sugarcane and tropical fruits by polynesian settlers.
It’s since evolved into a beloved staple for many. today, it’s a staple in hawaiian cuisine that has become wildly popular across the u.
S. almost everyone loves the charming sweetness and light, fluffy texture, perfect for breakfast or as a snack.
And let’s keep it real: making this bread is super easy! the hardest part? waiting for it to bake! with just about 10 minutes of prep and 2 hours in the machine , you’ll have a glorious loaf ready to crush.
Plus, i wouldn’t call it wallet busting either. you can whip up this tropical bread recipe for about the cost of a fancy coffee.
Why You’ll Love It
Alright, let’s get down to the nitty gritty. what makes this hawaiian bread recipe a must try? well, first off, it’s not just delicious; it’s packed with health benefits.
Pineapple, for example, is rich in vitamin c and has some cool anti inflammatory properties thanks to bromelain. toss in some shredded coconut, and you’ve got a treat that feels indulgent but won’t leave you feeling guilty.
What’s more, this sweet bread is a hit for special occasions! whether it’s a beach party, birthday, or just a backyard bbq, serving up this delightful loaf will earn you major points.
And let’s not forget the easy bread maker recipe aspect it’s a lifesaver for busy folks or those just starting out in the kitchen.
No fancy techniques, just good, old-fashioned baking comfort!
Bringing It All Home
In a nutshell, this hawaiian bread will be your new go-to for a quick treat that can wow your friends and family.
Imagine slicing into that soft, fluffy goodness, spreading on some honey butter, and feeling like you've been transported to a sunny island.
Sounds amazing, right?
So, ready to turn on that bread maker? Because coming right up, we’ll talk about all the tasty ingredients you need to whip up this island inspired sweet bread recipe ! Let’s get baking!
Essential Ingredients Guide
Let’s dive right in, shall we? cooking’s a whole lot more fun when you know your ingredients! here’s a breakdown of essential components that’ll set you up for success in the kitchen, especially when we’re tackling sweet breads like our irresistible hawaiian bread recipe for the bread maker .
Premium Core Components
First things first, knowing the measurements can make or break your dish. For all those exact folks out there, here are some detailed measurements you’ll love:
- 1 cup (240 ml) pineapple juice
- 1/4 cup (60 g) granulated sugar
- 3 1/2 cups (440 g) bread flour
Now, all these goodies have quality indicators too. when you’re picking up bread flour vs all-purpose flour , go for the one with a higher protein content.
It’ll help provide that light and fluffy texture we’re after!
Storage guidelines? keep unopened items in a cool pantry, while opened ingredients like shredded coconut should head straight to the fridge.
They can last about a week in the fridge or up to six months in the freezer. yep, meal prep at its finest!
Freshness tips: Check expiration dates on your yeast. If it’s past its prime, your dough’s not gonna rise, and we don’t want that!
Signature Seasoning Blend
Now, let’s talk flavors! The right blend is key, especially in something delightful like our Hawaiian bread . Think essential spice combinations that elevate that tropical vibe.
- Herb selections: Fresh cilantro or mint pairs well with coconut, bringing out those island inspired flavors. Let’s kick it up a notch!
- Flavor enhancers: A touch of vanilla or even nutmeg can add a cozy twist. You know, like that hug you get when you bite into something decadent!
Smart Substitutions
Cooking is all about flexibility, right? Maybe you’re out of pineapple juice or coconut. No worries! Here are some quick emergency replacements:
- Use mango juice instead of pineapple for a different tropical twist.
- Swap out coconut for almond extract if you want to keep it nutty and flavorful.
If you’re looking for dietary modifications, you can use gluten-free bread flour for a healthier alternative. The results might differ in texture, but hey, it’s good to try new things!
Kitchen Equipment Essentials
Alright, tool time! You’ll need a few must have gadgets in your arsenal:
- Bread maker: Your trusty sidekick for all those bread machine recipes. You can't go wrong here. It’ll do the heavy lifting.
- Measuring cups: Precision is key! Don't just eyeball it. Get those measurements right for the best results!
Preparation tips: Measure everything out before starting. It’s fun to have all your ingredients lined up like a little cooking army.
And as for storage solutions? A good air-tight container will keep any leftover bread fresh for days, and we all know that the best bread maker brands often offer that extra fluff!
Transitioning Into Homemade Bread
Now that you’ve got the lowdown on essential ingredients and equipment, it’s time to roll up your sleeves and get cooking! ready to tackle that hawaiian bread recipe for the bread maker ? let’s explore how to whip up this delightful treat step-by-step.
Grab your ingredients, and let’s get started on baking bread at home that’ll impress everyone at your breakfast table!
Look into into Professional Cooking with Hawaiian Bread
You know, crafting yummy food is like creating magic in your kitchen, especially when you dive into the hawaiian bread recipe for the bread maker.
It's all about those tropical vibes think pineapple, coconut, and a sprinkle of sweetness. today, we're unlocking some professional cooking methods that’ll level up your bread baking game.
And trust me, whether you're a beginner or a seasoned pro, there's something here for everyone.
Essential Preparation Steps
Let’s kick things off with the foundation of any great dish: mise en place . you gotta gather all your ingredients before you start.
For our hawaiian bread, make sure you’ve got 1 cup of warm pineapple juice (around 110° f/ 43° c ), sugar, butter, eggs, and flour.
Place everything where you can see it. it’ll make your life so much easier!
Now, onto time management . this bread recipe isn’t time prohibitive, but let’s not flatter ourselves either. with a total time of about 2 hours and 10 minutes , you want to stay alert.
So, plan for the active 10 minutes at the start, then let that bread maker do its thing!
Organization strategies are super important. keep your kitchen tidied up as you go. a clean station speeds up the process and keeps your head clear.
Trust me; i’ve learned the hard way that working around a mess is a recipe for disaster.
And don’t forget about safety considerations . make sure to avoid burns while handling that hot bread pan! use mitts and set the bread on a wire rack to cool down.
It’ll look much prettier that way, too who doesn’t want a picture perfect loaf?
Step-by-step Process
Ready for the fun part? Let's break down the steps.
Prep : Combine all your ingredients those warm and cozy flavors.
Mix : Pour the pineapple juice, sugar, butter, eggs, and then the dry stuff into the bread maker. Don’t forget that 1 teaspoon of instant yeast !
Set it : Choose the basic or sweet bread cycle on your bread maker and hit start. Pat yourself on the back while you wait.
Check that dough : after about 5 10 minutes of mixing, pause to see how it looks. if it’s too sticky, just sprinkle on a tablespoon of flour until it’s smooth.
It should be silky and soft but not pancake batter sticky.
Bake : Let everything do its magic. The bread will bake for about 1 hour 30 minutes . That’s time for a cup of coffee or a quick dance break!
Cool : when it’s done, take that golden loaf out and let it cool for a while. then, brush it with some melted butter and add extra shredded coconut on top if you’re feeling fancy.
Expert Techniques
To make this tropical delight really shine, try out some pro tricks. one essential is monitoring the temperature . if you want that light and fluffy bread, your internal dough temp should reach at least 190° f/ 88° c .
As for timing precision , try not to skip the cooling. If you cut into the bread too soon, you’ll ruin the texture. Give it about 30 minutes .
Stir in some cooking with pineapple tips: choose ripe, fresh pineapple chunks if you decide to mix in some fruit variations!
Success Strategies
Don’t be surprised if things don’t go 100% perfect the first time. I’ve had my share of ugly loaves! Here are some common mistakes to avoid:
Over measuring flour : Always stick to the amount laid out in the sweet bread recipe to avoid a brick of bread.
Skipping the yeast proofing : While we used instant yeast, it’s smart to keep an eye on yeast freshness if you’re stuck with active dry yeast.
For ultimate quality assurance , taste before serving. If it doesn’t feel right or look appealing, you might want to tweak your methods next time.
And hey, if you want to get ahead, this Hawaiian bread keeps well. You can easily freeze it for later or enjoy it toasted with your favorite breakfast spread.
Wrapping Up
So there you have it! this hawaiian bread recipe for the bread maker will surely bring smiles and warmth to your table.
With a little practice, each loaf can be your sweet masterpiece. baking isn’t just about following rules; it’s all about the fun of experimenting with flavors.
Feeling the tropical spirit yet? If you want more tips on how to spin this recipe or dive deeper into the ocean of bread maker recipes , stick around for Additional Information coming your way soon!
Pro Tips & Secrets to Hawaiian Bread Bliss
Let’s dive into the nitty gritty of baking with my hawaiian bread recipe for the bread maker ! after countless loaves baked up in my little machine, i’ve learned a thing or two that’ll make your baking experience a breeze.
First off, timing is everything. if you want that killer flavor, try using warm pineapple juice ! warming it to about 110° f ( 43° c) helps activate the yeast, giving your hawaiian bread that light and fluffy texture we all crave.
It’s like magic trust me! and don’t overlook the dough monitoring stage; it can make or break your bread! if the dough feels too sticky, just add flour a tablespoon at a time until it’s smooth.
Easy peasy!
For flavor enhancement, consider a little sprinkle of cinnamon or a splash of coconut extract. This is a simple way to level up the sweetness without making it super complicated.
Perfect Presentation Like a Pro
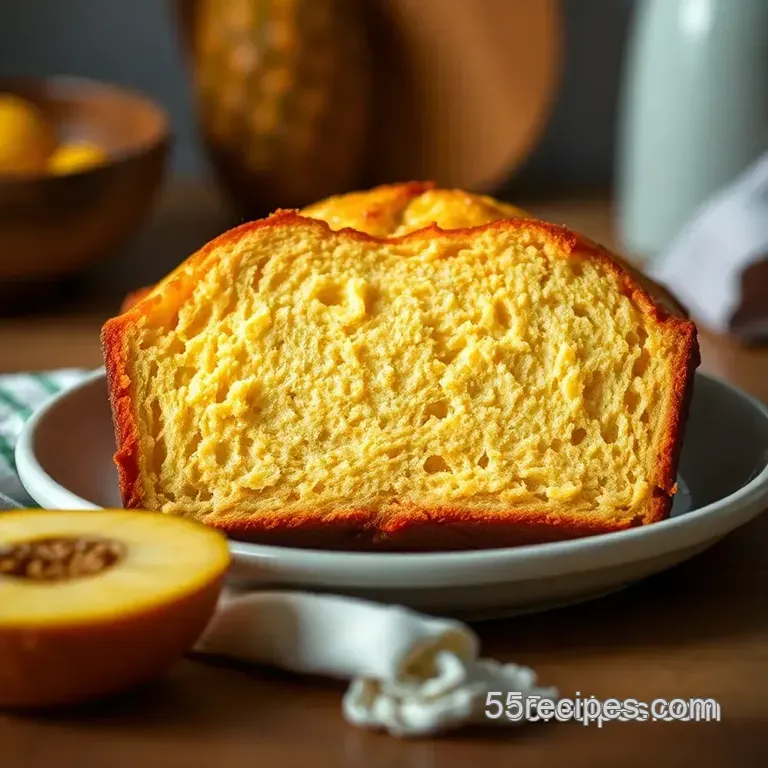
Now, let’s talk presentation, because no one wants their gorgeous tropical bread to look boring! once your bread is baked and cooled, brush it with melted butter and throw on some extra shredded coconut.
Not only does it taste divine, but it looks pretty spectacular too!
For plating, slice the bread into thick pieces that stand upright arranging it like a little bread tower always impresses guests.
Pair it with colorful tropical fruit think strawberries, kiwis, or even dragon fruit! the vibrant colors will give your table that island vibe while displaying your culinary skills.
Storage & make-ahead Magic
Leftovers? no sweat! keeping your hawaiian bread fresh is simple. store it in an airtight container for up to three days .
If you want some longevity, feel free to freeze it! just slice it up before freezing so you can grab individual pieces anytime you want a quick snack or breakfast treat.
When ready to enjoy, just pop it in the toaster or oven to warm it up, and it’ll taste as good as fresh out of the bread maker!
Creative Variations That Wow
One of my favorite parts about this recipe is how versatile it is. want to take a tropical twist ? add in some chopped macadamia nuts or dried cranberries for a little crunch.
Feeling adventurous? turn this into a coconut bread by using coconut milk instead of pineapple juice yummy!
If you’re aiming for dietary modifications, you could switch sugar out for honey or maple syrup. Voila! You’ve got a healthier sweet bread recipe. It’s all about making it yours!
Complete Nutrition Guide for Health Conscious Bakers
Alright, let’s chat about the numbers. this hawaiian bread is definitely a treat, but it's rich in flavors without going overboard.
Each slice is about 160 calories , and it doesn’t skimp on the fun. you've got a little protein, healthy fats from the coconut, and plenty of satisfying sweetness to power your day!
If you’re counting carbs or looking for dietary considerations, it’s worth noting the use of bread flour gives this bread its fluffy texture a little more than all-purpose flour would.
But hey, if you’re set on healthier options, swap in whole wheat bread flour for a nutty flavor!
In Conclusion - Let’s Get Baking!
So there you have it an easy, delightful journey into baking hawaiian bread with a bread maker . with tips to enhance your skills, creative variations to spice things up, and the best storage methods for your fresh bakes, you're ready to bring a taste of the islands into your kitchen.
Whether it’s a casual weekend brunch or a festive family gathering, this recipe is a guaranteed crowd pleaser. so, roll up your sleeves, dust off that bread machine , and let’s bake up some sunshine together.
You won’t regret it! happy baking, friends!
Frequently Asked Questions
What is the best Hawaiian bread recipe for a bread maker?
The best Hawaiian bread recipe for a bread maker typically includes ingredients like pineapple juice, sugar, and shredded coconut. Following the proper steps in the bread maker is key, including monitoring the dough for texture after mixing. This ensures a perfectly soft and sweet loaf!
Can I use all-purpose flour instead of bread flour for Hawaiian bread?
Yes, you can use all-purpose flour in place of bread flour, but your Hawaiian bread may not have the same chewy texture. Bread flour has a higher protein content, which gives the bread its signature structure. However, it will still taste delightful with all-purpose flour!
How do I store leftover Hawaiian bread?
To store leftover Hawaiian bread, keep it in an airtight container at room temperature for up to three days. If you want to keep it longer, freeze it wrapped tightly in plastic wrap or foil. Just remember to slice it before freezing for easy thawing later very handy for snacking!
What are some variations of the Hawaiian bread recipe?
You can get creative with your Hawaiian bread! Try adding mashed bananas for a tropical twist, or make Hawaiian sweet rolls by forming small balls of dough. For a savory touch, omit the sugar and coconut, and add herbs and cheese instead perfect for family gatherings!
Is this Hawaiian bread recipe suitable for beginners?
Absolutely! This Hawaiian bread recipe is very beginner friendly. With a simple ingredient list and straightforward steps, your bread maker does most of the work. Just keep an eye on the dough during mixing, and you'll be whipping up this sweet loaf in no time!
Can I use a different type of sweetener in place of sugar?
Yes, you can substitute maple syrup or honey for granulated sugar if you prefer a different sweetness profile! Just keep in mind you may need to adjust the liquid in the recipe slightly to maintain the right dough consistency. A bit of experimenting can lead to delicious new flavors!
Homemade Hawaiian Bread Recipe For The Bread Mak