Peanut Butter Jelly Bar Recipe

- Time: Active 15 minutes, Passive 35 minutes, Total 50 minutes
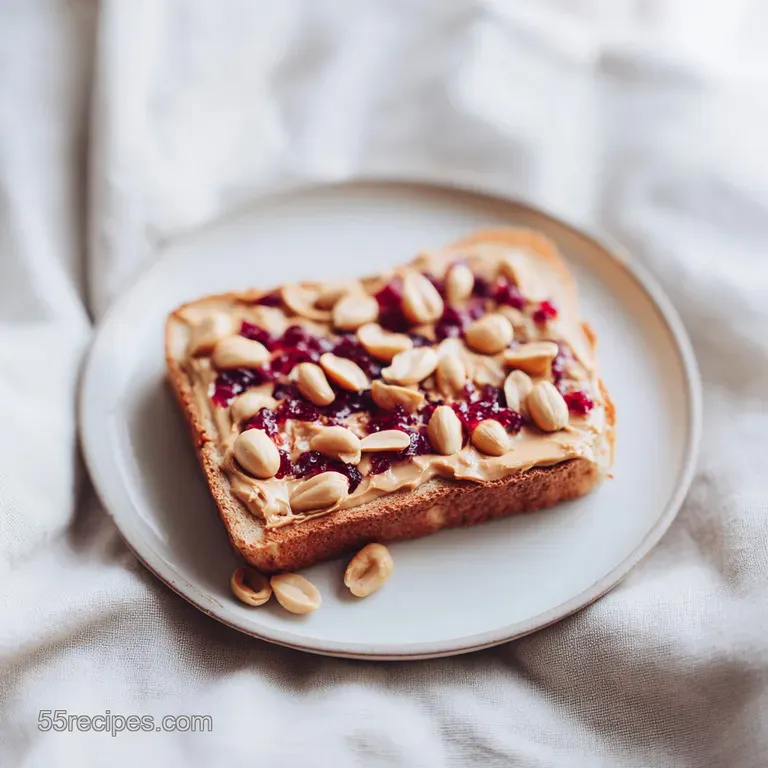
- Flavor/Texture Hook: A salty sweet crumb that yields to a gooey, concentrated fruit core.
- Perfect for: School lunchbox surprises, weekend meal prep, or a nostalgic dessert for a crowd.
- The Physics of the Perfect Peanut Butter Jelly Bar Crumble
- Key Specifications for Your Favorite Childhood Snack Remix
- Selecting the Best Components for a Golden Jammy Center
- Essential Kitchen Tools for a Mess Free Baking Experience
- Step by Step Guide to a Shattering Crust and Gooey Filling
- Solving Common Baking Hiccups for a Flawless Result
- Fun Flavor Variations and Dietary Adjustments for Everyone
- Keeping Your Bars Fresh and Using Up Every Crumb
- Creative Ways to Plate and Enjoy Your Homemade Treats
- Recipe FAQs
- 📝 Recipe Card
The Physics of the Perfect Peanut Butter Jelly Bar Crumble
The magic of this specific bake lies in the ratio of fats to flour. We aren't just making a cookie; we are creating a structural base that can support the weight of 340g of dense fruit jam without becoming a soggy mess.
The combination of 225g of butter and 250g of creamy peanut butter provides a massive amount of fat, which coats the flour particles. This prevents long gluten strands from forming, resulting in a texture that is tender and short rather than tough or bready.
- Fat Saturation
- High fat content from the butter and peanut butter inhibits gluten development, ensuring the bars stay melt in-the mouth tender.
- Starch Gelatinization
- As the bars bake, the moisture in the jam hydrates the starches in the bottom layer just enough to create a "jam lock" seal.
- Maillard Reaction
- The protein in the peanuts and the sugars in the dough react at 180°C to create that deep, toasted aroma we all love.
| Method | Total Time | Texture | Best For |
|---|---|---|---|
| Standard Bake | 50 mins | Classic, balanced crumb | Most home bakers |
| Par Bake Base | 60 mins | Extra crispy, sturdy base | Heavy/liquid jams |
| No Bake Version | 20 mins | Fudgy and dense | Hot summer days |
If you are looking for a different texture profile, you might enjoy my How to Bake recipe which offers a softer, more cake like crumb compared to these dense bars. But for that classic "sandwich in a bar" feel, we want the structure that only a true shortbread based dough can provide. It's about finding that sweet spot where the bottom layer is firm enough to hold with one hand while the top crumble literally shatters when you bite into it.
Key Specifications for Your Favorite Childhood Snack Remix
To get these bars right every single time, you need to watch your metrics. I remember the first time I made these, I used a pan that was way too large, and the "bars" ended up more like peanut butter lace cookies. They were still tasty, but they didn't have that iconic jammy middle.
Now, I always stick to a 20x20cm (8x8 inch) square pan for the best height to width ratio.
- 1. Temperature
- Ensure your oven is calibrated to exactly 180°C (350°F) before the pan goes in.
- 2. Weight
- 312g of flour is the limit too much and the crumble will be dry and sandy; too little and the jam will sink to the bottom.
- 3. Cooling
- You must wait at least 60 minutes before slicing, or the jam will flow out like lava.
| Ingredient | Science Role | Pro Secret |
|---|---|---|
| Creamy Peanut Butter | Emulsified fat and flavor | Use stabilized brands (like Jif) for a consistent, non greasy bake. |
| Light Brown Sugar | Moisture and chewiness | Pack it tight into the cup to ensure the molasses content is accurate. |
| Large Egg | Structure and binding | Ensure it is room temperature so it emulsifies perfectly with the fats. |
The interaction between the granulated sugar and the brown sugar is actually quite intentional here. The granulated sugar helps with the crispness of the top crumble, while the brown sugar keeps the base layer from becoming too brittle.
It's a delicate dance of chemistry that results in a bar that is satisfyingly chewy yet crisp on the edges.
Selecting the Best Components for a Golden Jammy Center
When we talk about the Peanut Butter Jelly Bar, the quality of your preserves matters just as much as the dough. I've tried this with everything from cheap grape jelly to high end artisanal marmalades.
- Unsalted Butter (225g): Softened to room temperature. Sub: Salted butter (omit the extra sea salt).Why this? Provides the foundational "short" texture of the dough.
- Creamy Peanut Butter (250g): The smooth kind works best here. Sub: Almond butter for a different nut profile.Why this? Adds fat, protein, and that essential nostalgic flavor.
- Granulated Sugar (150g): For sweetness and aeration. Sub: Caster sugar for a finer texture.
- Light Brown Sugar (150g): For that hint of caramel. Sub: Dark brown sugar for deeper molasses notes.
- Large Egg (1): To bind the dough together. Sub: 1/4 cup applesauce (yields a denser bar).
- Vanilla Extract (1 tsp): To round out the flavors. Sub: Almond extract for a cherry bakewell vibe.
- All Purpose Flour (312g): The structural backbone. Sub: 1 to-1 gluten-free flour blend.
- Baking Powder (1 tsp): For a tiny bit of lift. Sub: 1/4 tsp baking soda + 1/2 tsp cream of tartar.
- Sea Salt (1/2 tsp): To balance the sugar. Sub: Table salt (use slightly less).
- Fruit Jam or Jelly (340g): I prefer strawberry or raspberry. Sub: My Apple and Jelly recipe for a tart twist.Why this? The moisture in jam creates the "fudge" factor.
- Roasted Peanuts (70g): Roughly chopped for crunch. Sub: Honey Roasted Peanuts recipe for extra sweetness.
Choosing between fresh preserves and store-bought shortcuts is a common dilemma. While homemade is lovely, a high-quality store-bought jam often has more consistent pectin levels, which helps the center set properly during the cooling process.
| Feature | Fresh Homemade Jam | Quality Shortcut (store-bought) |
|---|---|---|
| Texture | Runnier, chunks of fruit | Firm, consistent set |
| Prep Time | 45+ minutes | 0 minutes |
| Sugar Level | Adjustable | Fixed, usually higher |
Essential Kitchen Tools for a Mess Free Baking Experience
You don't need a professional pastry kitchen to pull this off, but a few specific tools will make your life much easier. I've made these using just a wooden spoon and a bowl, and while it works, your forearm will definitely feel the workout. If you have a stand mixer, now is the time to let it shine.
- Square Baking Pan (20x20cm): This is the non negotiable size for 16 perfectly thick bars.
- Parchment Paper: Leave an overhang on two sides (a "sling") so you can lift the entire block out of the pan once cooled.
- Electric Hand Mixer or Stand Mixer: Essential for "creaming" the butter and sugars until they are pale and fluffy.
- Offset Spatula: This is the best tool for spreading that sticky 340g of jam evenly over the base without tearing the dough.
- Large Mixing Bowl: For the main dough.
- Medium Bowl: For whisking your dry ingredients (flour, baking powder, salt) together.
Chef's Tip: Before you start measuring your peanut butter, spray your measuring cup with a little bit of non stick cooking spray. The peanut butter will slide right out without leaving half of it stuck to the sides. It's a total game changer for cleanup!
step-by-step Guide to a Shattering Crust and Gooey Filling
The flow of this recipe is all about managing the dough. Since the dough serves as both the foundation and the decorative topping, you want to keep it at the right temperature so it doesn't get too greasy.
- Preheat and Prep: Set your oven to 180°C and line your 20x20cm pan with parchment paper.
- Cream the Fats: Beat 225g of softened butter, 250g of creamy peanut butter, 150g granulated sugar, and 150g brown sugar until pale and very light. Note: This takes about 3 full minutes.
- Incorporate Aromatics: Add the egg and 1 tsp vanilla extract, beating until the mixture looks velvety and smooth.
- Whisk Dry Goods: In a separate bowl, stir together 312g flour, 1 tsp baking powder, and 1/2 tsp sea salt.
- Combine: Gradually add the flour mixture to the wet ingredients. Mix on low until a soft, slightly crumbly dough forms.
- Form the Base: Press exactly two thirds of the dough into the bottom of the prepared pan. Press firmly until it forms an even, solid layer.
- Apply the Jam: Spread 340g of jam over the base, leaving a 1cm border around the edges. Note: This prevents the jam from burning against the pan sides.
- The Crumble Finish: Crumble the remaining dough over the top of the jam in small chunks. Sprinkle with 70g of chopped peanuts.
- The Final Bake: Bake for 35 minutes until the top is golden brown and the jam is bubbling slightly.
- The Hardest Part: Remove from the oven and let cool completely in the pan for 1 hour until the bars are firm to the touch.
Why Does Par Baking the Bottom Layer Prevent Sogginess?
If you find your bars are consistently soft on the bottom, you can bake the base layer alone for 10 minutes before adding the jam and crumble. This "sets" the starches and creates a waterproof barrier against the fruit preserves.
It’s an extra step, but for those who love a "snappy" bar, it is worth the extra ten minutes.
For the Shattering Peanut Butter Crust & Crumble
The secret to that "shatter" is not over mixing the dough once the flour goes in. You want to see small, pea sized clumps. When these hit the heat of the oven, the air trapped between the crumbs expands, creating a light, aerated texture that contrasts beautifully with the dense jam.
Solving Common Baking Hiccups for a Flawless Result
Baking with high fat ingredients like peanut butter can sometimes lead to oily results if the temperature isn't controlled. If your kitchen is particularly warm, your dough might feel a bit greasy. Don't panic just pop the bowl in the fridge for 10 minutes before pressing it into the pan.
Why Is My Jam Leaking Out the Sides?
This usually happens if the jam is spread all the way to the metal of the pan. Without a "dam" of dough, the sugar in the jam will liquefy and seep down the sides, potentially sticking the bar to the pan and creating a burnt flavor. Always leave that little 1cm border of dough visible.
What If My Bars Are Too Soft to Cut?
Peanut butter is very temperature sensitive. If the bars are still gooey, they likely haven't cooled enough. The fats need to re solidify to hold their shape. If an hour on the counter isn't enough, put the whole pan in the fridge for 30 minutes. They will slice like a dream once chilled.
| Problem | Root Cause | Solution |
|---|---|---|
| Oily Surface | Butter was too melted | Chill the dough for 15 mins before baking. |
| Crumble falls off | Pieces were too small | Press the top crumble lightly into the jam layer. |
| Burned edges | Pan was too thin | Use a heavy gauge metal pan or decrease temp by 10°C. |
Common Mistakes Checklist:
- ✓ Using "natural" oily peanut butter (this can lead to separation and a greasy bar).
- ✓ Over measuring the flour (it makes the bars dry and sandy).
- ✓ Cutting the bars while they are still warm (the jam will spill out).
- ✓ Forgetting to line the pan with parchment (these are sticky and hard to remove otherwise).
- ✓ Skipping the salt (the salt is what makes the peanut flavor pop against the sugar).
Fun Flavor Variations and Dietary Adjustments for Everyone
While the classic strawberry or raspberry jam is the gold standard for a Peanut Butter Jelly Bar, you don't have to stop there. I once made a version with apricot jam and toasted almonds that felt incredibly grown up and sophisticated.
- The "Fluffernutter" Twist: Dollop small amounts of marshmallow fluff alongside the jam before adding the top crumble.
- The Chocolate Lover: Sprinkle 1/2 cup of semi sweet chocolate chips over the jam layer.
- The Tropical: Use mango jam and replace the chopped peanuts with shredded coconut.
If you want X, do Y: If you want a chewier bar, replace the granulated sugar entirely with more light brown sugar. If you want a crunchier topping, double the amount of chopped peanuts and add a tablespoon of oats.
If you want a healthier version, use a low sugar fruit preserve and swap half the all purpose flour for whole wheat pastry flour.
For those dealing with allergies, you can easily swap the peanut butter for sunflower seed butter (SunButter). The flavor is remarkably similar, though the bars may take on a slight greenish tint due to a natural reaction between the sunflower seeds and the baking powder it's totally safe to eat and actually quite a fun science experiment for kids!
Keeping Your Bars Fresh and Using Up Every Crumb
Because of the high sugar and fat content, these bars actually stay fresh longer than your average cookie. They are the ultimate "bake on Sunday, eat all week" snack.
- Room Temperature
- Keep in an airtight container for up to 4 days. They stay surprisingly moist.
- Fridge
- Store for up to 1 week. The texture will become firmer and more fudge like, which some people (including me!) actually prefer.
- Freezer
- These freeze beautifully. Wrap individual bars in plastic wrap and store in a freezer bag for up to 3 months. They are great for school lunches because they thaw by noon!
Zero Waste Tips: If you find yourself with leftover crumbs at the bottom of the pan after the bars are gone, don't throw them away. Those buttery, jammy bits are incredible sprinkled over vanilla ice cream or mixed into your morning yogurt.
You can also pulse any broken bars in a food processor to create a "PB&J Pie Crust" for a cheesecake or a cream pie. It's an easy way to ensure not a single gram of that delicious dough goes to waste.
Creative Ways to Plate and Enjoy Your Homemade Treats
While these are perfectly fine eaten standing over the kitchen counter (no judgment here!), you can definitely dress them up for a dinner party. The key is in the contrast of temperatures.
Try serving a warm bar (just 15 seconds in the microwave) with a big scoop of cold vanilla bean ice cream. The way the jam starts to run and mix with the melting cream is nothing short of spectacular.
If you want to get really fancy, a drizzle of slightly warmed peanut butter over the top adds a beautiful visual element.
Another fun idea for a brunch spread is to cut the bars into very small 2cm squares. These "mini bites" are much easier for guests to grab and feel less indulgent than a full sized bar.
They look beautiful piled high on a white ceramic platter, especially if you give them a very light dusting of powdered sugar right before serving. However you choose to eat them, remember that the best part of a Peanut Butter Jelly Bar is the memories they evoke.
It's comfort food at its finest, made with real ingredients and a little bit of home cooked love. Enjoy the process, and don't forget to lick the spoon the raw dough is honestly half the fun!

Recipe FAQs
Can I use a jelly that is too runny, like apricot preserves?
No, stick to jams or jellies with higher pectin content. Runny preserves will soak into the bottom crust, leading to a soggy base, so use something thick or consider par-baking the base layer.
How to prevent the peanut butter dough from tasting greasy?
Ensure your peanut butter is the stabilized, creamy kind, not natural separated varieties. The high fat content in natural peanut butter can cause separation when baked, leading to an oily finish on the bars.
Is it true I must let the bars cool completely before slicing them?
Yes, cooling for at least 60 minutes is mandatory for clean slices. The fats and jam need time to fully reset and solidify after coming out of the heat; cutting them early causes the jam to ooze out dramatically.
How to make the topping crumble more textured and crunchy?
Increase the chopped nuts and lightly press the topping into the jam layer. Adding 1/4 cup of rolled oats along with the second half of the dough also enhances the overall crunch factor.
Can I substitute all the sugar with honey for a different sweetness profile?
No, substituting all the granulated sugar with honey will ruin the structure. Honey is a liquid sweetener and will add too much moisture, turning the crumb into a soft cake rather than a shortbread bar.
What is the best method to remove the entire block of cooled bars from the pan?
Use the parchment paper "sling" you created during the prep. Lift the entire cooled block using the overhanging edges of the parchment paper, placing it gently onto a cutting board for slicing.
How do I achieve the perfectly tender crust texture seen in professional bakes?
Master the creaming stage by whipping the fats and sugars for a full three minutes until very pale. If you enjoyed mastering this technique of aerating the fat/sugar mixture, see how the same principle achieves lift in my How to Bake recipe for cookies.
Peanut Butter Jelly Bar Recipe
Ingredients:
Instructions:
Nutrition Facts:
| Calories | 425 calories |
|---|---|
| Protein | 7g |
| Fat | 22g |
| Carbs | 52g |
| Fiber | 2g |
| Sugar | 29g |
| Sodium | 172mg |
