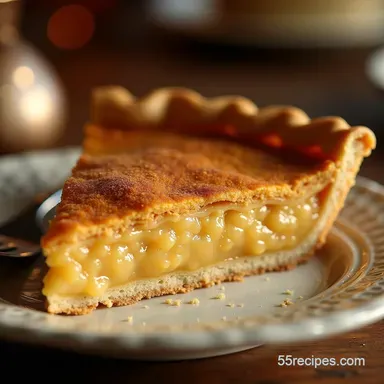
The Ultimate Golden Hour Butterscotch Pie Rich Filling in a Flaky Shell
- Unlocking Nostalgia: Why This Butterscotch Pie Stands Above the Rest
- The Secret to Achieving That Signature Gooey Depth of Flavour
- Assembling Your Treasure Trove of Components for this Butterscotch Delight
- Step-by-Step Mastery: Constructing Your Incredible Butterscotch Pie
- Troubleshooting and Pro-Tips for a Flawless Bake
- Creative Variations on the Classic Butterscotch Theme
- Recipe FAQs
- 📝 Recipe Card
Unlocking Nostalgia: Why This Butterscotch Pie Stands Above the Rest
The allure of a truly magnificent Butterscotch Pie is rooted deep within our collective culinary memories. It’s more than just a dessert; it's a flavour time machine, capable of transporting you straight back to childhood celebrations or comforting Sunday dinners.
Forget the overly gelatinous, one-note sweet imposters you might have encountered; this recipe for the Best Butterscotch Pie delivers on richness, texture, and profound caramel notes.
This Classic Butterscotch Pie isn't just about sugar; it’s about the careful alchemy of brown sugar, rich butter, and cream transforming into something truly transcendent.
Achieving that perfect, slow cooked depth of flavour that defines a superb Homemade Butterscotch Pie is our primary goal, resulting in a dessert that instantly elevates any table setting.
The Secret to Achieving That Signature Gooey Depth of Flavour
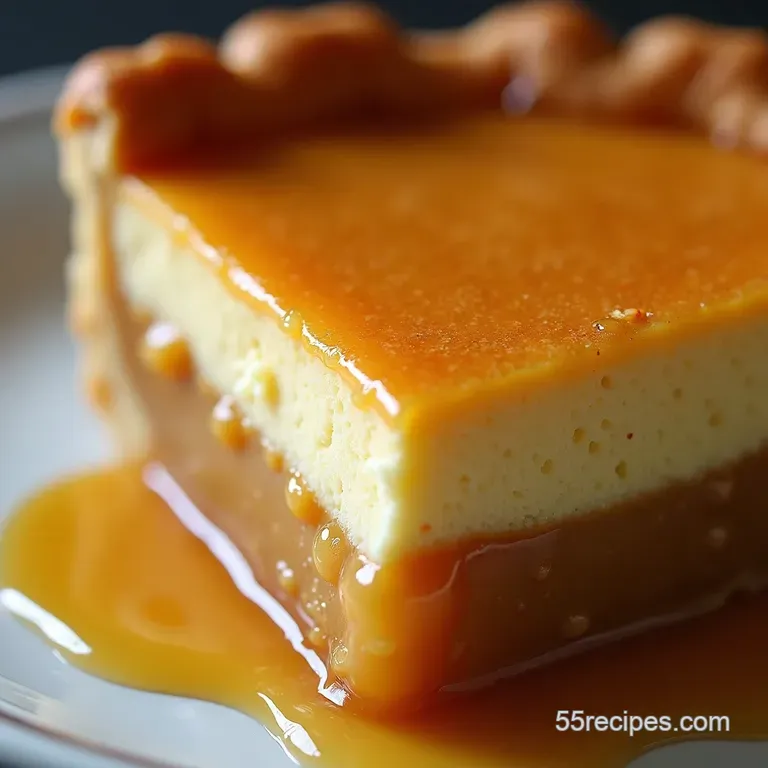
Creating a pie that earns the title of "ultimate" requires attention to detail at every stage. We aren’t aiming for a simple, thin pudding; we want a substantial, luxurious Gooey Butterscotch Pie filling that holds its shape while remaining velvety smooth on the tongue.
This texture hinges on two major factors: proper caramelization and precise egg tempering.
A Culinary Trip Back to Gran's Kitchen
The heart of this experience is that unmistakable warmth that only butterscotch can provide. To replicate that comforting feeling associated with Comfort Food Desserts , we rely heavily on quality, deeply caramelized light brown sugar.
Unlike recipes that rely solely on pre-made sauces or simple thickening agents, our method involves cooking the sugars and butter down until they achieve a glorious amber hue. This step develops complex, nutty undertones that elevate the overall profile far beyond simple sweetness, giving you that authentic "Gran's kitchen" aroma.
Assessing Your Baking Arsenal: Essential Gear for Success
While we aim for an Easy Butterscotch Pie experience where possible, certain tools are non-negotiable for quality results. A 9 inch pie dish, preferably ceramic or glass, ensures even heat distribution for the final bake. Crucially, you need a medium, heavy bottomed saucepan.
This heavier metal prevents scorching when you’re melting the sugars, which is vital when developing that dark, flavourful base. Beyond that, a reliable whisk is your best friend it will be used constantly to ensure a smooth emulsion, especially when incorporating the yolks and cream.
Defining the Perfect Texture: Beyond Basic Pudding
The texture of this Butterscotch Pie Filling must be firm enough to slice cleanly but soft enough to truly melt in your mouth. This balance is achieved through the calculated use of cornstarch alongside the natural thickening power of egg yolks.
The cornstarch provides immediate structure upon cooling, while the yolks lend richness and a custardy mouthfeel. We aim for a consistency that heavily coats the back of a spoon before the final bake, guaranteeing that satisfying, non-runny slice.
Assembling Your Treasure Trove of Components for this Butterscotch Delight
The success of this show stopping dessert begins long before any heat is applied. Whether you opt for the fully from scratch route or incorporate a few shortcuts, understanding the role of each ingredient ensures you have everything ready for the high speed assembly process.
For our Ultimate Golden Hour Butterscotch Pie , we plan for 8 generous slices, demanding both a structurally sound crust and an intensely flavourful interior.
The Flaky Foundation: Crust Component Breakdown
A true Butterscotch Pie demands a contrasting texture something crisp and yielding to counter the creamy filling. We start with a classic Pâte Brisée , utilizing 1 ¼ cups of all-purpose flour paired with ½ cup of ice-cold, cubed unsalted butter.
The incorporation of a single teaspoon of granulated sugar and ½ teaspoon of fine sea salt doesn't just season the dough; it promotes better browning. The key to success here is keeping everything frigid and using only 3 to 5 tablespoons of ice water to bring the dough together into a disk, which then requires a mandatory minimum of one hour chilling time.
Crafting the Golden Filling: Sugar, Cream, and Spice Ratios
The filling relies on a potent combination of sugars. We use 1 cup of firmly packed light brown sugar for that deep molasses flavour, balanced by ¼ cup of granulated sugar to ensure clarity in the caramelization process. This is melted down with ½ cup of unsalted butter.
To enrich the custard base, we incorporate 1 cup of heavy cream (warmed slightly to prevent shocking the sugar mixture) and 4 large egg yolks, which are whisked separately with 3 tablespoons of cornstarch to create our primary thickening slurry.
A final teaspoon of good quality vanilla extract and a pinch of salt round out the essential flavour architecture.
Optional Toppings: Elevating Your Final Presentation
While the pie is magnificent on its own, texture variance is always welcome. If you are aiming for the traditional, cloud like cap, you will need 1 cup of cold heavy whipping cream and 2 optional tablespoons of powdered sugar for a soft topping.
Alternatively, for a dazzling display, consider a classic Butterscotch Pie with Meringue , utilizing those reserved egg whites from the filling preparation.
Related Recipes Worth Trying
- Homemade Kewpie Mayo Ingredients My Umami Secret — Ditch the storebought My Kewpie mayo ingredients recipe gives you the umami bomb youve been craving Richer creamier and easy to make at home Get the secret
- Grandads Pumpkin Pie from Scratch The Ultimate Recipe — Bake the BEST pumpkin pie from scratch This old fashioned pumpkin pie recipe uses fresh pumpkin homemade pie crust for a Thanksgiving dessert showstopper
- How to Make Hush Puppies Crispy Southern Comfort Food — Learn how to make hush puppies a Southern staple This easy hushpuppy recipe delivers golden crispy perfection every time Dip em enjoy Get the recipe now
Step-by-step Mastery: Constructing Your Incredible Butterscotch Pie
The construction process moves swiftly once the dough is chilled and the ingredients are measured. We divide the workflow into managing the pastry shell first, then focusing intensely on the stovetop custard before the final bake sets everything in place.
Pre-Baking the Shell: Ensuring Zero Soggy Bottoms
The first critical step is blind baking the crust. After rolling the dough and fitting it into the 9 inch pie dish, it must be chilled again about 30 minutes helps prevent shrinkage. Preheat your oven to 375° F ( 190° C).
Line the chilled shell with parchment paper and fill it with pie weights (or dried beans). Bake for 15 minutes, remove the weights, and bake uncovered for another 8– 10 minutes until the crust achieves a pale golden colour.
This pre-bake is non-negotiable for preventing a soggy bottom when faced with a liquid filling. Set this partially baked shell aside while preparing the interior.
Whisking the Custard: Temperature Control is King
On the stovetop, melt the butter, brown sugar, and granulated sugar over medium heat, stirring until the butter dissolves and the mixture is uniform. Continue cooking until a deep amber colour is achieved this is where the magic happens, but watch closely, as the difference between perfect caramel and bitter char is mere seconds.
Next, slowly whisk in the warm heavy cream. Once smooth, you must temper the egg yolks: whisk a small ladleful of the hot sugar mixture into your yolk/cornstarch bowl, then pour that warmed mixture back into the saucepan.
Cooking over medium low heat, whisk constantly until the mixture thickens substantially, coating the back of a spoon beautifully.
The Crucial Cooling Phase: Setting Up the Filling Correctly
Immediately remove the thickened Butterscotch Pie Filling from the heat and whisk in the vanilla and salt. Pour this hot custard directly into the warm, pre-baked crust. To achieve the final set, the pie needs a secondary, gentler bake.
Place the filled pie into a 325° F ( 160° C) oven for about 15 to 20 minutes. The goal here is not to cook the custard further, but to gently set the exterior edges while leaving the centre slightly jiggly it will firm up completely upon chilling.
Allow the pie to cool completely on a wire rack before transferring it to the refrigerator for at least four hours, preferably overnight.
Finishing Touches: Meringue Peaks or Whipped Cloud
Once fully chilled and firm, your Butterscotch Pie is ready for its crown. For the simplest, most elegant finish, whip the cold heavy cream with a dusting of powdered sugar until soft peaks form. Spoon this cloud gently over the surface just before serving.
If you opt for the meringue route, ensure your browned meringue peaks are torched or briefly baked until golden brown, adding a dramatic height to this already impressive dessert.
Troubleshooting and Pro-Tips for a Flawless Bake
Even with the most detailed instructions, unexpected issues can arise. Being prepared for common hiccups ensures your attempt at this showstopper remains successful.
Avoiding the Grainy Filling: Common Pitfalls to Sidestep
Graininess is the sworn enemy of smooth custard. This usually occurs when the sugars aren't fully dissolved or if the mixture is allowed to cool too much before the yolks are added.
Ensure you stir the initial sugar and butter mixture over the heat until you can no longer feel any grit when rubbing a small amount between your fingers. On top of that,, when tempering the yolks, ensure the liquid you add to them is warm, not scalding hot, to prevent the proteins from seizing instantly.
Optimal Storage Guidelines for Leftover Butterscotch Pie
Because this pie is custard based, refrigeration is mandatory. Store any leftovers tightly covered in the refrigerator. A well made Butterscotch Pie will maintain its perfect texture for up to three days when kept chilled.
If you have topped it with an unsweetened whipped cream, that topping should ideally be added just before serving, as it tends to deflate slightly overnight.
Inspired Flavor Pairings: What to Serve Alongside This Dessert
To cut through the inherent richness of this decadent dessert, balance is key. A simple cup of strong, dark roast coffee provides a wonderful bitter counterpoint. For an alcoholic pairing, consider a small digestif of aged rum or a high-quality bourbon; their oaky, vanilla notes mirror the brown sugar and butter notes beautifully.
Creative Variations on the Classic Butterscotch Theme
While the standard recipe yields perfection, culinary exploration is always encouraged. Experimenting slightly can lead to new family favourites built upon this solid foundation.
For a contemporary twist, consider introducing salted caramel. Swirling just two tablespoons of high-quality salted caramel sauce into the finished filling before pouring it into the crust adds layers of salty complexity that cut through the sweetness beautifully.
Alternatively, if you enjoy a touch of spice, add ¼ teaspoon of ground cinnamon and a tiny whisper of nutmeg to the sugar mixture during the initial melting phase. These small additions transform the experience while still honouring the core profile of this exceptional dessert.
Recipe FAQs
Why is my Butterscotch Pie filling runny and won't set properly?
This is usually down to not cooking the custard long enough, or insufficient chilling time. The mixture needs to reach a high enough temperature (around 180°F/82°C) to fully activate the cornstarch and thicken.
Remember, it will firm up considerably in the fridge, but if it’s still sloppy after 6 hours of cooling, it likely needs another 10 minutes baked next time.
Can I use a pre-made pie crust instead of making one from scratch?
Absolutely! If you’re short on time, a good quality, store-bought refrigerated pie crust will do the job just fine no need to make a song and dance about it if you’re busy.
Just make sure you blind bake it according to the recipe instructions before adding the filling, otherwise, you’ll end up with a soggy bottom, which is a total travesty!
How should I store leftover Butterscotch Pie and how long does it last?
Because this pie contains eggs and cream, it must be kept in the refrigerator. Cover it loosely with cling film (be careful not to let it touch the surface of the topping if you’ve added whipped cream) and it should keep well for about 3 to 4 days. It tastes best when served straight from the fridge!
I’m worried about burning the butterscotch it keeps going dark too fast! What should I do?
That moment when the sugar goes from golden to black in a blink is definitely nerve wracking! Keep your heat on medium low, use a heavy bottomed pan to distribute the heat evenly, and stir constantly using a heatproof spatula, making sure to scrape the bottom corners.
If you notice it darkening rapidly, immediately take the pan off the heat and slowly whisk in the cream.
Is this recipe suitable for freezing?
Unfortunately, the texture of this custard based filling doesn't fare too well in the freezer; the chilling process can cause the starches and fats to separate upon thawing, resulting in a grainy or weepy texture. It's best enjoyed fresh within a few days.
My topping keeps weeping (separating). How do I get stiff, fluffy peaks for serving?
For the best whipped cream topping, ensure both your heavy cream and the mixing bowl (and even the whisk attachments) are thoroughly chilled this helps the fat molecules stabilize. Don't overbeat it; stop whipping just as stiff peaks form, or you risk turning it into butter!
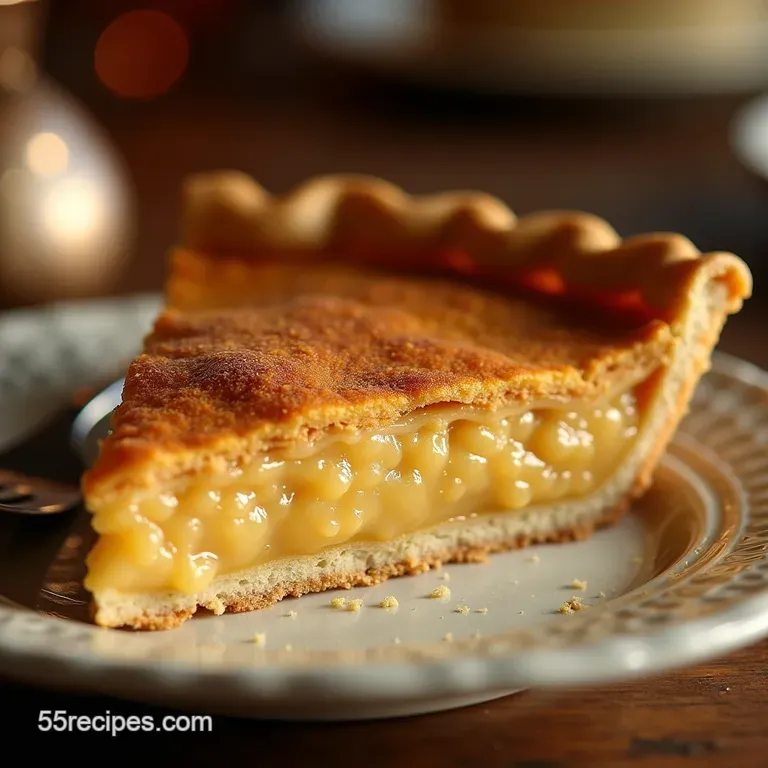
Gooey Butterscotch Dream Pie