Valentine's Day Cake Pops
- Have You Ever Tried Making Cake Pops From Scratch?
- Valentine's Day Cake Pops: A Culinary Journey
- Why This Recipe Will Amaze You
- Health and Nutrition Highlights
- Recipe at a Glance
- Master Ingredient List
- Kitchen Equipment Essentials
- Professional Cooking Guide
- Professional Secrets
- Perfect Presentation
- Storage and Make-Ahead
- Creative Variations
- Complete Nutrition Guide
- Expert FAQ Solutions
- 📝 Recipe Card
Have You Ever Tried Making Cake Pops From Scratch?
What’s the most delightful, bite sized treat you could bring to a valentine's day celebration? if your mind instantly jumps to cake pops, congratulations! you're already halfway to creating a masterpiece that's as fun to make as it is to eat.
But let’s be honest people often think they're too complicated or time consuming. that’s where this recipe for valentine's day cake pops comes in like a charming hero ready to turn that misconception upside down.
This recipe requires just about 50 minutes of your time (plus chilling time) and is rated easy, so don't sweat it if you’re a kitchen rookie!
Now, let's talk about what makes this cake pop recipe so special. not only is it a hit for romantic occasions, but it also shines at kid’s parties or casual get-togethers.
These little treats pack a punch of flavor and creativity, and they let you express love in the most scrumptious way possible.
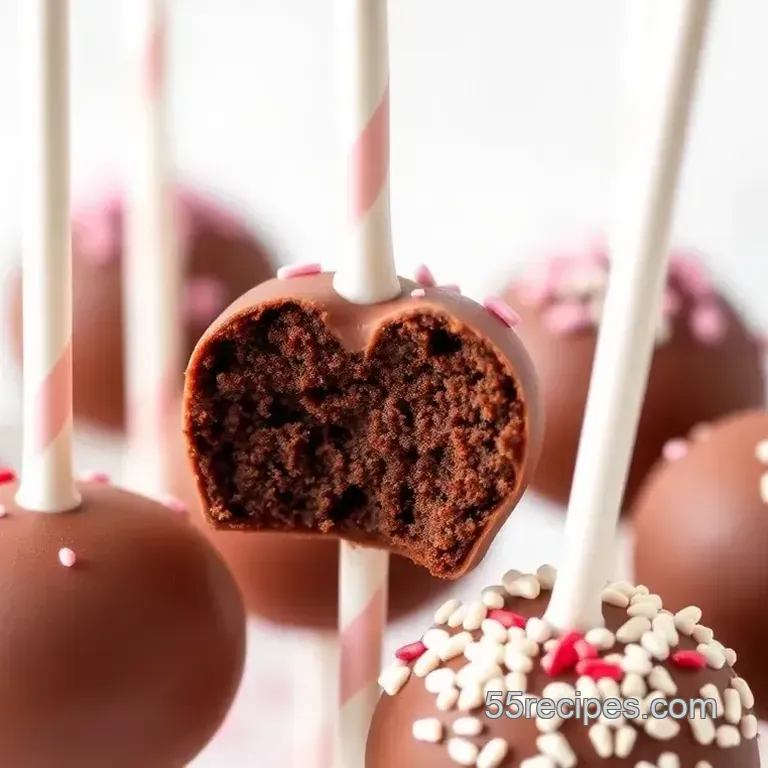
Imagine your partner's face lighting up when they see these cute cake pops heart shape and all! trust me, there’s a lot to love here.
Valentine's Day Cake Pops: A Culinary Journey
When it comes to delicious desserts, cake pops hold their own in the sugary pantheon. these sweet bites blend simple cake and frosting into a handheld snack that dates back to the early 2000s.
Invented by a bakery named bakerella, cake pops quickly gained popularity, becoming a must try among baking ensoiasts in the uk and beyond.
Their rise to fame coincided with the trend of personalizing food for special occasions what's more personal than a lovingly crafted treat that looks like a little work of art?
The cultural significance of cake pops has flourished, especially around holidays like valentine's day. these festive bites have become a beloved way to showcase culinary creativity, and who wouldn’t want to give or receive a pretty cake pop decorated with sprinkles?
they’ve even migrated from home kitchens to bakeries and cafes, solidifying their contemporary popularity as both a dessert and a sweet gift.
Why This Recipe Will Amaze You
Now, let’s get real for a moment what are you waiting for? this recipe is loaded with unique flavor combinations, where chocolate meets fluffy frosting for a taste that can send your sweet tooth into overdrive.
With my expert tested methods, i’ve tinkered and perfected these cake pops to ensure they come out right every time. forget about clumpy chocolate coatings or falling sticks i've learned from past kitchen disasters, and you won't have to.
Plus, i've got some time saving tips that will have you knocking out these treats in no time. trust me, your friends will be begging to know your secret when they taste these gourmet cake pops.
Just imagine rolling these delightful spheres of goodness in colorful sprinkles and watching everyone’s faces light up!
Health and Nutrition Highlights
Now, i know what you might be thinking: "are cake pops really healthy?" well, while not exactly health food, these little gems can fit into a balanced diet.
Each cake pop contains about 165 calories, which isn’t terrible for a sweet treat. they have a moderate amount of fats and sugars, but you're not going to eat a dozen at once right?
If you want to experiment with dietary options, try using gluten-free flour or egg substitutes. this makes them inclusive for various dietary needs without sacrificing flavor.
It’s all about offering a little indulgence, with a nod toward healthier choices when possible. and let’s face it a little sweet treat here and there can be part of a happy, balanced life!
Recipe at a Glance
Are you ready to embark on this baking adventure? Here’s what to expect:
- Total Preparation Time: 25 minutes
- Cooking Time: 25 minutes
- Total Time: 50 minutes (plus chilling time)
- Serving Size: 12 cake pops
- Difficulty Level: Easy
With all that said, let’s gather our ingredients and dive into the nitty gritty of how to make these irresistible Valentine's Day cake pops. I promise once you start mixing and tasting! you’ll be hooked!
Okay, grab those ingredients, and let’s make some magic happen in the kitchen! You won't want to miss the next part on how to actually whip these delicious cake pops into existence.
Master Ingredient List
Let’s dive into the wonderful world of cake pops, shall we? whether you’re whipping up these valentine’s day cake pops for your loved ones or just treating yourself because, why not, the ingredients you choose can make all the difference! here's what you’ll need.
Premium Core Ingredients
1 cup all-purpose flour : try to get unbleached flour it’s a little better flavor wise and often yields a lighter texture.
When you scoop it up, don’t pack it down; use a spoon instead.
1/2 cup granulated sugar : Get that fine sugar. The kind that’ll dissolve quickly in your batter. It creates the magic of sweetness!
1/2 cup unsweetened cocoa powder : Don’t go for that sweetened stuff it’ll throw off your balance! Always check that it’s nice and dark. The richer, the better!
1 tsp baking powder and 1/2 tsp baking soda : both are vital, but they do different jobs. the baking powder gives it fluffiness, while the soda ensures the cake doesn't have a weird metallic taste.
1/4 tsp salt : This always balances the sweetness, trust me on this one!
1/2 cup buttermilk : If you don’t have buttermilk handy, a mix of regular milk and vinegar will do the trick. Just let it sit for a few minutes.
1/4 cup vegetable oil : Opt for a flavorless oil. It’s less intrusive and keeps your cake moist and tender.
1 large egg : The binding agent! Use it at room temperature for better mixing.
1 tsp vanilla extract : The soul of the dessert! Your cake will taste incomplete without this.
1/2 cup boiling water : This is a bit unusual, but it helps create a super moist crumb. Just be careful!
Signature Seasoning Blend
Now let’s move on to make our cake pops pop even more with a little coating love!
12 ounces pink or white candy melts : these are your best friend when it comes to coating. they melt beautifully and are super easy to work with.
Aim for high-quality brands like merckens or candy melt usually give a better finish.
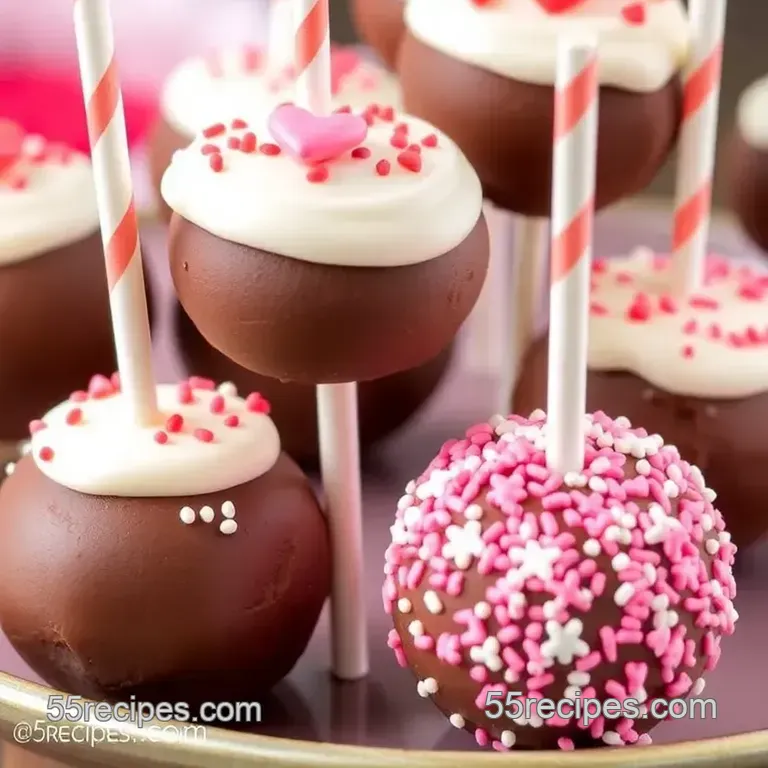
Sprinkles or edible glitter : Because who doesn’t love a little sparkle? Pick your favorites heart-shaped sprinkles scream Valentine's Day!
Smart Substitutions
Sometimes, life throws a wrench in our plans. Here are some hacks you may find handy:
Alternative options : If you can't find candy melts, try using chocolate chips. Just make sure to add a teaspoon of vegetable oil to help it melt smoothly.
Dietary swaps : Going vegan? You can use applesauce instead of the egg and swap in almond milk for the buttermilk.
Emergency replacements : Running low on powdered sugar? Blitz granulated sugar in a blender until it turns to powder it doesn’t work exactly the same, but it’ll do!
Seasonal variations : Add some pumpkin puree in the fall or peppermint extract during the winter holidays for a twist!
Kitchen Equipment Essentials
Now, let’s talk gear because, believe it or not, having the right tools can make your cake pop experience a breeze.
Must have tools : A sturdy mixing bowl and a whisk are non-negotiable. You’ll need them for everything from blending the batter to combining frosting.
Recommended appliances : A microwave for melting your candy and a baking sheet lined with parchment paper for cooling those beauties.
Helpful gadgets : Grab some lollipop sticks don’t skip this part otherwise, where do we put the pops? A small ice cream scoop can help shape those cake balls nicely too.
Home alternatives : If you don’t have lollipop sticks, use pretzel rods! They're a fun twist and add a bit of crunch.
Pro Ingredient Tips
Before I continue, let's chat about a few secrets I’ve learned while navigating the cake pop cosmos.
Selection secrets : Go local for the best ingredients. Farmers' markets often have fresh eggs and surprisingly affordable butter.
Quality markers : When choosing cocoa powder, look for Dutch processed it’ll give you that rich chocolate flavor that's just divine.
Storage solutions : those cake pops can last in the fridge for a week if you keep them in an airtight container.
So, you can make them ahead of time, which is a lifesaver!
Money saving tips : Always buy your pantry staples in bulk! Flour and sugar are things you will use all the time.
Now that we’ve covered the essentials to get you ready for valentines day cake pops , let’s jump into how to actually make these delightful treats.
Roll up your sleeves, and let’s get this sweet project started!
Professional Cooking Guide
Alright, my friends, let’s dive into the sweet world of valentine’s day cake pops ! i remember the first time i attempted to make these little beauties.
It was chaotic! the kitchen looked like a candy store explosion, and i was knee deep in chocolate. but oh boy, were they worth it at the end! a delicious treat for that special someone, or let’s be honest, for yourself (i won’t judge).
So, grab your apron and let’s get to the good stuff!
Essential Preparation Steps
Before we get into the nitty gritty of actually baking, let’s talk about mise en place . this fancy french term just means having everything in its place.
Measure out your ingredients, pour them into little bowls if you’re feeling fancy, and set everything on the counter. this not only saves time while cooking but also keeps you from losing your mind when you realize you’re out of cocoa powder.
Prep techniques: start with your cake pan. grease and flour it nobody wants a cake that sticks like it’s bonding with the pan.
For the cake batter, you’ll want to whisk the dry ingredients and mix the wet ones separately. this way, you ensure a smooth batter without any lumps.
Time management : the entire process takes about 50 minutes , but don’t forget that you’ll need chilling time for those cake pops.
Plan for that, and maybe even whip up a cup of tea while you’re waiting.
Organization Tips : Keep your workspace tidy. Trust me, a clean station saves many a last minute panic.
Professional Cooking Method
step-by-step Process
We’ll start by baking the actual cake. preheat your oven to 350°f (175°c) while that’s heating, you can mix the dry ingredients (flour, sugar, baking powder, and all).
In another bowl, combine the wet ingredients (think buttermilk, egg, and so on). slowly stir them together and throw in some boiling water yes, it's supposed to be thin.
Pour that glorious mix into your loaf pan, bake for about 25 minutes , and then let it cool completely.
A toothpick should come out clean. this is the moment where i usually do a little "yay!" dance, but you do you!
Temperature Control
Keep an eye on that oven! Too much or too little heat can ruin your cake, and we don’t want that.
Timing Precision
Cooking is all about timing. Set your timer; otherwise, you might wander off, forgetting about the lovely cake in the oven. Trust me, I’ve burnt more than my fair share of treats.
Success Indicators
Your cake is done when the toothpick pulls out clean and the smell... oh the smell is just heavenly! you should let the cake cool completely before crumbling it up patience is key here.
Expert Techniques
Now, onto the fun part: turning that cooled cake into cake pops! crumble your cake into a bowl until you see no large bits.
Here’s where i made a mistake once: i added all the frosting at once. bad idea. gradually add it until you have a nice, moldable consistency.
Roll them into balls and pop them in the fridge to firm up for about 30 minutes .
Critical Steps
Make sure your cake balls are cold when you dip them into the melted candy coating to avoid disaster no one wants a soggy cake pop!
Precision Points
When melting your candy coating, go in 30-second increments so you don’t end up with a burnt blob of chocolate goodness.
Quality Checks
Before decorating, check that the coating is smooth and the cake pop is upside right. If it's dripping too much, just let it sit for a moment patience people!
Success Strategies
Troubleshooting Tips
If your cake pops are falling apart, they might be too warm or you’ve added too much frosting. Keep them cool, and remember, practice makes perfect!
Quality Assurance
Always taste your frosting before mixing it in. i once made a frosting that was way too sweet and, i tell you, it was like eating pure candy sugar not the best.
Perfect Results Guide
Aim for uniform cake balls so they cook consistently. And don’t worry if they’re not perfect spheres; you can always call them “rustic”!
Now that you’re prepped and ready, why not explore some cake pop decorating ideas ? I can’t wait to share some creative designs that will impress all your friends and maybe your crush too!
In our next section, I’ll cover some fun decorating techniques and variations of cake pops you can try out, just in time for your next party or special occasion! Because, let’s face it, who wouldn’t love some gourmet cake pops as a sweet gift? Stay tuned!
Professional Secrets
Professional Insights
Let me tell you, when it comes to making valentine's day cake pops , there’s a certain finesse that comes from experience.
The beauty of these treats isn’t just in their taste but in their presentation and construction. i learned the hard way (awkward kitchen mishaps, you know) that taking your time during the mixing of the cake batter is crucial.
If you rush, the pops can end up too dry or crumbly.
Expert Techniques
One technique i picked up is to bake the cake a day ahead. this way, it cools down thoroughly, allowing you to get those cake crumbs just right.
If you’ve never experienced the joy of molding perfectly round cake pops, trust me it gives an immediate sense of victory! plus, smashing that cooled cake feels oddly therapeutic.
Kitchen Wisdom
Keep a small bowl of water nearby when you're rolling those cake balls. dipping your hands in it helps prevent the cake batter from sticking to your fingers.
It’s a little trick, but it makes a world of difference, especially if you’re making these adorable treats in bulk.
Success Guarantees
Want to guarantee success? use a candy thermometer when melting your chocolate. it should be around 90°f to 110°f for optimal coating without clumping.
You’ll be surprised at how much of a game changer this tip is!
Perfect Presentation
Plating Techniques
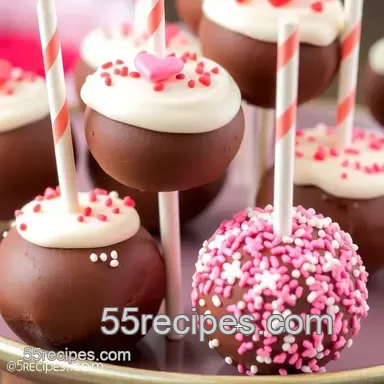
When you finally finish those cake pops , it’s time to showcase them! i love sticking them in a cute little vase filled with colorful jelly beans for a pop of color.
It's like a bouquet of sweetness!
Garnish Ideas
Sprinkles are practically a must. I always keep a stash of colorful sprinkles handy. They not only add flair but transform your cake pops into festive treats. Don’t be shy layer them on!
Serving Suggestions
Serve these delights on a wooden cutting board for a rustic look or on a plate with a drizzle of melted chocolate underneath. It’s all about that elegant touch, as they say!
Visual Appeal Tips
The key to visual appeal? consistency. aim for similar sizes and smooth coatings on your cake pops. trust me, it’ll make people think you’re a baking pro.
Plus, make sure to keep color harmony; i often stick to reds, whites, and pinks for that romantic touch.
Storage and make-ahead
Storage Guidelines
If you’re not eating these bad boys straight away, you can store your cake pops in the fridge in an airtight container for up to a week. They taste just as delightful!
Preservation Methods
Alternatively, you can freeze them for longer storage. just place them in a freezer safe container, separating each layer with parchment paper.
They last well for a month, and when you’re ready, let them thaw in the fridge.
Reheating Instructions
No reheating is needed, but if you do need to refresh your melted chocolate for dipping, just put it back in the microwave for short bursts of 10 seconds, stirring in between.
Freshness Tips
Freshly made cake pops always taste best. however, i’ve successfully kept them fresh by wrapping each one in cellophane before storing.
It adds an extra layer of charm if you plan to gift them.
Creative Variations
Flavor Adaptations
Getting bored with chocolate? Try vanilla! Or, bold as it sounds, coconut or matcha flavored cake pops! The world is your oyster when it comes to flavors.
Dietary Modifications
If you’ve got gluten-free pals, no worries! Simply switch the flour with almond or coconut flour. And for vegan versions, flax eggs come in handy; they work fantastically in cake recipes.
Seasonal Twists
As winter melts into spring, why not add lemon zest or raspberry flavoring? Seasonal ingredients can transform your cake pops and embrace the flavors of the times.
Regional Variations
Feeling adventurous? Incorporate flavors from other regions! Think chai spiced or even a hint of Earl Grey for a playful twist on traditional cake pops.
Complete Nutrition Guide
Detailed Breakdown
Each Valentine's Day cake pop packs a sweet punch at about 165 calories. This means, well, they’re not exactly health food, but a treat in moderation is fine!
Health Benefits
Hey, at least they have some nutritional value compared to regular candies! You’ve got protein from the cake and some calcium from the milk. So go ahead, indulge a little!
Dietary Information
Before diving into these sugar bombs, keep in mind that each pop has about 14g of sugar. Totally a sweet tooth’s delight!
Portion Guidance
Let’s be real while they’re perfectly portioned, you’ll probably want to double down. I mean, who stops at one?
Expert FAQ Solutions
Common Concerns
What if your pops fall off the stick? Just re-melt your chocolate and dip them back in; a little repair work goes a long way!
Expert Answers
“If I don’t have candy melts, can I use chocolate?” Absolutely! Just temper it well before dipping to get that glossy finish.
Troubleshooting Guide
If your cake pops are cracking after being dipped, that might mean they were too cold. Let them sit at room temp for a little before dipping to avoid the drama.
Success Tips
Always use room temperature ingredients the batter comes together beautifully this way, which leads to flavorful pops.
In conclusion, making valentine's day cake pops can be a delightful experience, whether you're a novice or seasoned baker. with a few personal anecdotes and tricks, you’re all set to impress your loved ones.
So roll up your sleeves and enjoy the tasty journey ahead because nothing says “i love you” quite like a homemade sweet treat!
Valentine S Day Cake Pops
Ingredients:
Instructions:
Nutrition Facts:
| Calories | 165 |
|---|---|
| Protein | 1.5g |
| Sodium | 50mg |
