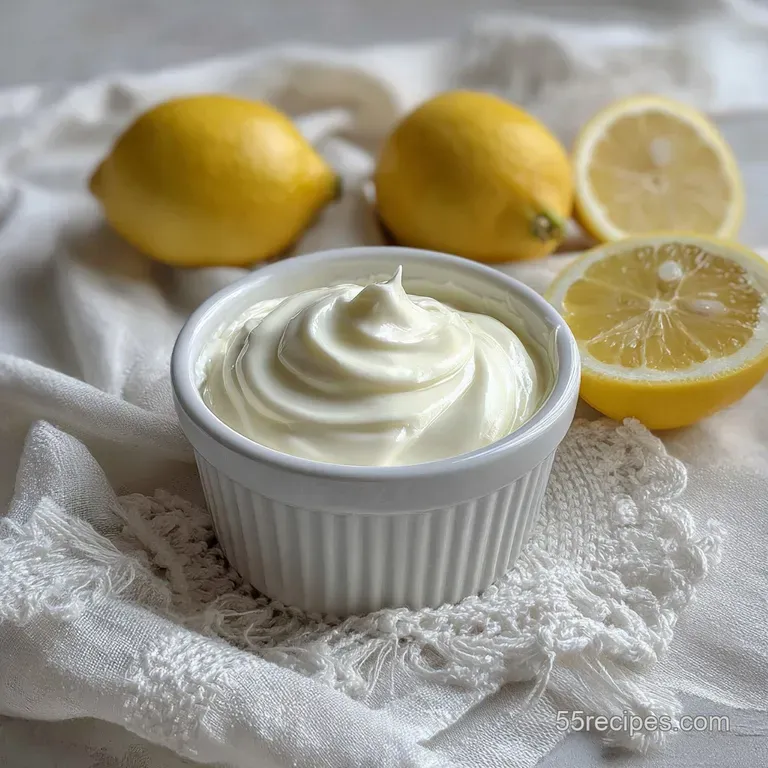
Fraiche Cream Recipe
- Time: Active 2 minutes, Passive 24 hours, Total 24 hours 2 minutes
- Flavor/Texture Hook: Buttery, tangy, and incredibly velvety
- Perfect for: Enriching sauces, dolloping on fresh berries, or meal prep
- Why This Fraiche Cream Recipe Rules
- Essential Specs for Best Results
- Two Simple Ingredients You Need
- Essential Tools for Easy Prep
- Bringing the Whole Recipe Together
- Fixing Texture and Thinness Issues
- Smart Swaps and Flavor Variations
- Best Methods for Storing Your Cream
- Ways to Plate and Present It
- Final Secrets for a Great Batch
- Fraiche Cream Recipe FAQs
- 📝 Recipe Card
Why This Fraiche Cream Recipe Rules
I still remember the first time I stood in the specialty cheese aisle, staring at a tiny, four ounce jar of crème fraîche that cost nearly ten dollars. I wanted to make a fancy pan sauce for a date night dinner, but my budget was screaming.
I bought it anyway, and while the sauce was lovely, my wallet felt a little lighter than I liked. It wasn't until I started chatting with a neighbor who grew up in France that I realized I had been overpaying for something I could literally make in my sleep.
Honestly, the "secret" isn't a secret at all. It is just biology doing the hard work for you while you go about your day. When I finally tried making it at home, I was stunned by how much better the texture was compared to the store-bought stuff.
It has this specific, gentle tang that sour cream just cannot replicate, and because of the high fat content, it doesn't break or "shatter" into a greasy mess when you stir it into a bubbling soup.
You are going to love having a jar of this sitting in your fridge. It feels like a little luxury that you can just pull out whenever a dish needs a bit of silky depth. Whether you are using it to top a baked potato or folding it into some lightly sweetened fruit, the difference is night and day.
Plus, it makes your kitchen feel like a proper French bistro without the airline ticket or the expensive grocery bill.
Lactic Fermentation Power
- Bacterial Conversion: Cultured buttermilk introduces live lactic acid bacteria that consume the natural sugars in the cream.
- Acid Thickening: As the bacteria produce acid, the proteins in the cream begin to clump together, creating a thick, spoonable texture.
- Heat Stability: The high fat content protects the protein structures, allowing it to remain stable and smooth even at boiling temperatures.
| Premium Option | Budget Alternative | Flavor Impact | Savings |
|---|---|---|---|
| Imported French Jar | Homemade Recipe | Fresher, cleaner tang | Save $7-8 per batch |
| Specialty Buttermilk | Standard Cultured Buttermilk | No noticeable change | Save $2 per carton |
| Organic Heavy Cream | Store Brand Heavy Cream | Slightly less yellow | Save $3 per pint |
This comparison shows that you really do not need to hunt down "gourmet" versions of these basic dairy items to get a spectacular result. The fermentation process is a great equalizer, turning even the most basic store brand cream into something that feels incredibly high end once the 24 hours are up.
Ingredient Deep Dive
| Ingredient | Science Role | Pro Secret |
|---|---|---|
| Heavy Cream | Provides the fat structure | Use "pasteurized" but avoid "ultra pasteurized" for the thickest set. |
| Cultured Buttermilk | Inoculates with bacteria | Ensure the label says "Live Cultures" so the fermentation actually happens. |
Using the right cream is the biggest factor here. While ultra pasteurized cream will still work, the high heat used during its processing can sometimes lead to a thinner final product. If you can find standard pasteurized cream, you'll get a much more velvety finish that holds its shape on a spoon.
Essential Specs for Best Results
When you are dealing with a slow burn recipe like this one, precision comes down to timing and temperature rather than frantic chopping. You are essentially acting as a shepherd for a tiny colony of beneficial bacteria, and they are quite picky about their working conditions.
If your kitchen is particularly chilly, the process will slow down significantly, whereas a warm summer day might have your cream ready in half the time.
The beauty of this fraiche cream recipe is its simplicity, but don't let that fool you into being careless with the specs. We are aiming for a specific pH level where the cream is tangy enough to be interesting but still buttery enough to be decadent.
I have found that a steady room temperature is the sweet spot for a consistent 24 hour set.
| Factor | Homemade Classic | store-bought Quick |
|---|---|---|
| Wait Time | 24 hours | Instant |
| Cost | Low ($2-3) | High ($7-10) |
| Additives | Zero | Often contains gums/thickeners |
As you can see, the only thing the store-bought version has going for it is speed. If you can plan just one day ahead, the homemade version wins on flavor, price, and purity every single time. It is a much better velvety base for a Honey Ice Cream recipe than anything you'll find in a plastic tub.
Two Simple Ingredients You Need
This is one of those rare moments in cooking where the ingredient list is shorter than the equipment list. We are looking for quality over quantity here. Since there are only two components, their freshness and type really do matter for the final outcome.
- 2 cups heavy cream: Look for a fat content of at least 36%. This high fat level is what prevents the cream from curdling in hot sauces. Why this? High fat ensures a stable, non curdling texture when heated.
- 2 tablespoons cultured buttermilk: This is your "starter." It contains the live bacteria needed to transform the cream. Why this? It provides the active cultures necessary for the thickening process.
For a fun twist, I sometimes use this as a filling inside a Profiteroles Recipe by whipping the finished product with a little powdered sugar. It adds a sophisticated tang that cuts through the rich chocolate sauce perfectly.
Essential Tools for Easy Prep
You don't need a stand mixer or a fancy sous vide machine for this. In fact, you probably have everything you need in your cupboard right now. The goal is to keep the environment clean so that only the "good" bacteria from the buttermilk get to grow.
2 Must Have Tools
- Glass Mason Jar: Glass is non reactive and easy to sanitize. Avoid metal bowls as the acid produced during fermentation can react with the surface.
- Breathable Cover: A clean coffee filter or a piece of cheesecloth secured with a rubber band allows gases to escape while keeping dust out.
Precision Checkpoints
- 70°F (21°C): This is the ideal ambient room temperature for the fermentation to occur predictably.
- 24 Hours: The maximum time you should leave it on the counter before moving it to the fridge to stop the process.
- 40°F (4°C): The temperature your fridge should be at to allow the "cold set" to firm up the fats.
Bringing the Whole Recipe Together

This is the easiest "active" cooking you will ever do. It is all about the setup. Once you mix the two ingredients, your only job is to leave it alone. I have made the mistake of hovering over the jar and stirring it every few hours, but trust me, that just disrupts the protein chains as they are trying to bond.
Phase 1: Inoculation
- Clean your jar. Wash a glass pint jar with hot, soapy water and dry it completely.
- Combine the dairy. Pour 2 cups heavy cream and 2 tablespoons cultured buttermilk into the jar.
- Seal and shake. Put the lid on tightly and give it a vigorous shake for 10 seconds to ensure the cultures are evenly distributed.
Phase 2: The Countertop Rest
- Vent the jar. Remove the solid lid and replace it with a coffee filter or cheesecloth. Secure it with a rubber band.
- Find a spot. Place the jar in a warm, draft free area of your kitchen out of direct sunlight.
- Wait 24 hours. Let it sit undisturbed. You will see it begin to thicken and look slightly opaque. Note: If your house is over 75°F, check it at 12 or 15 hours.
Phase 3: The Cold Set
- Check the consistency. After 24 hours, the cream should be the thickness of a loose yogurt.
- Seal and chill. Replace the breathable cover with a solid lid and refrigerate for at least 12 hours.
- Stir before using. Once chilled, it will be thick and spoonable. Give it a gentle stir until it looks silky and uniform.
Chef's Tip: If you want a super thick, almost cheese like consistency, let the finished crème fraîche drain through a coffee filter set in a mesh strainer for 2 hours in the fridge. This removes excess whey and leaves you with a spreadable masterpiece.
Fixing Texture and Thinness Issues
Sometimes things don't go exactly to plan. Usually, it is because of the temperature or the age of your buttermilk. Don't panic and pour it down the drain; most issues are easily fixed with a little more time or a slight change in environment.
My Cream Is Thin
If after 24 hours your cream is still liquid, your kitchen might be too cold. The bacteria are dormant when they are chilly. Move the jar to a warmer spot, like on top of the refrigerator or near a toaster oven that you use frequently. Give it another 6 to 12 hours.
If it still doesn't thicken, your buttermilk might not have had active live cultures.
Separation and Liquid
Seeing a little clear or yellowish liquid at the bottom or top of the jar is perfectly normal. This is just the whey separating from the milk solids. It doesn't mean the batch is ruined. Simply stir it back in, or if you want a thicker result, you can carefully pour the liquid off.
| Problem | Root Cause | Solution |
|---|---|---|
| No thickening | Cold room or dead cultures | Move to warmer spot or use fresh buttermilk |
| Yeasty smell | Fermented too long | Chill immediately; use in savory dishes only |
| Grainy texture | Over shaking or high heat | Whisk vigorously after chilling to smooth out |
Common Mistakes Checklist
- ✓ Using ultra pasteurized cream (it takes much longer to set).
- ✓ Using "shelf stable" buttermilk that doesn't contain live cultures.
- ✓ Placing the jar in direct sunlight which can cause the cream to spoil.
- ✓ Moving the jar to the fridge too early before it has visibly thickened.
- ✓ Using a metal lid during the counter rest (traps moisture and gases).
Smart Swaps and Flavor Variations
Once you have the base down, you can start playing with the profile. This fraiche cream recipe is a blank canvas. I often divide a batch in half one for savory dinners and one for sweet breakfasts. It is much more versatile than sour cream because the flavor is more nuanced and less "punchy."
- Herb and Garlic: Whisk in minced chives, parsley, and a smashed garlic clove. This is incredible on top of seared steak or roasted potatoes.
- Honey and Vanilla: Add a teaspoon of honey and a drop of vanilla extract for a dessert topping that puts whipped cream to shame.
- Citrus Zest: Fold in lemon or lime zest to brighten up a bowl of spicy chili or a plate of fish tacos.
3 Ways to Use It
- If you want a thicker set: Leave it on the counter for 30 hours instead of 24.
- If you want it tangier: Increase the buttermilk to 3 tablespoons for a sharper flavor.
- If you want a lighter version: Use half and half, though keep in mind it will be much thinner and may curdle if boiled.
Best Methods for Storing Your Cream
Proper storage is what keeps your hard work from going to waste. Since this is a fermented product, it actually has a decent shelf life, but you still need to be careful. Always use a clean spoon when scooping from the jar to prevent introducing new bacteria that could cause spoilage.
- Fridge: Store in an airtight glass jar for up to 10 to 14 days. The flavor will continue to sharpen slightly as it sits, which many people (including me!) actually prefer.
- Freezer: I don't recommend freezing it. The emulsion will break when it thaws, leaving you with a grainy, watery mess. It is best enjoyed fresh.
- Zero Waste Tip: If you have a few tablespoons left that are about to expire, stir them into your scrambled egg mix. It makes the eggs incredibly creamy and gives them a slight lift that is just brilliant.
Ways to Plate and Present It
Presentation is where you can really show off that "velvety" texture we've been talking about. Because it is thicker than heavy cream but softer than cream cheese, it holds its shape beautifully on a plate. It doesn't just run everywhere; it sits exactly where you put it.
For a professional look, try "quenelling" the cream. Take two spoons and pass a dollop of the chilled cream back and forth between them to create a smooth, football shaped scoop. Place this on top of a warm slice of apple tart or a bowl of borscht.
The contrast between the cold, tangy cream and the hot food is a sensory experience that your guests will notice immediately.
If you are serving it with berries, I like to put the cream in a small, pretty bowl and create a "well" in the center with the back of a spoon. Pour a little bit of high-quality maple syrup or a balsamic glaze into that well. It looks stunning and allows people to get a bit of everything in one dip.
Final Secrets for a Great Batch
The biggest secret to this fraiche cream recipe isn't the stirring or the jar it is the patience. It is so tempting to put it in the fridge after 8 hours when it still looks like liquid, but you have to trust the process. The "magic" happens in those final hours on the counter.
Also, don't be afraid to experiment with the cream you use. Some local dairies sell "cream top" or minimally processed creams that have an even higher fat content than the standard grocery store versions. Using those will result in a crème fraîche so thick you can almost slice it with a knife.
One last thing: if you ever find yourself out of buttermilk, you can actually use a tablespoon of the crème fraîche from your last batch to start the new one! It works exactly like a sourdough starter.
Just keep that cycle going, and you will never have to buy that expensive little jar from the store ever again. Right then, let's get that jar on the counter and start fermenting!

Fraiche Cream Recipe FAQs
How do you make cream fraiche?
Combine heavy cream and cultured buttermilk, then let it ferment. Mix 2 cups of heavy cream with 2 tablespoons of cultured buttermilk in a clean glass jar. Cover with a breathable material, like cheesecloth, and let it sit at room temperature for 24 hours until thickened. Then, chill in the refrigerator for at least 12 hours before stirring and using. If you enjoyed mastering this slow fermentation technique, see how similar principles of culturing and thickening apply to our How to Make Ice Cream: Classic Vanilla Bean, From Scratch!.
What is crème fraîche made of?
Typically, it's made from heavy cream and a bacterial culture. The live lactic acid bacteria in cultured buttermilk ferment the lactose in the cream, producing lactic acid. This acid thickens the cream and gives it its characteristic tangy flavor.
What do you do with crème fraîche?
It's incredibly versatile for both sweet and savory dishes. Use it to enrich pan sauces, swirl into soups, dollop on fruit or desserts, or as a base for dips and dressings. It adds a wonderful tangy creaminess without curdling when heated, making it perfect for dishes like our Best Homemade Butterscotch Pie Recipe with Flaky Crust to cut through the sweetness.
How to make a crème fraîche sauce?
Stir it into your sauce at the end of cooking. After your sauce has finished simmering, remove it from the heat and whisk in a generous spoonful of crème fraîche. Stir gently until it's fully incorporated and the sauce is smooth and creamy.
Its high fat content means it won't curdle like regular cream when added to hot liquids.
Can I use sour cream instead of crème fraîche?
Yes, but with a caveat regarding heat. Sour cream can be used as a substitute in cold applications or when the dish isn't heated to a boil, as its lower fat content makes it prone to curdling. Crème fraîche is preferred for hot sauces and dishes because it's much more heat stable.
How long does homemade crème fraîche last?
It typically lasts for 10-14 days when stored properly in the refrigerator. Keep it in an airtight glass container and always use a clean utensil to scoop it out to prevent introducing spoilage bacteria. The flavor may continue to develop and sharpen slightly over time.
Why is my homemade crème fraîche not thickening?
Your kitchen might be too cold, or the buttermilk's cultures may not be active. Ensure the cream is in a warm spot (around 70°F/21°C) to allow the bacteria to ferment properly. If it remains liquid after 24 hours, try moving it to a slightly warmer location for an additional 6-12 hours.
If it still doesn't thicken, you may need to use fresher cultured buttermilk next time.
Fraiche Cream Recipe
Ingredients:
Instructions:
Nutrition Facts:
| Calories | 102 kcal |
|---|---|
| Protein | 0.7 g |
| Fat | 10.7 g |
| Carbs | 0.9 g |
| Fiber | 0 g |
| Sugar | 0.9 g |
| Sodium | 13 mg |
