Fried Green Beans Recipe
- Achieve Crunch with This Fried Green Beans Recipe
- Essential Technical Success Secrets
- Vital Stats and Yield Data
- Selecting Your Flavorful Ingredients
- Tools for a Shattering Crust
- Steps for a Golden Fry
- Solving Common Texture Issues
- Smart Swaps for Dietary Needs
- Preserving the Perfect Crunch
- Best Ways to Serve Them
- Fried Green Beans Recipe FAQs
- 📝 Recipe Card
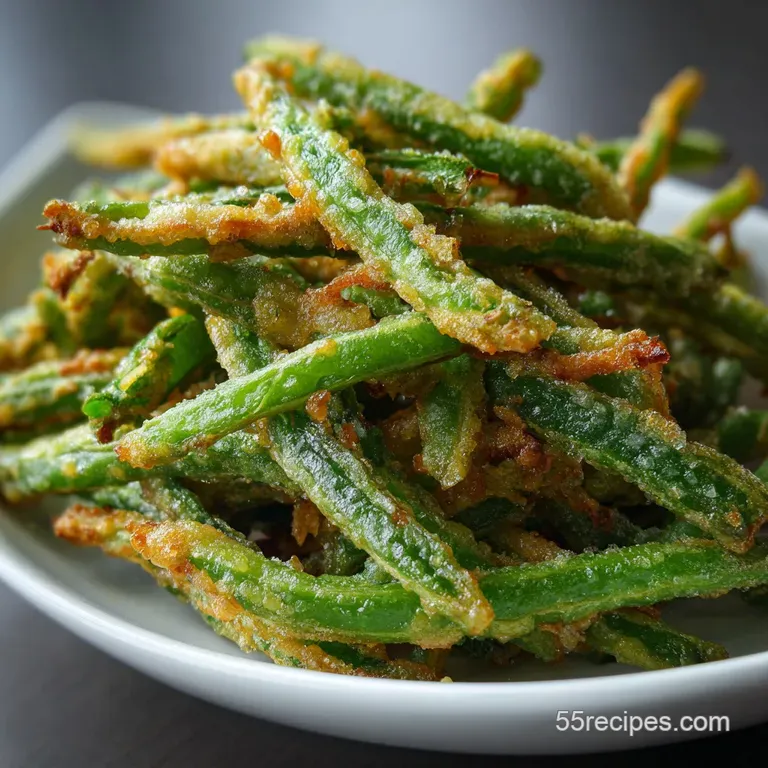
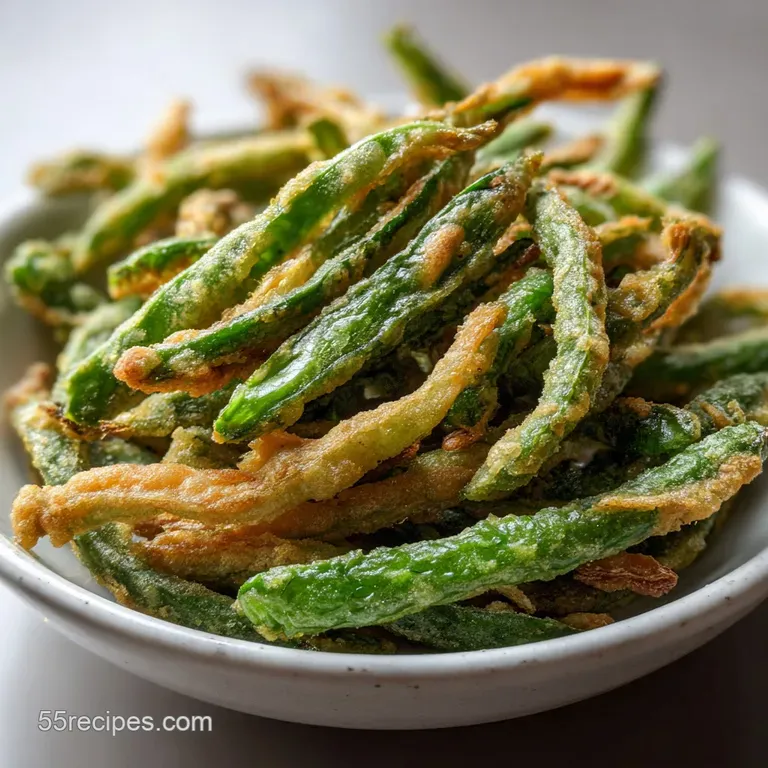
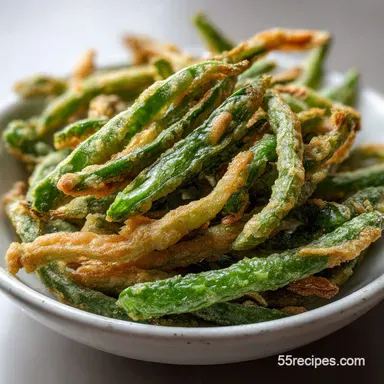
Achieve Crunch with This Fried Green Beans Recipe
Listen to that sound. It is a sharp, clean shatter as you bite through a golden crust into a tender, snappy bean. We have all had those sad, limp versions at fairs that are more grease than vegetable, but this is different.
I remember the first time I got the dredging right in my own kitchen, I ended up eating half the batch standing over the stove before they even hit the table. This is the side dish that finally makes the "vegetable" part of dinner the most exciting thing on the plate.
We are aiming for a coating that stays put and a bean that doesn't turn to mush. It is a fine line to walk, but once you find that rhythm of dipping and frying, it feels like second nature. Honestly, forget those soggy frozen appetizers.
This version is about fresh ingredients and a few smart pantry staples that create a texture so light you’ll forget these were ever deep fried in your own home.
We have all been through the "breadcrumb tragedy" where the coating falls off in the oil, leaving you with a naked bean and a mess. I’ve made that mistake so you don’t have to.
Right then, let’s get into the specifics of why this method actually works and how we can keep things affordable while getting results that taste like a high end bistro snack.
Essential Technical Success Secrets
The secret to a crust that won't budge lies in the marriage of moisture and starch. When we use a wet bind followed by a seasoned flour mixture, we create a protective barrier. This keeps the internal moisture of the bean from escaping too quickly, which would otherwise steam the coating right off the surface.
The Science of Why it Works: Amylose Expansion: Cornstarch contains high levels of amylose which, when fried, creates a brittle, glass like film that provides a superior shatter compared to flour alone.
Protein Coagulation: The egg in our wet wash acts as a structural glue, setting rapidly upon contact with hot oil to anchor the breading to the bean's slippery skin.
Chef’s Tip: Freeze your dry flour and cornstarch mix for 15 minutes before dredging. This temperature shock when hitting the hot oil creates tiny steam pockets for a lighter, crispier finish.
Chef’s Tip: Add 1/2 teaspoon of baking powder to your flour mix. It releases CO2 when it hits the heat, aerating the batter so it doesn't feel heavy or "doughy."
| Method | Time | Texture | Best For |
|---|---|---|---|
| Deep Fry (Classic) | 3 minutes | Shattering, golden crust | Ultimate party appetizer |
| Air Fryer | 12 minutes | Crunchy, less oily | Healthier weeknight side |
| Shallow Pan Fry | 6 minutes | Patchy but rustic crunch | Minimal oil cleanup |
It is worth noting that while deep frying gives the most uniform color, the air fryer is a fantastic shortcut for those busy Tuesdays. If you decide to go the air route, similar to the technique used in our Air Fryer Fried recipe, make sure you spritz the beans generously with oil to help the flour hydrate and brown.
Vital Stats and Yield Data
Before we start heating up the oil, we need to look at the numbers. Consistency is key when you are working with hot fats. This recipe is designed to feed four people as a side dish, or two people if you are like me and consider "fried things" a complete meal.
We are using 1 lb of fresh green beans, which provides enough surface area for the seasoning to really shine without feeling like you're eating a bowl of batter.
Component Analysis
| Component | Science Role | Pro Secret |
|---|---|---|
| All purpose Flour | Bulk and Structure | Sift it first to avoid clumps that trap raw flour pockets |
| Cornstarch | Crispness Agent | Use a 2:1 ratio with flour for a thinner, crispier shell |
| Large Egg | Binding Agent | Whisk until no streaks remain to ensure even coating |
| Smoked Paprika | Color and Depth | Toast it slightly in a dry pan for 30 seconds to wake up the oils |
Having your yield and timing down prevents that frantic feeling when the oil starts to shimmer. This dish comes together quickly, so having your "dredging station" set up in an assembly line is the smartest move you can make for your sanity and your kitchen's cleanliness.
Selecting Your Flavorful Ingredients
For this fried green beans recipe, the quality of your produce dictates the final snap. We want "stringless" beans that are firm enough to stand up to the heat. If they are limp in the bag at the store, they will be mushy on the plate.
- 1 lb fresh green beans: Trim the ends but leave them whole for the best finger food experience. Why this? Fresh beans retain more internal structure than canned or frozen varieties.
- 2 cups neutral oil: Canola or vegetable oil works best here because of the high smoke point. Why this? Avoid olive oil; it breaks down at frying temps and adds a heavy flavor.
- 1/2 cup all purpose flour: The base for our breading.
- 1/4 cup cornstarch: The secret to that glass like crunch.
- 1 tsp garlic powder: Provides a savory backbone without burning like fresh garlic would.
- 1 tsp smoked paprika: Adds a subtle wood fired aroma and a beautiful amber hue.
- 1/2 tsp cayenne pepper: Just enough for a back of-the throat hum.
- 1 tsp kosher salt: Use a coarse grain like Diamond Crystal for better control.
- 1/2 tsp black pepper: Freshly cracked is non negotiable for the best bite.
- 1 large egg: Our primary binder.
- 1/4 cup whole milk: Thins the egg to the right consistency for a thin, even coat.
| Original Ingredient | Substitute | Why It Works |
|---|---|---|
| Whole Milk | Buttermilk | Adds a tangy zip. Note: Batter will be slightly thicker. |
| All purpose Flour | White Rice Flour | Creates an even crunchier, gluten-free friendly shell. |
| Smoked Paprika | Chili Powder | Adds more earthiness and heat, though less smoky. |
Tools for a Shattering Crust
You don't need a professional deep fryer to make this work, but you do need a few specific items to keep things safe and successful. A heavy bottomed pot is your best friend here. I prefer a cast iron Dutch oven because it holds onto heat like a champ.
When you drop cold beans into hot oil, the temperature dips; cast iron minimizes that dip so your beans don't soak up excess grease.
- Deep fry thermometer: This is the most important tool. Frying at 375°F is the sweet spot.
- Wire cooling rack: Never drain fried food on paper towels alone; it traps steam and makes the bottom soggy.
- Stainless steel spider or slotted spoon: For safely retrieving the beans without bringing half the oil with them.
- Three shallow bowls: For your assembly line (dry, wet, dry).
If you are looking for a lower maintenance vegetable side that doesn't require a thermometer, you might enjoy my Southern Fried Cabbage recipe. It uses a similar flavor profile but in a much more relaxed, pan seared format.
Steps for a Golden Fry
- Prep the beans. Wash 1 lb fresh green beans and pat them completely dry. Note: Any surface water will cause the oil to splatter dangerously.
- Heat the oil. Pour 2 cups neutral oil into a heavy pot and heat until it reaches 375°F on a thermometer.
- Mix the dry base. In a shallow bowl, whisk 1/2 cup all purpose flour, 1/4 cup cornstarch, and all spices.
- Create the wet bind. In a separate bowl, whisk 1 large egg and 1/4 cup whole milk until smooth and velvety.
- Initial dredge. Toss a handful of beans in the flour mixture to lightly coat them. Note: This helps the wet ingredients stick better.
- The dip. Submerge the floured beans into the egg mixture, ensuring every inch is covered.
- Final coating. Return the beans to the flour bowl and toss well until they are fully crusted and matte.
- Fry in batches. Carefully lower the beans into the oil and cook for 2 to 3 minutes until they are deep golden and sizzling.
- Drain and rest. Move the beans to a wire rack and sprinkle with an extra pinch of salt immediately.
Precision Checkpoints
- Oil Temp: Exactly 375°F before adding the first bean.
- Batch Size: No more than 10-12 beans at a time to prevent temperature drops.
- Internal Texture: The bean should be "tender crisp," not soft.
Solving Common Texture Issues
Even with a plan, frying can be fickle. The most common heartbreak is a soggy coating. This usually happens because the oil wasn't hot enough, or the beans were still wet when you started. If your coating is sliding off, it’s usually a sign that you skipped the first dry flour dredge before the egg wash.
Why Your Coating is Falling Off
If you find the breading staying in the pot while the bean comes out bare, you likely have "slick" beans. Green beans have a naturally waxy skin. That first light dusting of flour acts like a primer on a wall, giving the wet egg something to grab onto. Without it, the egg just slides right off into the oil.
Quick Fix Guide
| Problem | Root Cause | Solution |
|---|---|---|
| Greasy/Soggy beans | Oil temp too low | Wait for thermometer to return to 375°F between batches. |
| Coating is too thick | Too much flour buildup | Shake off excess flour vigorously before frying. |
| Dark but raw inside | Oil temp too high | Lower heat and aim for a steady 350°F-375°F range. |
Common Mistakes Checklist
- ✓ Never crowd the pot; if the beans touch too much, they steam instead of fry.
- ✓ Always use a thermometer; "guessing" by looking at bubbles is a recipe for greasy food.
- ✓ Pat the beans bone dry before starting; moisture is the enemy of a crisp crust.
- ✓ Don't skip the cornstarch; it provides the structure that flour lacks on its own.
- ✓ Season immediately after frying while the surface oil is still liquid.
Smart Swaps for Dietary Needs
Making a fried green beans recipe accessible for everyone is actually pretty easy with the right pantry swaps. If you need to go gluten-free, rice flour is actually a secret weapon used by many professional chefs for tempura because it absorbs less oil than wheat flour.
For a dairy-free version, any unsweetened nut milk or even cold sparkling water works in place of the whole milk. In fact, sparkling water adds tiny air bubbles that make the crust even lighter.
If you want to lean into a more "Southern Style," adding a bit of bacon grease to your frying oil (about 2 tablespoons) adds a smoky depth that pairs beautifully with the paprika.
Decision Shortcut
- If you want Maximum Crunch, use 50/50 cornstarch and rice flour.
- If you want Southern Flare, whisk a teaspoon of hot sauce into the egg wash.
- If you want Healthier Results, use the air fryer method at 400°F for 12 minutes.
Preserving the Perfect Crunch
Fried foods are notorious for having a short shelf life. If you have leftovers, do not I repeat, do not put them in the microwave. You will end up with a rubbery, sad shadow of a snack. Instead, treat them like you're cooking them for the first time, just faster.
- Storage: Store in an airtight container in the fridge for up to 3 days.
- Reheating: Place them in a single layer in an air fryer at 370°F for 3 minutes, or in a 400°F oven for 5 to 7 minutes. This recrisps the oils and revives the shatter.
- Freezing: You can freeze these after frying! Flash freeze them on a tray for 1 hour, then move to a bag for up to 2 months. Reheat directly from frozen in the oven or air fryer.
- Zero Waste: If you have leftover dredging flour, don't toss it. If it hasn't touched raw egg, use it as a base for a savory gravy. If it has, it’s best to discard it for safety.
| State | Freshness | Texture Impact |
|---|---|---|
| Freshly Picked | High Snap | The bean stays vibrant and firm. |
| Frozen/Thawed | Low Snap | Often becomes watery and causes the coating to pop off. |
| Canned | No Snap | Too soft to survive the dredging process. Note: Not recommended. |
Best Ways to Serve Them
These beans are a superstar appetizer, but they also play well as a side dish for heavier meats. I love serving them alongside a steak or a juicy burger. The brightness of the green bean cuts through the richness of the meat, while the salty crust satisfies that "fries" craving.
- Dipping Sauces: A zesty horseradish aioli or a spicy ranch is the classic choice. For something different, try a lemon garlic yogurt dip to keep things feeling light.
- Toppings: A dusting of freshly grated Parmesan cheese while they are still hot adds a salty, nutty finish that is hard to beat.
- Main Dish Pairing: These are the ultimate companion to a Southern Fried Cabbage recipe if you are doing a full "fried feast" night.
Myth: The Oil Must Be Smoking
Many people think oil needs to be smoking to be ready. This is actually a sign that the oil is breaking down and will taste bitter. You want "shimmering" oil, not smoking oil. If it starts to smoke, take it off the heat immediately and let it cool down before proceeding.
Myth: Double Breading is Always Better
While double dipping (dry wet-dry wet-dry) works for thick chicken tenders, it’s too heavy for a delicate green bean. You end up with a "corndog" effect where you can't even taste the vegetable. Stick to the single coat method for the best balance of flavor and crunch.

Fried Green Beans Recipe FAQs
How long do you fry green beans for?
Fry for 2 to 3 minutes. This is the sweet spot to achieve a deep golden color and a tender crisp interior without making them soggy.
Why do restaurant green beans taste so good?
They use a proper dredging technique and hot oil. Restaurants focus on a two-stage coating (often flour, then egg, then seasoned flour or breadcrumbs) and maintain a consistent, high frying temperature, crucial for that shatteringly crisp exterior.
Can you fry green beans without blanching them?
Yes, absolutely. Blanching is an optional step to pre-cook the beans for a softer interior, but for a true "crispy fried" experience, frying them directly from raw is perfectly fine and often preferred for maximum snap.
How long do you blanch green beans before frying them?
Blanch for just 1 to 2 minutes. This brief dip in boiling water is enough to slightly tenderize them without cooking them through, preparing them for the frying stage.
What's the secret to crispy fried green beans?
The secret is a two-part coating with cornstarch and hot oil. A light dusting of flour before the wet dredge helps the coating adhere, while cornstarch in the final coating creates that signature glass like crispness. Keeping the oil at a steady 375°F is also vital.
Can I use frozen green beans for frying?
No, stick with fresh. Frozen green beans release too much moisture when thawed and fried, leading to a soggy coating and less appealing texture. Fresh beans provide the necessary firmness and structure.
How can I make my fried green beans coating stick?
Ensure beans are dry and use a flour primer. Pat your fresh green beans completely dry, then give them a light toss in your dry flour mixture before dipping them in the egg wash. This "primer" coat gives the wet ingredients something to grip onto, just like mastering the dry dredge in our Golden Fried Crab Claws: My Spicy Remoulade Secret!
Fried Green Beans
Ingredients:
Instructions:
Nutrition Facts:
| Calories | 278 kcal |
|---|---|
| Protein | 5.8 g |
| Fat | 15.8 g |
| Carbs | 28.3 g |
| Fiber | 3.1 g |
| Sugar | 3.2 g |
| Sodium | 495 mg |
