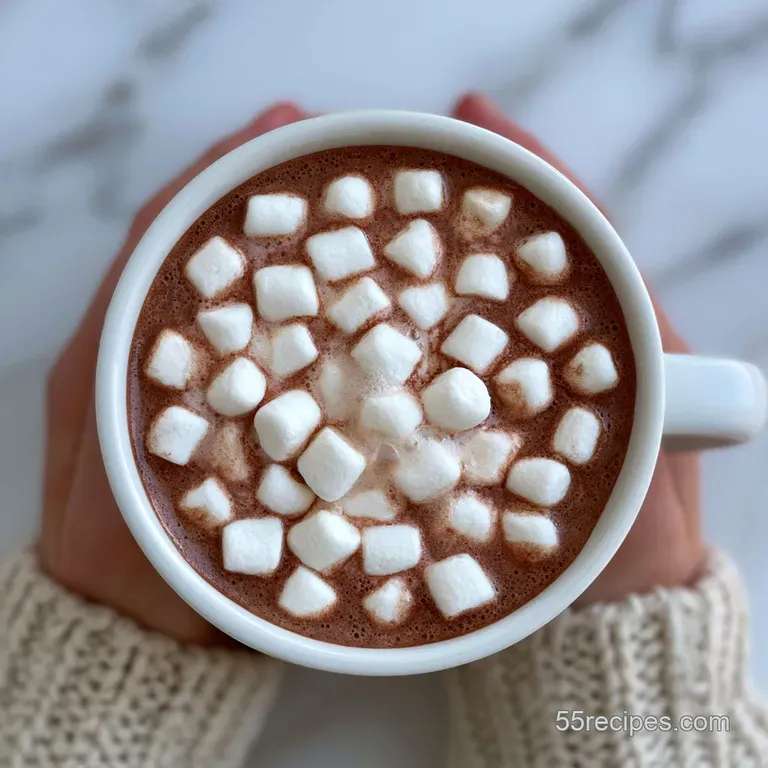
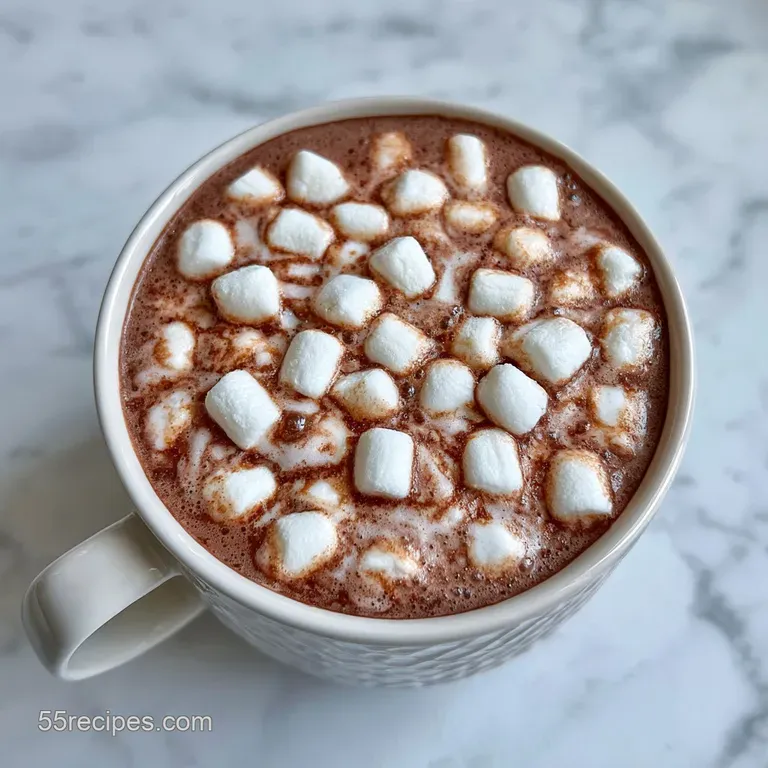
Hot Chocolate with Marshmallows: Silky and Rich
- Time: 5 min active + 10 min cooking = Total 15 minutes
- Flavor/Texture Hook: Rich, mahogany colored liquid with a silky, melt in-your mouth finish
- Perfect for: Rainy afternoons, winter nights, or a comforting treat for the kids
- Hot Chocolate with Marshmallows
- The Secret to Smoothness
- Essential Component Breakdown
- Required Kitchen Tools
- Step by Step Guide
- Fixing Common Texture Issues
- Clever Flavor Variations
- Adjusting for Crowd Sizes
- Debunking Common Myths
- Storage and Waste Tips
- Pro Presentation Ideas
- Recipe FAQs
- 📝 Recipe Card
Hot Chocolate with Marshmallows
I can still smell the scent of burnt milk from the first time I tried to make this. I was in a rush, so I just dumped the cocoa powder and sugar straight into a pot of boiling milk. I thought I could just whisk it fast enough to beat the physics of it, but I was wrong.
I ended up with a drink that looked like a chocolate swamp, filled with dry, powdery clumps that refused to dissolve, no matter how hard I stirred. It was a total disaster and honestly, a bit heartbreaking when you're craving a cozy treat.
That's why I'm sharing this specific method with you. We're not just heating milk; we're building a base. By starting with a thick, mahogany colored paste, we force the cocoa to hydrate before the rest of the liquid hits it. This ensures the texture is velvety and consistent from the first sip to the last.
You can expect a drink that feels hearty and nostalgic, exactly like the kind of treat that makes a cold house feel warm. We'll focus on the contrast between the rich, deep chocolate and the airy, sugary sweetness of the marshmallows. It's a simple process, but the order of operations is everything. Let's crack on.
The Secret to Smoothness
If you've ever wondered why some drinks feel gritty while others feel like melted silk, it comes down to how the cocoa is introduced. Most people treat cocoa powder like sugar, but it's actually a hydrophobic substance, meaning it hates water.
If you throw it into a big pot of liquid, it forms tiny balls with dry powder trapped inside.
The Paste Method: Mixing cocoa with a tiny bit of milk first creates a slurry that breaks down these clumps before they can lock in.
Salt Balance: A tiny pinch of salt doesn't make the drink salty, but it actually suppresses the bitterness of the cocoa.
Thermal Control: Keeping the milk just below a boil prevents the proteins from scorching and creating a skin on top.
Vanilla Timing: Adding extract at the very end keeps the aroma from evaporating into the steam.
| Method | Time | Texture | Best For |
|---|---|---|---|
| Stovetop | 15 minutes | Velvety and rich | Maximum flavor and control |
| Microwave | 5 minutes | Thinner and grainier | Absolute emergencies |
Essential Component Breakdown
Right then, let's look at what's actually happening in the pot. Each ingredient has a specific job, and if you swap one out, it changes the whole vibe of the drink. I've found that using whole milk is non negotiable if you want that classic, mouthwatering richness.
| Ingredient | Science Role | Pro Secret |
|---|---|---|
| Whole Milk | Fat carrier | Provides the creamy body that carries the cocoa flavor |
| Cocoa Powder | Flavor base | Sift it first if it looks particularly lumpy in the tin |
| Granulated Sugar | Sweetness | Dissolves faster in the paste than in the final liquid |
| Vanilla Extract | Aroma lift | Adds a floral note that cuts through the heavy fat |
Required Kitchen Tools
You don't need a fancy laboratory to make this, but a few specific tools make life easier. A medium saucepan with a heavy bottom is your best friend here because it distributes heat evenly and prevents the milk from burning in one spot.
I always use a balloon whisk. It creates more agitation than a spoon, which is critical when you're turning that cocoa and sugar into a smooth paste. If you have a small handheld frother, that's a great backup for getting any last stubborn bits of powder.
A set of oversized mugs is also key, as you need extra room at the top for a mountain of marshmallows without it overflowing.
Step by step Guide
Now we get to the good stuff. Follow these steps exactly, and you'll avoid the "clump disaster" I had years ago.
- Combine the cocoa powder, sugar, and salt in your medium saucepan. Note: Mixing them dry first ensures the salt is evenly distributed.
- Stir in 1/4 cup (60ml) of the whole milk and whisk vigorously until it becomes a thick, mahogany colored paste with no visible dry powder.
- Gradually pour in the remaining milk while whisking constantly. Note: Adding the milk slowly prevents the paste from breaking apart into lumps.
- Turn the heat to medium low and heat the mixture, stirring occasionally until it is steaming and small bubbles form around the edges.
- Monitor the heat closely to ensure it does not reach a rolling boil. Note: Boiling milk can change the flavor and cause it to separate.
- Remove the pan from the heat immediately and stir in the pure vanilla extract.
- Pour the hot chocolate into mugs.
- Top immediately with mini marshmallows until they start to soften and slump into the chocolate.
Chef's Note: For a truly professional touch, try grating a small piece of chilled dark chocolate into the paste in step 2. It adds a layer of depth that cocoa powder alone can't reach.
Fixing Common Texture Issues
Even with a guide, things can go sideways. The most common issue is the "cocoa bubble," where a clump of dry powder manages to survive the paste phase and floats to the top of your mug. If this happens, don't panic. You can actually fish them out with a spoon or whisk them back in with a tiny bit of extra hot milk.
Another problem is the "milk skin," that thin layer of protein that forms when milk is heated too quickly. This usually happens if you leave the pot unattended or use heat that's too high. To avoid this, keep the liquid moving and never let it hit a full boil.
Solving Cocoa Clumps
If you see lumps in your finished drink, it's usually because the paste wasn't whisked long enough. You can fix this by pouring the drink through a fine mesh strainer into your mug. It's a bit of an extra step, but it guarantees a silky result.
Preventing Milk Scalding
Scalded milk has a distinct, slightly burnt taste that ruins the nostalgia. If you notice the milk sticking to the bottom of the pan, remove it from the heat for 30 seconds and stir vigorously before returning it to the flame.
| Problem | Root Cause | Solution |
|---|---|---|
| Gritty texture | Cocoa not hydrated | Whisk the paste longer in step 2 |
| Burnt taste | Heat too high | Use medium low and stir more often |
| Too sweet | Sugar ratio too high | Add a pinch more salt or a drop of espresso |
- ✓ Sift cocoa powder before adding to the pot.
- ✓ Use a heavy bottomed pan to avoid hot spots.
- ✓ Keep the heat on medium low throughout.
- ✓ Stir in vanilla only after removing from heat.
- ✓ Use full fat milk for the most velvety mouthfeel.
Clever Flavor Variations
Once you've nailed the base, you can start playing around. I love adding a pinch of cinnamon or a drop of peppermint extract for a holiday feel. If you're feeling adventurous, you can create a "S'mores version" by adding a teaspoon of graham cracker crumbs to the bottom of the mug before pouring in the chocolate.
For those who want something a bit more complex, try swapping a portion of the milk for heavy cream. This makes the drink incredibly rich and decadent. If you prefer a spiced profile, you might enjoy my Homemade Chai Coffee recipe, which uses similar warming notes but with a caffeine kick.
Using Oat Milk
If you're avoiding dairy, oat milk is the best substitute because it has a natural creaminess that mimics whole milk. Just be careful with the heat, as some plant based milks can separate more easily than cow's milk.
Adding Dark Chocolate
For a more intense, less sweet drink, replace half of the sugar with a few squares of 70% dark chocolate. Stir these in during the simmering phase until they are completely melted and incorporated.
| Original Ingredient | Substitute | Why It Works |
|---|---|---|
| Whole Milk (2 cups) | Oat Milk (full fat, 2 cups) | Similar creaminess. Note: Slightly nuttier flavor |
| Granulated Sugar (1/3 cup) | Maple Syrup (1/3 cup) | Liquid sweetener. Note: Adds a distinct autumnal taste |
| Mini Marshmallows (1 cup) | Marshmallow Fluff (1/2 cup) | Gooey texture. Note: Much sweeter and denser |
Right then, if you're making this for a crowd, you'll need to adjust your approach. When scaling up, don't just multiply the salt and spices linearly.
Adjusting for Crowd Sizes
When doubling or tripling this recipe, the biggest risk is the "bottom burn." A larger volume of milk takes longer to heat, meaning the milk at the bottom of the pot is exposed to heat for a longer period. I recommend using a wider pot to increase the surface area and stirring more frequently.
If you're cutting the recipe in half, be careful with the heat. A small amount of milk can evaporate quickly, which might make your drink too thick or overly salty. Reduce your heat to the lowest setting and keep a close eye on the volume.
Debunking Common Myths
I've seen a lot of "hacks" online that are honestly just unnecessary work. One big myth is that you need to add cornstarch to get a thick Hot Chocolate with Marshmallows. While cornstarch creates a pudding like thickness, it can leave a starchy aftertaste.
The "paste method" and the natural reduction of milk provide all the body you actually need.
Another misconception is that using a microwave is just as good as the stove. It's not. Microwaves heat unevenly, creating "hot spots" that can scald the milk while leaving the cocoa powder dry. Stick to the stove for that velvety texture.
Storage and Waste Tips
You might not use all the chocolate base if you're making a giant pot. You can store the leftover chocolate mixture (without the marshmallows) in an airtight glass jar in the fridge for up to 3 days. When you're ready for another cup, just pour it into a mug and microwave for 60-90 seconds or reheat it on the stove.
Avoid freezing the mixture, as the milk can separate and the texture becomes grainy once thawed. To minimize waste, if you have a small amount of leftover cocoa paste that didn't get mixed in, stir it into your morning oatmeal or a bowl of yogurt for a chocolatey boost.
Pro Presentation Ideas
To really wow your guests, don't just dump the marshmallows on top. I love to toast them. If you have a kitchen torch, give the marshmallows a quick blast until they are golden brown and have a slight shatter when you bite into them.
If you don't have a torch, you can put the mugs under a broiler for 30-60 seconds, but watch them like a hawk or they'll ignite.
For a visual treat, try a "marshmallow snowman" by stacking three different sizes of marshmallows on top of each other. It's a hit with the kids and looks great in photos. If you want a crunchy side, I highly recommend serving this alongside some No Bake Cornflake Candy to contrast the velvety drink with something crisp.
Finally, a sprinkle of cinnamon or a dusting of cocoa powder over the toasted marshmallows adds a professional finish. It's all about those small details that turn a simple drink into a real experience. Trust me, the extra 2 minutes spent on presentation make the whole thing feel much more special.
Recipe FAQs
Is marshmallow good with hot chocolate?
Yes, they provide a creamy, sweet contrast. The marshmallows melt slowly, adding a fluffy layer to the rich drink.
Why do people put marshmallows in hot chocolate?
To balance the bitterness of the cocoa. This combination pairs perfectly with chewy oatmeal cookies for a cozy dessert.
What do you call a hot chocolate with marshmallows?
It is simply called hot chocolate with marshmallows. There is no specific technical name for adding marshmallows to cocoa.
Can I drink hot chocolate with diabetes?
Consult your doctor first. The granulated sugar in this recipe can cause blood glucose spikes.
How to prevent cocoa powder lumps?
Whisk the dry ingredients with 1/4 cup of milk first. Creating a thick, mahogany colored paste ensures the cocoa dissolves completely before you add the remaining milk.
Is it true I can freeze leftover hot chocolate?
No, this is a common misconception. Freezing the mixture causes the milk to separate and creates a grainy texture.
How to reheat stored hot chocolate?
Pour the chilled mixture into a mug and microwave for 60-90 seconds. You can also reheat it on the stove until steaming.
Hot Chocolate With Marshmallows

