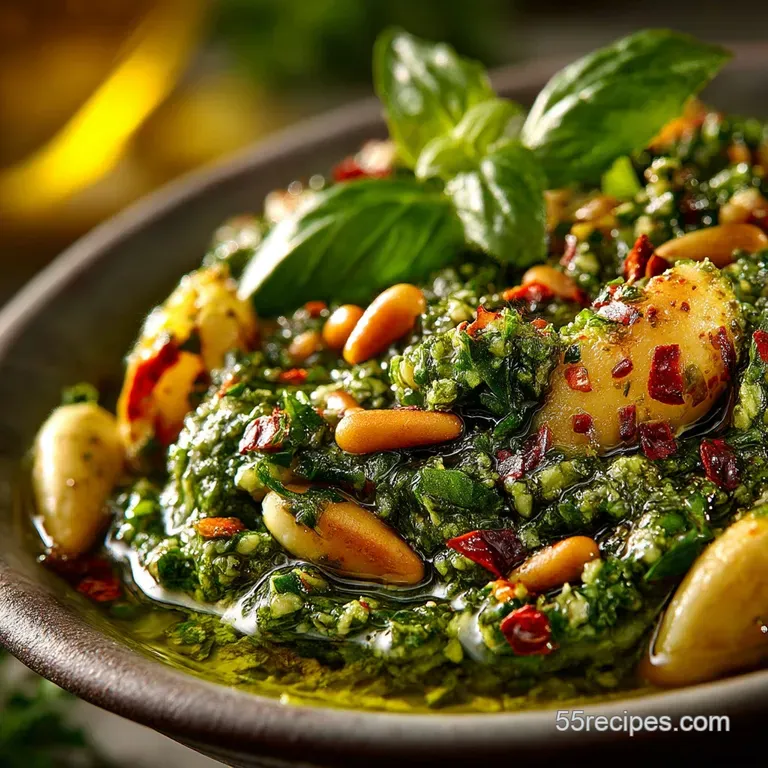
Sunkissed Lemon Basil Pesto with Goldstandard Toasted Pine Nuts
- Unlocking the Secret to Superior Pesto Flavor
- Why Toasting Transforms the Humble Pine Nut
- The Essential Building Blocks for Bright Pesto
- Mastering the Crucial First Step: Achieving Perfect Toasted Pine Nuts
- The Seamless Assembly of Zesty, Vibrant Pesto
- Extending the Life of Your Freshly Made Sauce
- Creative Applications Beyond Traditional Pasta Dishes
- Recipe FAQs
- 📝 Recipe Card
Unlocking the Secret to Superior Pesto Flavor
When we talk about achieving true Italian flavor at home, often the most impactful change comes not from a complex technique, but from perfecting a single component. In the realm of bright, herbaceous sauces, that crucial component is the nut.
Forget the bland, raw crunch you might be used to; we are delving deep into the Toasted Pine Nuts Recipe that forms the foundation of this Sun-Kissed Lemon & Basil Pesto.
This recipe is designed to be easy, yielding a sauce ready in about 15 minutes total, making it perfect for a busy weeknight or a sophisticated weekend accompaniment. The payoff for a few extra minutes of attention is truly remarkable, transforming a simple condiment into a gourmet experience.
Why Toasting Transforms the Humble Pine Nut
Toasting is not just about warming up the nuts; it’s a crucial chemical process that unlocks volatile aromatic compounds locked within their structure. Raw pine nuts are mildly sweet, but once subjected to gentle heat, they release deep, complex, almost buttery toasted pine nuts notes that add incredible depth.
This process is the difference between a bright green sauce and a truly memorable one.
The Five Minute Pesto Promise
Because the toasting step is so quick we are aiming for perfectly fragrant nuts in about five minutes it fits seamlessly into a fast paced cooking schedule. The entire Toasted Pine Nuts Recipe is streamlined around efficiency.
Once you master this initial step, you'll realize just how simple it is to elevate standard pantry items. This quick turnaround time is why this pesto recipe feels like such a cheat it tastes like it simmered all afternoon, but it’s ready nearly instantly.
Elevating Pantry Staples to Gourmet Status
Many home cooks use pine nuts straight from the bag. However, treating these delicate seeds with respect, by focusing on How to Toast Pine Nuts correctly, is what moves your preparation from average to exceptional.
By bringing out their inherent oils and fragrance, you are creating a flavour anchor that supports the sharp basil and tangy lemon zest beautifully. This small effort ensures the Toasted Pine Nuts Uses extend far beyond just this pesto, though this version is arguably their finest hour.
What Makes This Recipe the Benchmark for Freshness?
This pesto is built around maximum freshness, requiring only 10 minutes of active prep time, with only about 5 minutes of cooking dedicated solely to the nuts. We use vibrant, packed basil leaves, sharp garlic, and that essential fresh lemon zest.
The quick blending ensures minimal oxidation, preserving that gorgeous green hue. This is the benchmark against which all future homemade pestos should be measured.
The Essential Building Blocks for Bright Pesto
To achieve our goal of Sun-Kissed Lemon & Basil Pesto, we need quality components that complement the richness of the nuts. We are aiming for a vibrant, punchy flavour that cuts through rich pasta or complements lean proteins.
Precision Measurements for the Perfect Batch
This batch is designed to yield about 1 cup, perfect for coating 1 pound of pasta. For the nuts, we start with 1/2 cup (60g) of pine nuts . For the pesto itself, you will need 2 cups (about 60g) of packed fresh basil leaves .
Following these measurements ensures the right balance between the nutty base and the herbaceous body of the sauce.
Selecting Basil That Actually Smells Like Summer
The quality of your basil dictates the success of the sauce. Look for deep green leaves that are unblemished and highly fragrant. Avoid any leaves that look wilted or have begun to turn black.
For the Best Pine Nuts for Pesto , the basil must be equally high quality; the fragrance must hit you before you even begin chopping. Crucially, ensure the basil is washed and completely dried before use; excess water is the enemy of a thick, emulsified sauce.
Essential Kitchen Gear: Beyond the Blender
While a high speed blender works, a food processor is often preferred for pesto as it allows for better control over texture, preventing overheating that can turn the oil murky. You'll also need a small, dry skillet non-stick or stainless steel works well for the critical toasting phase, and a microplane for getting that bright, essential lemon zest without including the bitter white pith.
Related Recipes Worth Trying
- Deliciously Easy Pineapple Stuffing: My Family's Tropical Twist — Looking for a unique side dish? Try my pineapple stuffing a sweet and savory delight perfect for holidays and gatherings!
- Easy Tropical Pineapple Snacks: Crunchy Chips with Coconut Cream Dip — Discover these delightful pineapple snacks! Perfectly crispy chips paired with a refreshing coconut cream dip for your summer picnics.
- Toasted Coconut Marshmallows: A Sweet Escape to Tropical Delights — Delight in the best toasted coconut marshmallows! Easy to make at home, perfect for s'mores or chocolate dipping. Dive into this tropical sweetness today!
Mastering the Crucial First Step: Achieving Perfect Toasted Pine Nuts

This is where the magic happens. The goal is a uniform, golden brown hue and a pronounced, sweet aroma. If you are short on time or prefer a different approach, remember you can also utilize the Oven Toasted Pine Nuts method, though the stovetop offers more immediate control.
To achieve the Buttery Toasted Pine Nuts we seek, place the 1/2 cup of pine nuts into a small, dry skillet over medium low heat . This is vital: never use oil, and never rush this stage with high heat.
You must constantly stir or shake the pan gently for approximately 3– 5 minutes. Watch them like a hawk; they transition from pale to perfectly golden very quickly.
The moment they become deeply fragrant that sweet, woody scent remove them instantly from the heat and transfer them to a cool plate. Residual heat in the pan will scorch them instantly. Reserve 1 tablespoon of these glorious nuts for garnish; the rest go straight into the processor bowl.
The Seamless Assembly of Zesty, Vibrant Pesto
Once the nuts are toasted, the rest of the process is a swift journey into blending.
Stovetop Technique: Monitoring for the Golden Hue
As detailed above, the stovetop method relies on constant, gentle movement over medium low heat for about 3 to 5 minutes. This low-and-slow monitoring ensures every nut achieves the same beautiful colour, maximizing the flavour development for your Healthy Toasted Pine Nuts .
The Quick Pulse Method: Combining Ingredients Gently
In the bowl of your food processor, combine the majority of the toasted pine nuts , the 2 cups of packed basil leaves , the 2 medium peeled garlic cloves , and 1 teaspoon of fresh lemon zest .
Pulse this mixture about 5 to 8 times until everything is coarsely chopped. Scrape down the sides with a spatula to ensure even processing.
Adjusting Consistency: Achieving Your Ideal Texture
Now it’s time to introduce the liquid. With the food processor running on a low speed, slowly drizzle in the 1/2 cup of good quality extra virgin olive oil through the feed tube in a thin, steady stream.
Continue processing until the sauce reaches your preferred consistency some prefer it slightly textured, others perfectly smooth. This steady stream creates a beautiful, stable emulsion.
Incorporating the Toasted Pine Nuts for Final Crunch
Once the oil is incorporated, stop the machine. Taste the pesto and adjust with 1/2 teaspoon of sea salt and 1/4 teaspoon of black pepper . If you want a less oily finish, you can stop blending sooner, reserving some of the oil to drizzle on top later.
Remember to reserve those magnificent Toasted Pine Nuts for garnishing the final dish, adding that crucial textural pop when serving.
Extending the Life of Your Freshly Made Sauce
While this pesto is best eaten immediately, properly stored, it will retain its bright flavour for days, or even months if frozen.
Optimal Storage Solutions for Maximum Shelf Life
For short term storage (up to 5 days), transfer the pesto to an airtight container. Crucially, to maintain the vibrant green colour and prevent oxidation, spread a very thin, clean layer of olive oil over the surface of the pesto before sealing the container. This oil barrier blocks air exposure effectively.
Freezing Pesto: A step-by-step Preservation Guide
To preserve pesto for several months, freezing is the best option. You can freeze it in standard ice cube trays. Once the cubes are solid, transfer them to a freezer safe zip-top bag, squeezing out all excess air. This makes perfect, pre-portioned servings for future use a lifesaver when basil is out of season.
Quick Variations: Swap the Greens, Keep the Brightness
While basil is the star, you can easily adapt this flavour profile. For a bolder, peppery note, swap half the basil for rocket (arugula). For a milder, sweeter base, use baby spinach. In every case, the technique for Toasted Pine Nuts Uses remains the same: toast first, blend second.
Nutritional Snapshot: Benefits of Fatty Acids in Toasted Pine Nuts
Beyond flavour, this pesto delivers significant nutritional benefits. Pine nuts and olive oil are rich sources of heart healthy monounsaturated fats. While calorie dense, the fats provided are essential for nutrient absorption, and the combination makes for a satisfying, energy rich sauce.
The estimated 36g of total fat per serving is largely composed of these beneficial oils.
Creative Applications Beyond Traditional Pasta Dishes
While tossed with a hearty pappardelle is divine, the powerful flavour unlocked by perfectly Toasted Pine Nuts demands wider exploration.
For a light lunch, spread this pesto generously on toasted sourdough slices, maybe topped with some fresh mozzarella and halved cherry tomatoes. It shines equally well as a vibrant counterpoint to richness; dollop it over grilled white fish like cod or halibut, or use it as a zesty topping for grilled chicken breasts.
Even a spoonful stirred into hearty vegetable soup instantly brightens the profile.
Recipe FAQs
How do I stop my Toasted Pine Nuts from burning? They seem to go from pale to charcoal far too quickly!
Ah, the old 'ninth life' predicament! Pine nuts are delicate; treat them like fine china. The trick is to use a dry skillet (no oil!) over medium low heat. Keep them moving constantly shake the pan or stir every 30 seconds until they achieve a lovely golden hue.
If you step away for even a minute, you'll likely come back to smoke!
Can I make this pesto ahead of time, or does it need to be eaten straight away?
You absolutely can make it ahead, but fresh is best, like a crisp Sunday morning lie-in. To keep it looking bright green and fresh for 3-4 days, transfer it to an airtight container and pour a thin layer of olive oil directly onto the surface.
This seals it off from the air, preventing that drab oxidation that makes it look like it’s been sitting since the Blitz.
My pesto is looking a bit too thick and grainy what can I do to loosen it up without ruining the flavour?
Don't panic, we can rescue it! This usually happens if you added the oil too quickly or didn't use enough. The secret ingredient here is reserved starchy pasta water. Add just a tablespoon or two of the hot, salty water you used to boil your pasta while the processor is running; it will emulsify beautifully and give the pesto a smoother, silkier consistency, perfect for clinging to your noodles.
I don't have pine nuts; what's a good substitute for toasting in this pesto recipe?
If you’re stuck, don't despair! Almonds or walnuts make brilliant stand ins, though the texture will change slightly they are a bit chunkier. Make sure you toast whatever nut you choose using the exact same low-and-slow method.
If you use walnuts, they can sometimes turn slightly bitter, so taste carefully before adding extra salt.
Are Toasted Pine Nuts high in fat? Should I worry about the calories?
It's true that pine nuts and olive oil are high in fats, but fear not! These are predominantly the 'good' fats (monounsaturated and polyunsaturated), which are brilliant for heart health. Think of it as quality fuel rather than empty calories.
Just be mindful of portion sizes a little goes a long way in flavouring your meal!
Goldstandard Toasted Pine Nuts